Categories
Fire and smoke damage restoration

Tips to Remove Smoke Odors After a House Fire

24/7 EMERGENCY SERVICE RESIDENTIAL & COMMERCIAL SERVICES

Fires can strike at any moment, causing significant damage to homes and businesses. The top priority is always ensuring the safety of all occupants. Once their safety is secured, the next crucial step is addressing smoke and soot removal. Removing smoke odor, however, poses a challenge, as it often clings stubbornly to walls, furniture, and other surviving items. Although difficult, eliminating smoke odors from a property is achievable. This guide will explore post-fire actions, crucial factors in smoke odor removal, and detailed steps to eradicate smoke damage from your home.

Review the Damage

Smoke residue, soot, and odors can cause significant property damage. The ease of restoring a space depends on the materials burned during the fire. Generally, soot from wood and paper is less oily than that from plastic furniture, carpet, or insulation. Burning plastic releases hydrochloric, hydrofluoric, and hydrobromic acids, among other reactive agents, in varying amounts. Furthermore, acid exposure leads to corrosion, and high humidity levels can exacerbate the activation of these corrosive elements.

Factors Affecting Smoke Removal

Factors Affecting Smoke Removal

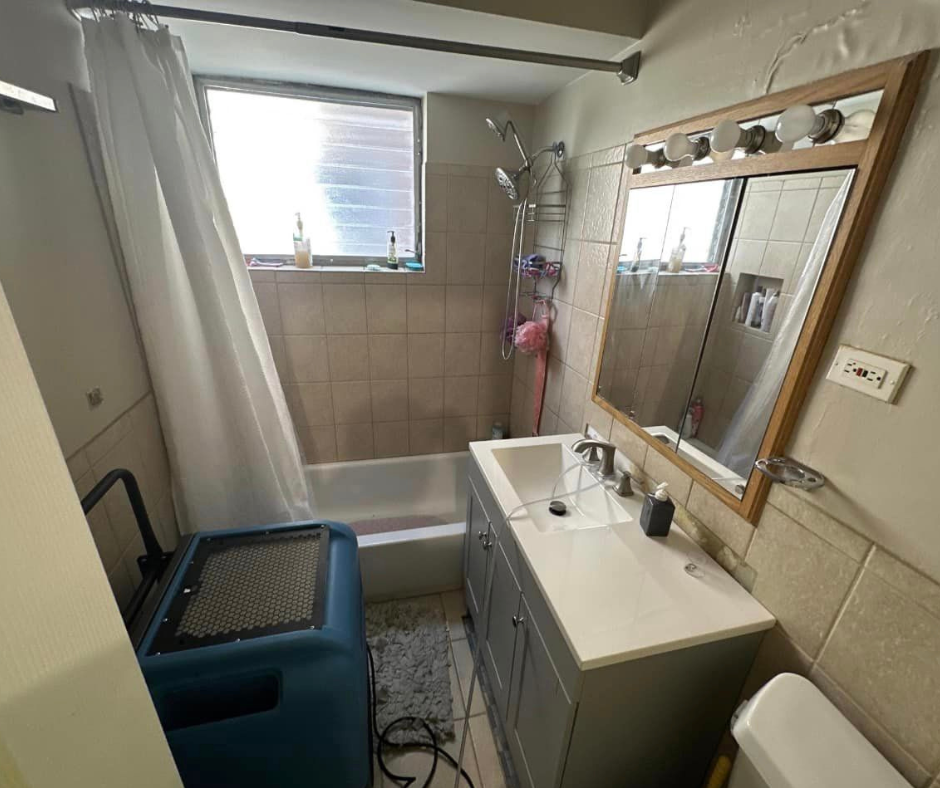
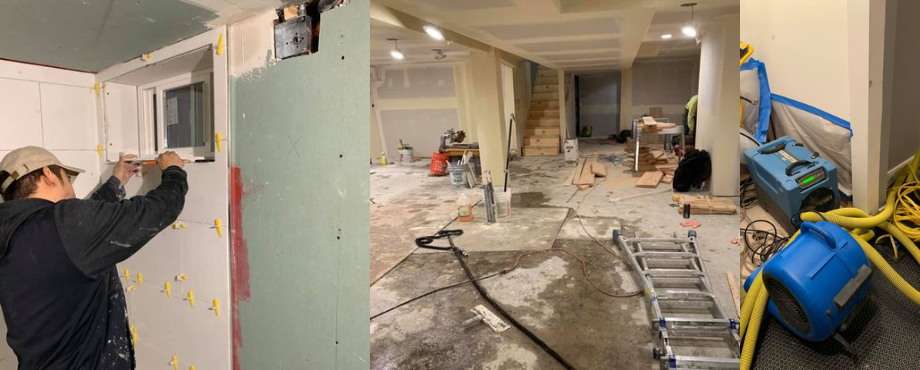
Restoring a fire-damaged home or business is possible. The process typically involves removing charred materials and using dehumidification and decontamination to lower humidity levels. This allows the space to be restored to normal use. Smoke odors usually cannot be eliminated by simply airing out the area due to the presence of soot, which must be addressed. Generally, vapor barriers made from heavy plastic sheeting are used to seal off the burned section or to protect untouched areas.

Professional fire damage restoration companies will remove smoke odors in various ways, depending on several factors. Here are some factors they will consider:

  • Type of soot.
  • The actual size of the damaged area.
  • How long the damaged area has sat after a fire. Smoke and soot continue to spread after a fire which means the damage will worsen as more time passes before the restoration.
  • The size of the fire. The bigger the fire, the more smoke it will produce.
  • The materials that were damaged. If you’ve had odorous materials burned in the fire, which include plastics, it can make it more difficult to remove the smell. Smoke will get absorbed by fabric including curtains, furniture, and even carpeting, therefore, those items will need to be cleaned if they were exposed to it.

Often, if the contents have been damaged by fire, replacement may be necessary. Fire restoration companies typically conduct a test cleaning to determine if items can be restored, ensuring cost-effectiveness in the process. Such restoration can be carried out either on-site or off-site.

What steps should you take to remove smoke odors?

Smoke odors can quickly cling to porous items and materials, so it’s crucial to remove them from your property promptly after a fire. The presence of smoke can also affect the air quality in your home, posing health risks. After the fire in your home has been put out and it is safe to return, follow these steps to reduce the smoke odor in your home:

Air Out Your Home

Air Out Your Home with Air purifier and houseplant in living room.

After a fire, smoke can persist in your home, leaving behind an unmistakable odor. Tiny smoke particles cling to surfaces such as furniture, clothing, carpets, and paint. Surface cleaning alone cannot eradicate these particles entirely, making it important to take swift action to eliminate the smoke smell and prevent inhaling these harmful smoke particles.

Airing out your home is essential. Open all windows and doors to ventilate the area and consider removing screens for optimal airflow. Strategically place fans in the corners, directing them towards the windows. Once activated, these fans will help expel the lingering fire smell more effectively.

Create Positive Pressure

Set a fan outside your front door and face it inward. Then close all the doors and windows while keeping the front door and window open and let the fan run for at least 15 minutes. This will allow fresh air into the room. Then, close the window and the door in that room. Move to another room with smoke odor and repeat the process.

Wash All Impacted Surfaces

Smoke and soot can spread anywhere in your home after a fire, including areas that the fire did not reach. The soot will settle on surfaces and objects throughout the affected area, and it must be cleaned to prevent further damage. These tips will help you clean some of the impacted surfaces and materials:

  • Remove all the fabrics and clean them:

Make sure to remove all duvets, blankets, area rugs, and even curtains and wash them. Also, wash any clothes, towels, and linens if they were exposed to smoke. If you have any clean fabric items, make sure to keep them out of the home until the smoke smell is fully gone as they will not absorb the smell.

  • Clean your windows:

Use a solution of hot water and white vinegar to clean your windows. Make sure to clean all areas of the window such as windowpanes, frames, sills, blinds, and screens. The windowpanes should be shiny and transparent. If they are not, that means that smoke may still be lingering. Window screens should be put in a tub or basin and cleaned with dish soap, then rinsed with cool water and dried in the fresh air.

  • Clean all solid surfaces:

Use a mixture of warm water, white vinegar, and dish soap to wipe down all walls and ceilings, doors and doorframes, baseboards, cabinets, shelves, light fixtures and light switches. All uncarpeted floors should be mopped. The mop should also be rinsed regularly, so you do not end up spreading the smoke particles back on the floor.
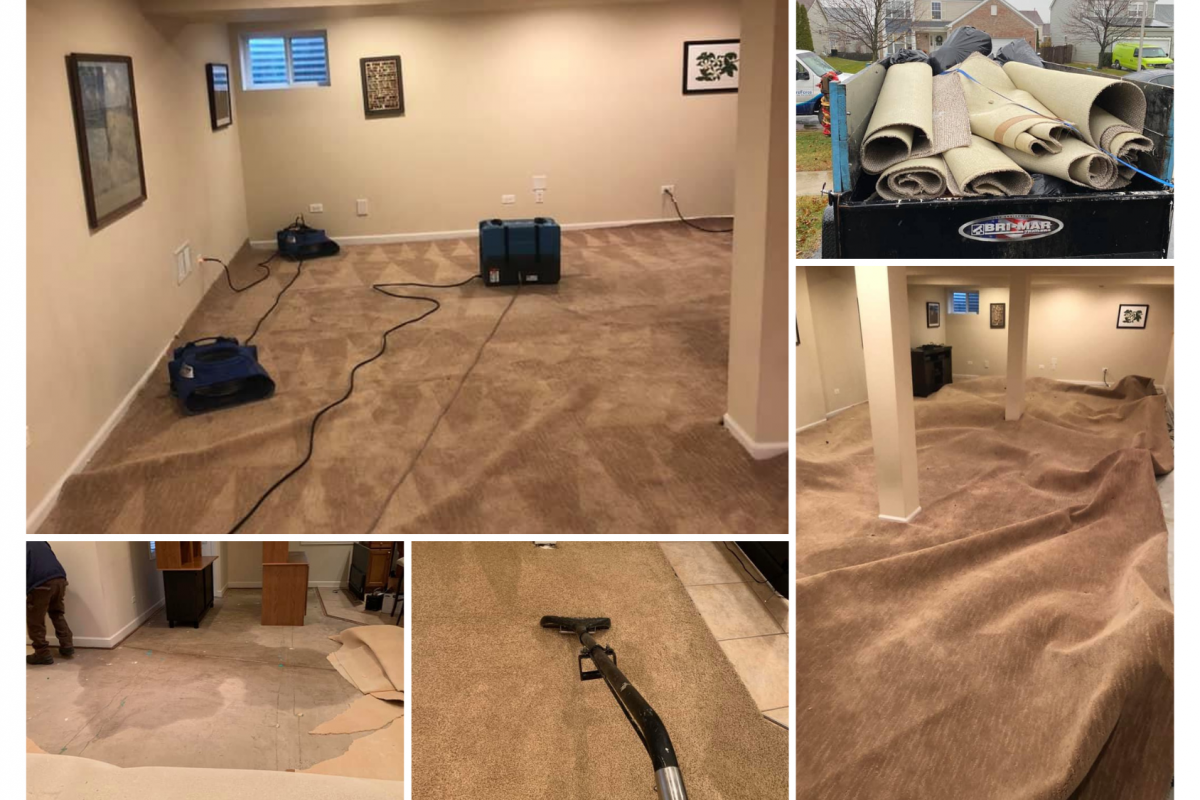
  • Clean the carpets:

Smoke particles can also linger in your carpets, so be sure to clean your carpets and upholstery. Sprinkle baking soda on them, let it sit for a few hours to absorb the odors, and then vacuum with a HEPA vacuum. For silk carpets or leather upholstery, hire a professional carpet cleaner to avoid potential damage.

Learn more about How to Remove Cigarette Smoke Odors from a Leather Couch.

Clean HVAC Systems and Air Ducts

After a fire, it’s important to clean and deodorize the HVAC system and air ducts as soot particles can become trapped in the filtration system. Ensure that registers and ductwork are inspected, and if found contaminated, they should be thoroughly cleaned. Additionally, introduce a neutralizing agent into your ductwork to eliminate odors, and apply a duct sealer to contain any residual smells.

Professional Smoke Removal

Fire Damage Restoration and Repair - HydroForce Cleaning & Restoration

Have you faced a fire at your home or business? Our team at HydroForce Cleaning and Restoration is here to assist! Equipped with specialized tools and techniques, our professionals expertly clean and restore spaces affected by fire. With extensive experience in smoke remediation, we ensure your space is returned to its pre-fire condition, giving you peace of mind.

We will promptly arrive and start the restoration process to limit the damage. Regardless of the extent of the damage, we are committed to restoring your space swiftly and efficiently. For professional smoke damage and odor removal, contact HydroForce Cleaning and Restoration at (630) 835-0862.

Categories
Mold Remediation

How to Remove Mold from Painted Ceilings

24/7 EMERGENCY SERVICE RESIDENTIAL & COMMERCIAL SERVICES

If you’ve encountered mold on painted ceilings, you understand the challenges of removal. Removing the mold often requires significant effort, and mold spores can multiply rapidly, making it crucial to address the issue promptly to prevent further spread and damage. Moreover, mold can pose health risks, so removing it helps you avoid long-term health issues. By tackling mold, you can prevent allergic reactions, respiratory problems, and even serious conditions like asthma that may develop from prolonged exposure.

Fortunately, it is possible to eliminate mold spores from your ceiling and ensure they don’t return. In this guide, we will explore effective cleaning methods you can try at home, ways to prevent mold growth, and the advantages of hiring a professional mold remediation company for thorough removal.

Methods to Clean Mold Off Your Ceiling

Methods to Clean Mold Off Your Ceiling

When it comes to cleaning mold off the ceilings, you need to use a cleaning product and method that will effectively remove the mold growth without damaging the ceiling. The following are cleaning methods that can help you remove the mold growth:

Use a Mold Spray

This biocide is specifically designed to eliminate mold and can be applied virtually anywhere mold is present, not just on ceilings. It can be used on seals in your bath or shower, and in various other locations as well. Additionally, there are foam sprays available for those hard-to-reach spots. Simply spray the product onto the mold from a distance of 2-3 inches and allow it to sit for 30 minutes. Afterward, wipe it off with a wet sponge, and the mold should come off easily. While these products are user-friendly and effective, it’s important to note that they are toxic to aquatic life.

Use Household Bleach

If you prefer not to purchase a specialized mold removal product for your ceiling, bleach can be an effective alternative, provided it contains chlorine. Simply mix about a cup of bleach with water in a bucket. You can apply this solution to your ceiling using a spray bottle or a cloth. Allow it to sit for 15 minutes, ensuring that the room is well-ventilated, and then wipe it clean. Repeat this process until the mold is completely gone.

While bleach is an inexpensive and readily available option, it’s important to remember that it is highly toxic. Multiple applications may be necessary for complete mold removal.

Use Baking Soda or Vinegar

You can effectively eliminate mold using either soda or vinegar. For a baking soda solution, combine one tablespoon of baking soda with one cup of water until dissolved. Then, use a stiff brush to scrub the affected area and remove the mold.

If you prefer vinegar, mix equal parts vinegar and water in a bucket or spray bottle. Apply it using a cloth or by spraying directly onto the moldy surface, and let it sit for 15 minutes before wiping it off with a dry cloth. While this cleaning method is relatively non-toxic, it may require more time and could potentially damage the paint on your ceiling.

From the methods outlined, select the one that suits you best. Consider your comfort level with chemicals and the effort required to remove the mold and choose a solution that prevents its return. While you can tackle mold on your ceiling yourself, if you feel uneasy about this DIY project, it’s wise to contact a professional mold removal service. They can effectively clean the area, prevent further damage, and ensure the mold doesn’t return.

Preventing Mold in Your Home

mold build-up on bathroom ceiling

As previously mentioned, cleaning mold from your ceilings is indeed possible. However, the chosen method requires both time and financial investment. Therefore, the most effective approach is to focus on preventing mold growth in your home altogether. Here are several proactive measures you can take to avoid mold issues in the first place, ensuring you won’t have to deal with cleaning later:

  • Make sure you have good air flow in your home and minimize the amount of moisture you let into your home. Good ventilation is crucial—open your windows regularly and allow all areas to be adequately aired out.
  • Use ceiling paint that is meant for moist areas which include your kitchen and bathroom. If you’ve already had mold on your ceiling previously and you’ve decided to paint, make sure to do your research and choose a paint appropriate for your space that can protect it from mold. You can hire a professional interior painter for quality residential or painting services to ensure a mold-free property.

Professional Ceiling Mold Removal

If you do not feel comfortable or have the proper knowledge to remove mold from your ceilings yourself, it is important to reach out to a professional mold removal company. They will send over properly trained mold removal technicians that use advanced methods and equipment to get rid of mold on your ceilings. Here are some reasons why hiring a mold removal company may be beneficial to you:

  • Cleaning mold yourself without the proper personal protective equipment (PPE) can put you at risk of health effects from mold exposure. Mold removal professionals use PPE to protect themselves and will isolate and contain the mold growth to prevent its spread and protect your health.
  • You can cause the mold to spread further within your property as using improper cleaning methods disturbs the mold colony and causes it to release its spores.
  • Mold may be hidden either inside, below, or even behind the affected surfaces. Professionals can locate and remove mold growth in hidden areas.
  • You may have a water or moisture issue causing the mold. Mold removal professionals can often identify the source of the moisture.
  • All mold growth will need to be removed before painting your ceiling. If you just paint over the mold, you may end up with mold getting trapped below the paint. Mold remediation professionals will ensure complete removal of the mold growth.

Professional Mold Remediation Services

Mold Removal and Remediaion - HydroForce Cleaning & Restoration

Have you experienced mold at your home or business? Our professionals at HydroForce Cleaning and Restoration provide professional mold remediation for homes and commercial buildings. Our professionals are trained and certified and use the proper tools, equipment, and methods to remove mold from your property quickly and efficiently.

To learn more about our mold removal services, make sure to give us a call at (630) 835- 0862.

Categories
Fire and smoke damage restoration

How to Remove Cigarette Smoke Odors from a Leather Couch

24/7 EMERGENCY SERVICE RESIDENTIAL & COMMERCIAL SERVICES

How to Remove Cigarette Smoke Odors from a Leather Couch

Leather couches are easy to maintain with proper care. Quick action is crucial when addressing issues, especially with cigarette smoke and tar. The longer smoke lingers on your couch, the harder it is to eliminate the smell. In this article, we’ll explore various methods to remove cigarette odors from leather furniture. While these solutions aren’t foolproof, they can be effective depending on your specific situation. Always test any method on a small, inconspicuous area first, and be mindful of the couch material to avoid damage. Lastly, we’ll discuss how to prevent cigarette smoke from settling on your furniture and in your home, whether you’re a smoker or have smoking visitors.

Methods to Remove Cigarette Smoke Odors from Your Couch

Methods to Remove Cigarette Smoke Odors from Your Couch

There are several methods you can use to remove cigarette smoke or tar from your couches. To prevent damage to the material, it’s essential to follow instructions carefully. Here are some options:

  • Ventilation: Try ventilating the room first to remove smoke odors from your leather couches. This is most likely to be effective if the odor is recent to the leather couch and the room. You can also use an exhaust fan to help eliminate the smoke odor. Make sure to direct the air toward a door or a window so it can be removed from the room, and open windows to let the fresh air in.
  • Leather Cleaner: You can purchase leather cleaner at home improvement stores or online. It effectively removes cigarette odor from leather surfaces and restores the leather’s pH balance, ensuring any lingering smells are eliminated. Be sure to use a high-quality leather cleaner and apply it thoroughly, especially to the seating and back areas, which are most prone to absorbing smoke.
  • Vacuum the furniture: Use the flat brush attachment to swiftly and efficiently vacuum up any soot, ensuring you hold the brush above the leather surface. Then, gently clean the leather with a soft cloth and a specialized leather soap or conditioner.
  • Clean the leather: To clean leather or vinyl, use rubbing alcohol or a 1:1 mixture of white vinegar and water. Separate your furniture as much as possible to access all crevices and improve ventilation. Apply the solution with a soft cloth, ensuring you do not over-saturate the leather.
  • Baking soda: Since baking soda is a natural deodorizer that can absorb the smoke odors from leather. Using baking soda is a great way to get smoke removed from smaller leather items such as wallets, shoes, key chains etc. and it can be applied to leather couches.
  • Laundry detergent: Put a couple of drops of mild laundry detergent in a spray bottle and just add warm water. Spray this solution on your couch and then wipe it down with a clean cloth.

Quick fixes for removing cigarette smoke from leather couches:

Quick fixes for removing cigarette smoke from leather couches

  • Dryer sheets: Insert dryer sheets on the inside of the cushions or other areas you cannot see to help eliminate the lingering odor.
  • Air purifier: Use an air purifier to mask the cigarette smell in your home. You can purchase one online or at a home improvement store. This will help mask the smell temporarily until you have more time to dedicate to properly cleaning the cigarette odor from your leather couches.
  • Odor-neutralizing spray: This is a temporary solution for eliminating smoke odor from your home. Avoid spraying too close to the furniture to prevent potential staining and damage.

Please note: The methods mentioned above may end up discoloring the leather on your furniture which may require additional restoration. It is always best to try a new cleaning method on a small hidden area first to see how it affects the leather upholstery.

Preventing Cigarette Smoke from Lingering on Leather Furniture

If you’ve ever had to remove cigarette odor from leather furniture, you know that it requires a lot of time and effort. This is why it is important to prevent this issue from happening. The best way to protect your furniture from cigarette smoke is to not smoke near the furniture. Some other options include standing near a window so that the smell does not linger inside the room. You can also blow smoke out so that it does not stay inside the room using an exhaust fan.

Regular dusting of the room is essential. Dust particles can trap smoke odors, causing them to linger longer. You can prevent the transfer of smoke smell to leather furniture by keeping all non-porous surfaces, including leather, clean. Always dust and wipe down these areas to minimize smoke residue.

Additionally, never leave cigarette butts in the room, even in an ashtray. Dispose of them in a garbage can and wrap them in a paper towel to prevent further odors. This practice ensures a fresher, cleaner environment.

If you follow the above-mentioned steps, it will help keep your home free of cigarette odors and keep your leather furniture smelling fresh instead of like cigarette smoke.

Professional Fire Damage Restoration

Fire Damage Restoration and Repair - HydroForce Cleaning & Restoration

Smoke odors, especially odors from cigarettes, are persistent and will linger for a long time unless the proper steps are taken to remove them. You can remove the smoke odors by following the steps above but if you cannot remove the odor yourself, you may need to seek the help of a professional that can provide advanced deodorization.

No matter what caused the smoke odor, whether a fire or cigarettes, our professionals at HydroForce Cleaning and Restoration can help with our fire and smoke damage restoration services. We use advanced equipment and methods to clean, dry, and restore your property back to its original state. We can also fully deodorize your home using professional deodorization methods. For your smoke odor removal needs, make sure to call HydroForce Cleaning and Restoration at (630) 835-0862.

Categories
Mold Remediation

How to Remove Mold from the Caulk Around the Kitchen Sink

24/7 EMERGENCY SERVICE RESIDENTIAL & COMMERCIAL SERVICES

How to Remove Mold from the Caulk Around the Kitchen Sink

Cleaning mold from the kitchen sink caulk is a common household task that is frequently forgotten. Mold in your kitchen can impact appearance, cleanliness, and potentially pose health risks if not addressed. Careful steps are needed to completely remove mold from caulk and prevent its recurrence.

What Causes Mold to Grow Around Kitchen Sinks?

The presence of moisture around kitchen sinks creates an ideal environment for mold spores to thrive. Various factors such as leaky faucets, water splashes during dishwashing, and high humidity levels in kitchens contribute to elevated moisture. Inadequate ventilation worsens the issue by slowing down moisture evaporation, while food particles create a food source for mold spores. If the area around the sink is not regularly cleaned, soap scum, grease, and other residues accumulate, encouraging the growth of mold.

Mildew mold developed on kitchen sink silicon seal

Is Mold on Caulking Dangerous?

The presence of mold on caulk can release spores and mycotoxins into the air, which can be harmful if inhaled or touched. Exposure to indoor mold can cause respiratory problems, allergies, and other health issues. Certain molds, such as black mold, can produce mycotoxins that are known to be specifically toxic to humans and animals.

Not only does mold growth on caulking compromise indoor air quality, but it can also indicate a potential moisture issue that could lead to structural damage. Mold breaks down the caulking, reducing its effectiveness in sealing gaps and preventing water damage.

How to Remove Mold from Sink Caulking

Removing mold from caulk around the kitchen sink and other moisture prone areas is crucial due to the negative impact on the home’s structure and potential health risks. With the right materials and a step-by-step method, you can effectively eliminate mold and restore the hygiene and beauty of your kitchen sink area.

How to Remove Mold from the Caulk Around the Kitchen Sink

Mold Removal Method #1: Vinegar

Research has shown that vinegar can eliminate 82% of mold species. Vinegar does not release any toxic fumes unlike other mold-killing agents, making it a safe option for using in households. The first step in killing and mold from caulk around your kitchen sink is gathering the necessary materials.

Here is a list of materials you will need:

  • Safety Materials: Rubber Gloves, Safety Goggles, Mask
  • Ventilation (Open windows or use an exhaust fan)
  • Vinegar
  • Spray Bottle

After gathering your materials, follow these steps to remove the mold:

  1. Fill a spray bottle with undiluted mild white vinegar. The acidity of vinegar makes it effective to killing mold, so avoid diluting it for the best results.
  2. Apply the vinegar solution to the affected areas and let it sit for an hour. To provide ventilation, open bathroom windows for the air to circulate if possible.
  3. After one hour, clean the area with hot water and a towel. Ensuring surfaces are dry will prevent mold from reappearing.

While vinegar may not work on its own for more persistent mold species, it is effective at preventing mold from growing to begin with. It is recommended to store a bottle of vinegar near your kitchen sink to spray susceptible surfaces regularly.

Mold Removal Method #2: Bleach and Baking Soda

Bleach is commonly marketed as an effective solution for eliminating mold, but it specifically works best on non-porous surfaces such as sinks and tiles. The active ingredient in bleach, sodium hypochlorite, reacts with water to form hypochlorous acid, which eliminates mold by breaking down proteins, enzymes, and nucleic acids.

You will need the following materials to remove mold with bleach and baking soda:

  • Safety Materials: Rubber Gloves, Safety Goggles, Mask
  • Small Scrubbing Tool (Old toothbrush, disposable paint brush, etc.)
  • Small Mixing Bowl
  • Plastic Wrap
  • Bleach
  • Baking Soda

Follow these effective steps:

  1. Create the cleaning solution by combining bleach and baking soda to form a paste. Use a small scrubbing tool to stir the solution, as bleach can ruin the tool you use.
  2. Generously apply the paste to the moldy caulk and cover the area with plastic wrap. The plastic wrap will prevent the solution from drying and not being as effective.
  3. Let the paste sit for a few hours or overnight. Remove the plastic wrap and rinse the solution.
  4. If the mold is still present after one application, it is recommended to repeat the process.
  5. (Optional) Once the mold is completely removed, apply more caulk in the affected areas to prevent it from coming back. Adding more caulk will re-seal any areas where water would rest, causing mold growth.

Mold can be a tricky situation for homeowners to face, especially if it will not go away. If you cannot fully remove the mold or notice it is growing after following these processes, it may be necessary to call professionals for mold removal services. Mold growth should be taken seriously, considering the risks it can pose to individual’s health and safety.

How Can I Prevent Mold Growth on Caulk?

It is important to implement mold prevention methods to maintain a clean and healthy environment. Mold can grow easily in damp, poorly ventilated places like the kitchen sink if it is not maintained properly, even after conducting these mold removal methods.

To prevent mold growth on the caulk around your kitchen sink, conduct regular cleaning and ensure the area is kept dry. It is essential to inspect the area regularly to address the issues early.

For extra protection, you can invest in mold-resistant sealant and caulk. Mold-resistant caulk is made with anti-mold enzymes and biocides that seal and prevent moisture from seeping into cracks. Using a protective sealant after cleaning the area further protects the caulk with its waterproof elements. Silicone sealants are a popular choice for mold resistant sealants since they bond well with nonporous surfaces.

Mold Removal and Remediation - HydroForce Cleaning & Restoration

Considering professional mold remediation services may be a practical solution for addressing mold on kitchen sink caulking. Our mold remediation specialists at HydroForce Cleaning & Restoration have the training and equipment to thoroughly identify and address mold growth.

If you notice mold growth in your home, give our professionals at HydroForce Cleaning & Restoration a call today. To guarantee thorough mold removal and prevention, our team uses advanced technologies such as HEPA filtration systems and specialized cleaning agents. We will ensure the area is mold free and that the home is restored back to its safe and healthy condition.

Categories
water damage water restoration

Can I Break My Lease Due to Water Damage?

24/7 EMERGENCY SERVICE RESIDENTIAL & COMMERCIAL SERVICES

Water damage is not an uncommon problem in rented homes, condos, and apartments. The devastation in a rental can prompt the tenant to ask if they can break their lease. The answer depends on what is specified in the lease agreement. Tenants are advised to know their rights beforehand.

What are examples of water damage?

Different types of water damage can affect a rental unit. An appliance, such as a dishwasher or washing machine, can leak and cause major water damage to the surrounding floors. A pipe can burst and gush hundreds of gallons of water into the unit.

Water damage can occur in bathrooms, which contains an abundance of moisture. A toilet might overflow and cause water damage to not only the rental but the unit below. Apartments in close proximity to a river can be flooded if water overflows its banks.

Any of the abovementioned common scenarios can lead to moisture saturating belongings and damaging the walls, ceilings, and carpeting. The unexpected water damage may be so severe that it becomes impossible for the tenant to live in the unit safely and comfortably.

The landlord may outrightly refuse to perform the necessary repairs to maintain the livability of the unit. Or, the landlord may delay fixing the water damage, allowing the water damage to spread and making it difficult for the tenant to continue residing in the rental.

water damage on ceiling

Does the lease stipulate the right to cancel?

Renters are urged to understand the terms of their lease and be aware of their rights. If the landlord has insurance, it may cover the water damage to the building. When this vital information is unclear, it is the renter’s responsibility to ask beforehand who is responsible for water damage.

Total or partial water damage can give the landlord the right to evict the tenant. Conversely, the renter has the right to cancel the lease if the unit is partially or completely destroyed by water damage and the place is uninhabitable. This scenario applies to significant, not minor, water damage.

How does the Illinois RLTA protect tenants?

In Illinois, rental units must be properly maintained per the Illinois Residential Property Manager and Tenant Act (RLTA). This means property managers are required to ensure their rental units are safe, sanitary, and do not pose security threats, including water damage.

Per the RLTA, the landlord must respond to the tenant’s request for repairs within a reasonable time frame. If repairs are significantly delayed or the landlord fails to make proper repairs, the tenant may have the legal right to break the lease and leave the unit without further penalties.

Can the lease be broken if mold develops after water damage?

Especially when toxic substances, like mold, are present in the water damaged property, the tenant has legal grounds to terminate the lease. Prior to canceling the lease, the renter should make sure they are compliant with state and local statutes, plus take a series of steps.

mold from water damage

What steps should the tenant take after water damage?

When water damage occurs and makes the rental uninhabitable, the tenant should document the condition of their unit. Take photos and videos of the damage. Keep detailed records of when the water damage incident occurred, when the landlord was notified and how long they took to repair it.

The tenant must also prove that the landlord failed to make adequate repairs within a reasonable time frame. If the landlord did not act to fix the water damage at all, the tenant is responsible for documenting this negligence as well.

As a last step before terminating the lease, the tenant must notify the landlord immediately upon noticing the water damage that has affected their unit. A formal, written notification is advised. The tenant should give the landlord an opportunity to make proper repairs.

What if the tenant is at fault?

If water damage occurs, the tenant is responsible for mitigating the ruin. The tenant is expected to turn off the water supply and call the landlord soon after the water damage event. The landlord is responsible for maintaining the property and ensuring it remains functional and habitable.

Rental units are typically covered by the landlord’s property insurance. When the walls, floors, or interior structures become water damaged due to no fault of the tenant, the landlord’s insurance should cover it. Of course, if the tenant is at fault, a different scenario ensues.

In some cases, the tenant may have caused the water damage. An example is when the renter accidentally leaves the bathwater running, causing the water to overflow and seep into the unit below. In instances like this, the tenant is held accountable for the damages.

Water damage is costly and time-consuming to fix. Take the hassle out of the repairs by consulting Hydroforce Cleaning and Restoration for efficient, professional water damage restoration. Our technicians perform prompt water damage cleanup services to prevent damage from spreading.

Whether your water damage event is due to an appliance malfunction, a burst pipe, or a flood, our specialists are equipped to return your rental to its pre-loss condition fast. Technicians run powerful water extraction equipment to eliminate the moisture as well as drying machines to fully dry the area.

Call Our Professionals at Hydroforce Cleaning and Restoration

Our IICRC certified technicians locate the source of the moisture and repair it to prevent further damage. Any objects contaminated by water are removed. We also dry and reinstall carpets affected by water damage. Once the excess moisture is removed, we deodorize and sanitize the premises.

Hydroforce Cleaning and Restoration specialists offer pack-out services. As an added convenience, our crews work with your insurance to speed up claims. Our swift response to water damage emergencies helps prevent further damage and reduces the chances of a mold infestation.

Renters, homeowners, and commercial property owners choose Hydroforce Cleaning and Restoration for all their water damage mitigation needs. We are proud to serve Chicago, Illinois, 24/7. When you are faced with water damage and need immediate professional help, call our cleanup experts.

Categories
Mold Remediation

What Does Mold on Carpet Look Like?

24/7 EMERGENCY SERVICE RESIDENTIAL & COMMERCIAL SERVICES

How to Recognize When Your Carpet is Affected by Mold

The cozy ambiance of our homes is often linked to warmth, relaxation, and a sense of security. However, within the routine of our daily lives, a silent intruder exists that can compromise not only the aesthetics of our living spaces but also pose potential health risks – mold. While mold can manifest in various places within our homes, one of its favored hiding spots is often right beneath our feet: the carpet.

Are you worried about the possibility of having a moldy carpet? Well, there are various potential reasons that might indicate your carpet is affected by mold. Knowing these signals is essential for maintaining a healthy home. But before we explore that, let’s understand what mold is and how it appears.

What is Mold and What Does it Look Like?

Mold look on carpet

Mold is a type of fungus that can appear in various colors, such as black, white, or green. It often shows up as fuzzy patches or spots and may have a musty, moldy odor. If you see discoloration on surfaces, especially under carpets, it could be a sign of mold growth.

Why Mold Grows on The Carpet?

Mold and mildew, both belonging to the fungi family, thrive in environments with excess moisture and inadequate ventilation. When porous materials, like carpet pads, become saturated with water and are not promptly dried or ventilated within 48 to 72 hours, it creates an optimal breeding ground for mold and mildew. The porous nature of materials such as carpet pads provides an ideal surface for these fungi to attach and penetrate.

Moreover, the presence of organic matter within the carpet, such as dust or debris, can serve as a nutrient source for the proliferation of mold and mildew. While carpet mold is typically visible, in cases where it goes unnoticed, certain indicators may serve as warnings.

How to Tell If Your Carpets Have Been Affected By Mold? 

How to Tell If Your Carpets Have Been Affected By Mold? 

Here are key indicators that mold may be present in your carpet, signaling the need for effective mold remediation.

  • Damp and Wet Carpet: If you’ve recently faced water damage or spilled something on your carpet, mold may have found its way in – that’s a 100% possibility. Moreover, even in the absence of direct water damage, if your living space is consistently damp and humid, your carpet is still at a high risk of hosting and encouraging mold growth. Whether it’s an immediate spill or the ongoing environmental conditions, both situations pose a serious threat to the well-being of your carpet.
  • Allergy Symptoms: If you or others nearby unexpectedly develop allergies or health problems, it could be a sign of mold in the carpet. Mold might affect breathing, leading to symptoms like coughing or difficulty breathing. It can also trigger allergic reactions, including a stuffy nose, throat irritation, or skin rashes.
  • Foul odor: When there is mold on the carpet, you will notice an unpleasant smell whenever you’re around it or in the room where the carpet is laid. This foul odor, often described as musty or damp, is a primary indicator of mold presence.
  • Green, Brown, and Black Spots: When you notice discoloration on your carpet, especially in the form of green, brown, or black fuzzy spots, it serves as a significant warning sign, indicating the need for further investigation. In such cases, it becomes essential to promptly address the potential for mold growth.

There are mold testing kits available that can aid in identifying mold in the carpet. These kits come in different types, including Petri dishes, tapes, and color-changing pens. They are effective in revealing the presence of mold growth. Alternatively, hiring a professional mold removal company can provide testing and identification services to comprehensively address the issue.

What kills Mold in Carpets?

Use baking soda to kill mold on carpet

To effectively kill mold on carpet, you can use a combination of cleaning and disinfecting methods. Here’s what you can try:

  • Vinegar and Water: Create a solution by mixing equal parts white vinegar and water. White vinegar possesses natural antifungal properties, making it effective in killing mold. Pour the solution into a spray bottle for easy application. Once sprayed, allow the solution to sit for at least 10-15 minutes, providing ample time for the vinegar to penetrate and eliminate the mold.
  • Scrubbing: Gently clean the moldy area with a brush or sponge, using a mild detergent or a solution of water and white vinegar (equal parts). The natural antifungal properties of vinegar make it effective for this purpose. After allowing the cleaning solution to sit for the recommended time, delicately scrub the carpet with a brush or sponge to loosen and eliminate the mold from the fibers. Take care to avoid any damage, particularly if the carpet has a delicate or sensitive texture.
  • Vinegar and Baking Soda: Another alternative is to mix vinegar and baking soda. Combine equal parts of both, apply the mixture to the mold on your carpet, let it sit, and gently scrub to eliminate the mold. This natural solution provides an effective way to keep your carpet free from mold.

How to Get Rid of Mold Smell Off the Carpet?

If you’ve already removed the mold but are still dealing with lingering musty odors in your carpet, consider the following steps to eliminate the smell:

  • Provide Adequate Ventilation: Make sure to regularly ventilate the affected area by opening doors and windows. This promotes better air circulation and helps dissipate any remaining odors. Using fans can further enhance the ventilation process and expedite the removal of lingering musty smells.
  • Use an Air Purifier: Invest in an air purifier equipped with a HEPA (High-Efficiency Particulate Air) filter. These devices are effective in capturing and neutralizing mold spores and odorous particles. Place the air purifier in the room with the treated carpet and let it operate consistently to improve overall air quality and eliminate any persistent mold odors.
  • Use Air Fresheners: Opt for natural or chemical-free air fresheners designed to neutralize odors rather than simply masking them. Consider using essential oil diffusers with antimicrobial properties, such as tea tree oil or eucalyptus, to introduce a pleasant fragrance to the air while combating any residual musty odors.
  • Sunlight: Consider taking the carpet outside on a sunny day if you can. Sunlight works like a natural disinfectant, and it’s great for getting rid of lingering mold smells. Just let the carpet breathe in the fresh air and sunlight for a few hours. Make sure to flip it over to expose both sides, allowing the sunlight to reach all areas.
  • Activated Charcoal: Try putting bowls of activated charcoal around the carpet. Activated charcoal is fantastic at soaking up and getting rid of odors. Just leave the bowls in the room for a while, and if you notice the smell lingering, swap out the charcoal. It’s a simple trick that can do wonders in neutralizing any unwanted scents from your carpet.

Seek Professional Help for Mold Remediation

Mold Remediation - HydroForce Cleaning & Restoration

When grappling with mold troubles, it’s wise to bring in the experts. For those in the Chicago, IL area, Hydroforce Cleaning and Restoration is the name you can trust for exceptional mold removal. Our expert team is well-versed in the intricacies of efficient mold mitigation. It’s time to say goodbye to lingering concerns as we deliver a comprehensive solution, ensuring your living space remains fresh and healthy.

For mold remediation in Chicago, IL, and surrounding areas, give us a call at 630-835-0862.

Categories
disaster recovery water damage water restoration

How to Get Rid of Sewage Odors in the Bathroom

24/7 EMERGENCY SERVICE RESIDENTIAL & COMMERCIAL SERVICES

A sewage smell in your bathroom usually happens because solids have clogged your pipes, and the water is unable to move freely, causing it to be stagnant. You can sometimes resolve the sewage smell in your bathroom by using vinegar and baking soda, as well as a heavy duty drain cleaner. However, if that does not work, you should consult a plumber to help you unclog your drains.

Understanding How Bathroom Plumbing Works

Bathroom Plumbing

If you look under your sink, there is a U-shaped pipe. This pipe goes from your sink drain to a wastewater pipe in the wall called the P-trap. One end of this pipe goes to the sewer or septic system, while the other goes all the way to the roof to let the fresh air in and allow the smelly sewer gases outside. The P-Trap is U-shaped intentionally so that it can collect a small amount of water after each use of the sink, which allows it to be a barrier against sewage odors. If your plumbing system works as it should, the water stays in the P-trap after you turn off the sink, or empty the tub of flush your toilet.

That little amount of water will help block gases from the sewage system. Usually, these gases will flow past the bathroom and out to the vent pipe in your roof. If these gases are not vented properly, they can be dangerous for your health as they contain methane, hydrogen sulfide, carbon dioxide, ammonia, nitrogen oxides, and sulfur dioxide. If you’ve been exposed to these gases, you may experience headaches, nausea, and drowsiness. Therefore, if you have a sewage smell in your bathroom, make sure to have it corrected quickly to avoid further issues or possible harm to your health.

Odor Coming from Clogged Drains

If there are odors in your bathroom, it may likely be because the drain is clogged. This happens because whatever is causing the clog may cause bacteria growth and odors. A few common types of clogs that are seen in the bathroom include:

  • Toilet paper buildup, feminine products, baby wipes, and other items not meant to go in the toilet can prevent proper flushing
  • Tree roots causing underground pipe leaks
  • Buildup of hair causing the drain to be blocked
  • Buildup of mineral sediment over time

If these clogs are not resolved quickly, you may notice a bad odor coming from your drain.

Clogged Drains

Sulfur Odor in Your Drain

Sulfur odors coming from your drain are common. When this happens, it is best to check other faucets in the house to see if they have a similar smell, as the issue may be coming from your water supply. If not, you may have contaminated pipes or venting issues.

Quick & Easy Fixes for Sewage Smell in the Bathroom

If your bathroom has not been used recently, the water in the P-Trap will evaporate which removes the barrier between the bathroom and the gases in the sewer system. All you would need to do is run some water to allow the P-Trap to get filled again. If this does not work, you can use some pink RV water-safe antifreeze. If this does not work, then make sure to check for leaks around the P-Trap.

Another reason for the bad odor from your sink may be a clog in the drain as the clog itself may have an odor. Usually, you can resolve this with a plunger, however, if that doesn’t work, you may have to hire a plumber who will use a drain snake or a hydro-jetter to remove the clog.

Some other easy solutions you can try to resolve the bad odor coming from your drain include:

  • Pour boiling water down your drain to quickly clean it and remove odors
  • Use baking soda, vinegar, and boiling water to break any buildup in your drain’s pipes
  • Add baking soda periodically to your drain to keep it fresh
  • Change filters to eliminate bad smells from a contaminated water softener
  • Plunge your toilet to prevent venting issues coming from the waste line
  • Inspect the vent stack to get rid of any debris or heat up icy vents in the winter
  • Use lemon juice and baking soda to help eliminate drain odor

Call the Professionals

Sewage Cleanup Professionals

If your P-Trap has water, there are no leaks, and the drain and pipes are free of clogs, you should call a plumber as you may be dealing with a toilet issue. If you notice that your toilet bowl is not filling up properly, you may have a broken seal. If there is no caulk around the base of the toilet, water and urine can seep under and water will get stuck in crevices where it can cause bacteria with a bad odor to form. The easy solution is to add a bead of caulk around the bottom. It may be helpful to caulk the bolt holes as well to trap the odor. If you notice that your toilet bowl is loose, there may be damage to the wax ring of the toilet. This can cause water leaks and sewage smell. If this is the case and your toilet is loose or wobbly, it will need to reset with a new toilet ring.

Even when the bad sewage odors are in the bathroom, they may be coming from somewhere else. This may be due to a blocked roof vent that is not allowing fresh air to come into your bathroom. A few signs of a blocked vent include slow draining and bubbling or gurgling noises when trying to drain. You may have an issue with an improperly installed, cut, or cracked pipe, which can also cause gases to be released into your home. A cracked pipe may be more difficult to find as it may be hiding somewhere in your walls. However, a plumber can easily find it using a smoke machine and figure out the cause of your leak.

You may be able to do some plumbing fixes yourself such as cleaning your drains or replacing the toilet wax ring. However, if you are not handy and don’t have the proper skill level, you should hire a professional to ensure it is done properly.

Have you experienced a bad sewage smell from your drains? HydroForce Cleaning and Restoration can help you remove the bad odors and get your drains working properly again. We remove odors quickly and efficiently with our hi-tech equipment and proper methods to make sure your home smells fresh. Make sure to call us for all your sewage cleanup and odor removal needs. We know experiencing a sewage backup can be stressful, that is why we are here to help. We will remove all the sewage and clean, disinfect, and restore your property back to its original state. For more information, call us at 630-835-0862.

Categories
disaster recovery water damage water restoration

How Does Hail Cause Damage to the Roof?

24/7 EMERGENCY SERVICE RESIDENTIAL & COMMERCIAL SERVICES

Hail can cause major damage to your property. In 2022, there were over 4,400 severe hail damage reports which caused billions of dollars of property damage. Hail can damage various things outside such as your vehicle, roof, and even the windows of your home. Most of the time, hail damage is very apparent, such as when it breaks a window or dents a car. However, sometimes hail damage cannot be easily seen. With hail damage on a roof, you may need an inspection to figure out how much damage it has caused so you can take proper measures to fix it.

How does hail damage affect your roof?

roof affected by hail damage

The extent of hail damage can vary. It will depend on the hail size, wind speed, and directions, the material the roof is made of, and even the slope of it due to roof leaks and other issues. Whether you’ve experienced cosmetic damage or broken edges, bruises, or punctures, this can cause additional costly issues with your roof later.

Here are some common ways in which hail can damage your asphalt and composition shingles:

  • Granule loss:

This part of the shingle is sandpaper-like and if it loses its granules, its asphalt coating will get exposed to the elements and age it quickly. After a hailstorm, always make sure that granules have not come off your shingles.

  • Cracks in the shingles:

Hail is usually hard and will cause the shingles to crack. This means your roof may end up with bare spots, and the roof will not be able to protect you from the weather.

  • Fiberglass mat that is exposed:

When hail damages your roof, it can break the surface of the shingles and you will end up with the fiberglass mat that is underneath them.

  • Fractured fiberglass mat:

It may be difficult to tell if you have a fractured fiberglass mat unless you are a professional roofer, however, if you suspect this to be the case, make sure to have it checked out as fractured fiberglass mats can result in tears and cracks from hail impact.

Another way that hail and wind can ruin your roof is by affecting the seal integrity of the shingles. When the seal is weakened, the shingles can blow off and leave your roof exposed. If the shingle is damaged, its integrity is also compromised which leads to leaks and tears.

Now that you know all the different ways hail can damage your roof, you should look for signs of damage right after a hailstorm.

How to Identify if Hail Damaged Your Roof


If you have minor roof damage, it may be difficult to identify it if you are not a professional roofing contractor. Here are a few things to look out for if you want to inspect your roof and check for any damage after a hailstorm:

  • Inspect your gutters, downspouts, and siding:

Usually, if you’ve experienced hail damage, there may be dents and dings on your gutters and downspouts. Also, if your gutters are clogged or overflowing or granules are shedding from your roof, you may have roof damage. Make sure to also check your siding, which can show if you’ve experienced hail damage.

  • Inspect your deck:

If you’ve experienced a hailstorm, check the deck for damage. If the hail was bad enough to damage your deck, chances are it also damaged your roof.

Even though these are great indicators of hail damage on your roof, if you suspect damage, you should reach out to a professional roofing contractor for a roof inspection and an assessment.

What hail size can damage your roof?

roof damaged by hail

Even though hail size may vary, almost all sizes of hail can damage your roof. Here is a breakdown on different sizes and the damage they can cause:

  • ½” in hail:

This size of hail or even slightly smaller can cause damage to your roof or other areas of your home.

  • ¾” hail:

This size hail, if combined with strong winds, can cause damage to vinyl siding, window screens, metal fascia, and even deck paint. It can also dislodge granules from asphalt shingles and damage your gutters and downspouts. Sometimes, due to the size of this hail, homeowners don’t identify the damage caused by it.

  • 1” hail:

Usually, this size hail can cause bruising to shingle underlayment and very significant damage to gutters, siding, and fascia. The speed of the wind during the hailstorm will determine the severity of the roof damage, just like with the smaller size hail.

  • 1¼” hail:

This size hail will cause damage just by coming down from the sky. It will leave major dents on various items outside.

  • 1½” hail:

This size hail can cause major damage to your property depending on the amount, how long it falls, and wind speed, however the damage to your property could end up being severe.

  • 1¾ – 2” hail:

This size hail can go through various parts of your roof, or even through plastic roof vents. With this size hail and strong winds, you can end up with torn siding, cracked windows, and damage to metal fixtures.

  • 2” hail:

This size of hail will cause significant damage to your property. If you experience this size of hail and strong winds, you should have your property assessed by a professional roofing company.

Recognizing Roof Damage from Hail

If you experience hail that is over one inch in diameter, you will probably be able to visually see the damage to your roof. If the hail is accompanied by strong winds, you may experience even more damage. You may also see damage outside such as broken windows, dented gutters, or even damaged siding. It is important to get this damage remediated right away after a hailstorm.

Even with identifying the common damage seen on asphalt shingles covered earlier, be aware that hail can crack harder materials such as clay or concrete. However, sometimes hail damage is tougher to see and not knowing you have hail damage can lead to further damage to your property later.

Can you repair a hail damaged roof?

repair a hail damaged roof

Hail damage to your roof can vary in severity, however, it can usually be fixed. It can range from damage to a single shingle to replacing the whole roof. This is why it is important to have your roof inspected by a professional after a hailstorm. This will help determine the damage.

Roof inspections are usually free, and the inspectors can let you know if you have roof damage after a storm. If you are not sure if you’ve had hail damage to your roof, look for signs of damage outlined earlier. If you have multiple instances of damage such as damage to your gutters or siding, it is time to have a professional assessment done. This will help you fix the damage while it is still mild and prevent further damage.

Do Not Ignore Roof Damage

You should never ignore roof damage as you may end up with leaks and ice dams. This may cause mold damage, electrical issues, and even rotting wood which can be costly to fix. If you suspect damage, make sure to call the professionals to have your roof assessed and fixed.

Does insurance cover hail damage?

Usually, a homeowner’s insurance policy will cover damage to the roof from hail. However, this may differ depending on where you live, who you are insured by, and the details outlined in your policy.

You generally need to file your claim within one year of when you experienced roof damage. It is recommended to have your roof inspected right away if you’ve experienced hail damage. You need to ensure that all the damage is reviewed, and the proper assessments have been done so that you can receive your quotes for fixing the hail damage on your roof from your roof contractor.

Call the Professionals

Roof replacement and reconstruction after storm damage

Have you experienced roof damage at your home or business? HydroForce Cleaning and Restoration can help! Whether the damage was caused by strong winds, a storm, hail, or any other natural disaster, our professionals provide storm damage roofing services to restore or replace your roof, siding, and even gutters. You can rest assured that we will get your property back to its original state. For all your roofing needs, call us today at 630-835-0862 for more information.

Categories
water damage water restoration

Why is There a Sewage Odor Coming from My Kitchen Sink?

24/7 EMERGENCY SERVICE RESIDENTIAL & COMMERCIAL SERVICES

Why is There a Sewage Odor Coming from My Kitchen Sink?

The kitchen sink works hard for our households. It is where dishes are washed, various food particles go through the drain, and where the garbage disposal is located. Not many people pay much attention to their kitchen sink unless there is an issue. However, when there is blockage, the kitchen sink may produce a bad odor.

There are various reasons why a kitchen sink may have a bad odor. We will review the different reasons why this may occur and what you can do for regular maintenance to prevent odors coming from your sink.

Why does my kitchen sink have a bad odor?

If you notice your kitchen sink has a bad odor, it could be due to any of these common reasons:

Leftover food in your garbage disposal:

When leftover food gets stuck in your garbage disposal or drains, it can create a bad odor. Certain foods have a stronger odor than others and can also cause sink issues. Rice, grease/fat, coffee grounds, bones, and even potato peels can clog up your pipes.

 A dry P-trap:

If you notice a sewage odor, you may have an empty sink trap. A P-trap is a curved part of the pipe under your sink. Usually, it holds water by which a seal is created, and it prevents any gases from getting into the kitchen. The P-trap should always have water in it. You might also have an issue with the drainpipe or your vent. This issue may include pipe damage or an obstruction that is in your vent.

Clogged or cracked vent:

For your plumbing system to work, it needs to have the proper ventilation. If there is no vent, there can be issues with pressure and flow of water and sewage. If there is an issue with your vent or it is damaged or has a clog, you can experience a sewage odor in your home. Usually, your vent is on the roof, so your plumber can check for bird nests, leaves, or other debris that may have accumulated there. They can also check for cracking or damage.

Clogged or cracked vent

Mainline clog:

Usually, sewage backs up into the bathtub when the toilet is flushed. A mainline clog also usually shows up in the bathtub first before it backs up into the kitchen sink. However, at times it will go straight to your sink. This is an emergency due to the possible health hazards sewage water may contain, and you should call an experienced plumber to help.

Drain clog:

If there is food or grease stuck in your drain, you can experience a bad odor in your kitchen. If you notice other signs of a clog such as a sink that drains too slowly or gurgling pipes, you should have your drains cleaned by a professional.

Sulfate in the water:

If you notice a rotten egg smell, you may have a water issue. Sometimes the bacteria in the water heater can create an odor in your water. Also, sulfate may naturally occur if you have well water. When it is just a small amount it is not an issue, however, if it is a lot, you can start having bad-tasting water and health issues.

How can I stop my sink from smelling like a sewer?

stop sink from smelling like a sewer

Foul odors coming from the kitchen sink are annoying and can make it unpleasant to be in your kitchen. While these steps may not resolve the underlying cause of the odor, they can help reduce the bad smell in your kitchen:

  • Vinegar and baking soda: Pour one cup of baking soda and one cup of vinegar down the drain and let it set for 20 minutes. Then wash it down with hot water.
  • Ice cubes and coarse salt: If there may be food stuck in the disposal, you can remove it by putting some ice cubes and rock salt down the drain and turning on the disposal. Make sure to run cold water afterwards.
  • Lemon slices: Cut up small slices of lemon and put them down the drain and into the garbage disposal while running water. Turn on the garbage disposal until it grinds up the lemon and keep the water running for another 30 seconds after turning off the disposal.
  • Bio-enzyme drain cleaner: Bio-enzyme cleaners use natural enzymes to break down food particles that may be causing an odor.
  • Run water for one minute: If the trapped water in the drain dries up, this could cause a sewage smell. Try running water down the drain for at least one minute and check back after 30 minutes to ensure that the smell is gone.
  • Check sink trap: Check the sink trap and pipes under your sink for signs of leaks or damage. It is best to call a plumber if you notice a problem.

Call Our Professionals at Hydroforce Cleaning and Restoration for Help

equipment to remove odor from kitchen sink

If you are experiencing a sewage backup issue, our professionals at Hydroforce Cleaning and Restoration can help. We offer sewage cleanup and water damage restoration to residential and commercial customers and our technicians are highly trained to handle all types of sewage cleanup situations. Call us today for sewage cleanup emergencies at 630-835-0862.

Categories
water damage water restoration

How to Prevent Water Leaks in the Basement Due to Heavy Rain?

24/7 EMERGENCY SERVICE RESIDENTIAL & COMMERCIAL SERVICES

How to Prevent Water Leaks and Flooding in the Basement Due to Heavy Rain?

This is a common question that pops up in everyone’s mind. A heavy and persistent rain creates moisture and saturates the soil which results in hydrostatic pressure, pulling the water down through the basement walls and floors. Secondly, when gutters and drains get clogged up after a heavy storm, the lingering water pool ends up creating a lateral pressure onto the basement walls. Likewise, if there are any cracks and holes in the wall or if the windows are not properly installed, then it can lead to water leakage that can cause flooding in the basement.

There are 8 things that you can do to prevent flooding in the basement from rain. If any of these suggestions fail, then it is time to call our water damage restoration professionals who can help you with the water removal and repair the damage that is caused to your home.

How to Prevent Water Leaks and Flooding in the Basement Due to Heavy Rain

8 Simple Tips to Protect Your Basement from Flood Damage:

1. Sump Pump:

Sump pumps are an excellent asset that can save your basement from flooding by pulling the water out of the area and redirecting it into another drain or outlet that is away from your home’s foundation. It is usually installed in the lowest part of your basement. Having a sump pump can save you from the water damage and mold problems that are usually caused after a flood. There are two main types of sump pumps, pedestal and submersible sump pump. Usually, submersible sump pumps are more expensive than the pedestal ones, but they are more durable and efficient.

2. Install Backwater Valve:

A sudden storm can overwhelm city sewer lines, causing water and sewage to flow back into your home through your plumbing system. Thus, having a backwater valve installed in the sewer system of your home can stop sewage from flowing back in and protect your bathroom and basement from dangerous flooding and sewage backups.

3. Seal Your Basement:

Seal Your Basement

One of the most important things that you can do to flood proof your basement is seal the openings and visible cracks with a sealant or waterproofing membrane to prevent any kinds of leaks or dripping water into the area. In addition, add new caulking around the windows, doors, and pathways to keep the water out of the area.

4. Waterproof the Walls:

Sometimes there are hidden cracks that can cause serious water damage in your basement. We recommend you use a waterproof membrane that can be brushed onto the walls and ceilings of the basement to prevent any invisible leaks and water dripping issues. You can also use sandbags to protect windows and doors outside your home and prevent water from leaking through any cracks or openings.

5. Add Downspout Extensions:

Downspout extensions are a great way to keep draining water away from the foundation of your property and save it from flooding. If there are any faulty gutters, then there is a higher chance of water infiltrating your basement. Adding a longer downspout will ensure that the water drains far enough away from the home to avoid leaks and flooding in the basement. There are at least 6 types of downspout extensions to choose from such as aluminum, rain chute, splash stone, stealth flow pipe, buried drainpipe, and plastic extension.

6. French Drain:

French Drain

Installing a French drain prevents flooding and saves money on water damage and other remediation services. It usually lasts for 20 to 30 years. If water continues to permeate your basement after trying the above-mentioned tips, then a French drain can help. French drains look like a perforated pipe that is installed 8 to 12 inches below the ground and surrounded by gravel, rocks, and landscaping materials. The purpose of this is to prevent surface and ground water from entering your property and the basement.

7. Lawn Grading:

Your entire landscape and yard should be graded downhill from the home which can prevent water from pooling near your home’s foundation. Poor lawn grading that leads to the accumulation of water near the foundation is the main cause behind floods and water leaks in the basement. However, if you need to regrade your yard, then we recommend you hire a landscaping contractor and a professional who can help you grade the soil.

8. Keep Gutters Clean:

Keep Gutters Clean

Verify that your downspouts and gutters are clean and free of debris at least three times a year. Clean and well-maintained gutters prevent flooding and will save your basement from getting exposed to any flooding or contaminated water. If you’ve got leaky and aging gutters, then it is important to replace them with new ones because even if you clean those old gutters, they may still leak.

For Basement Flood Cleanup, Call Hydroforce Cleaning and Restoration


Whether your basement has flooded due to excessive rain, a pipe burst, or any other cause, we are available 24/7 to provide water damage restoration services. Our technicians are certified and trained to deal with emergencies like basement flooding repair, mold removal, flood damage cleanup, water extraction, and water damage restoration. Removing the standing water is important to prevent serious structural damage and mold growth that can lead to other issues. To book an appointment, call us today at 630-835-0862.