Categories
Mold Remediation

How to Remove Mold from the Caulk Around the Kitchen Sink

24/7 EMERGENCY SERVICE RESIDENTIAL & COMMERCIAL SERVICES

How to Remove Mold from the Caulk Around the Kitchen Sink

Cleaning mold from the kitchen sink caulk is a common household task that is frequently forgotten. Mold in your kitchen can impact appearance, cleanliness, and potentially pose health risks if not addressed. Careful steps are needed to completely remove mold from caulk and prevent its recurrence.

What Causes Mold to Grow Around Kitchen Sinks?

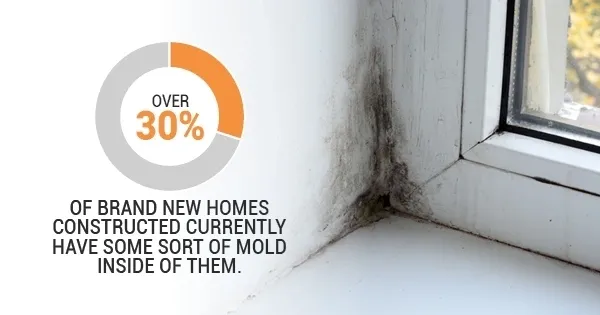
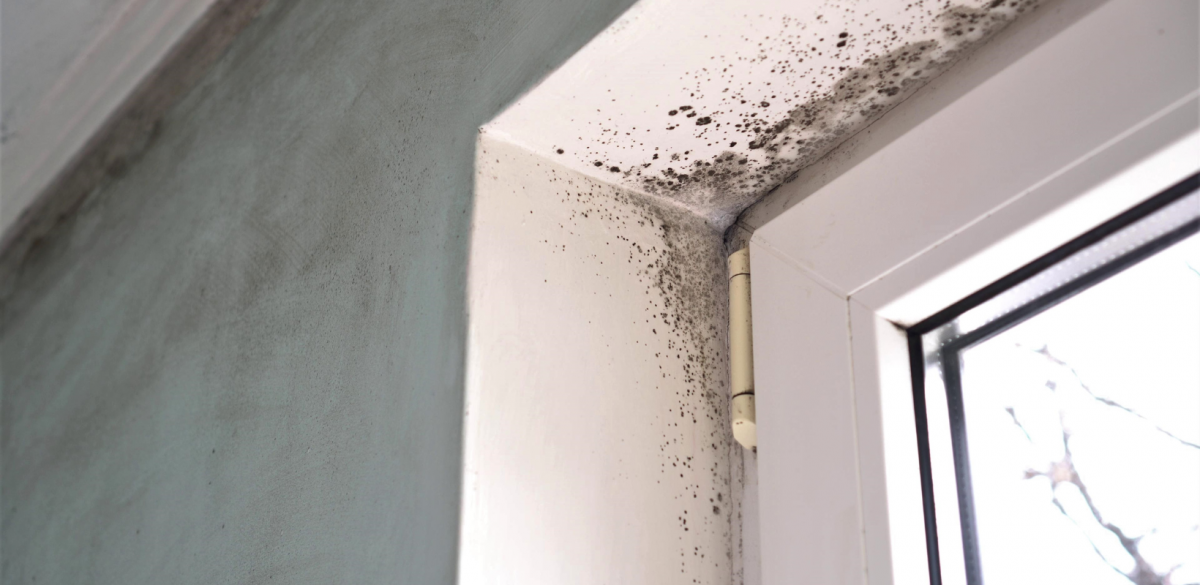
The presence of moisture around kitchen sinks creates an ideal environment for mold spores to thrive. Various factors such as leaky faucets, water splashes during dishwashing, and high humidity levels in kitchens contribute to elevated moisture. Inadequate ventilation worsens the issue by slowing down moisture evaporation, while food particles create a food source for mold spores. If the area around the sink is not regularly cleaned, soap scum, grease, and other residues accumulate, encouraging the growth of mold.

Mildew mold developed on kitchen sink silicon seal

Is Mold on Caulking Dangerous?

The presence of mold on caulk can release spores and mycotoxins into the air, which can be harmful if inhaled or touched. Exposure to indoor mold can cause respiratory problems, allergies, and other health issues. Certain molds, such as black mold, can produce mycotoxins that are known to be specifically toxic to humans and animals.

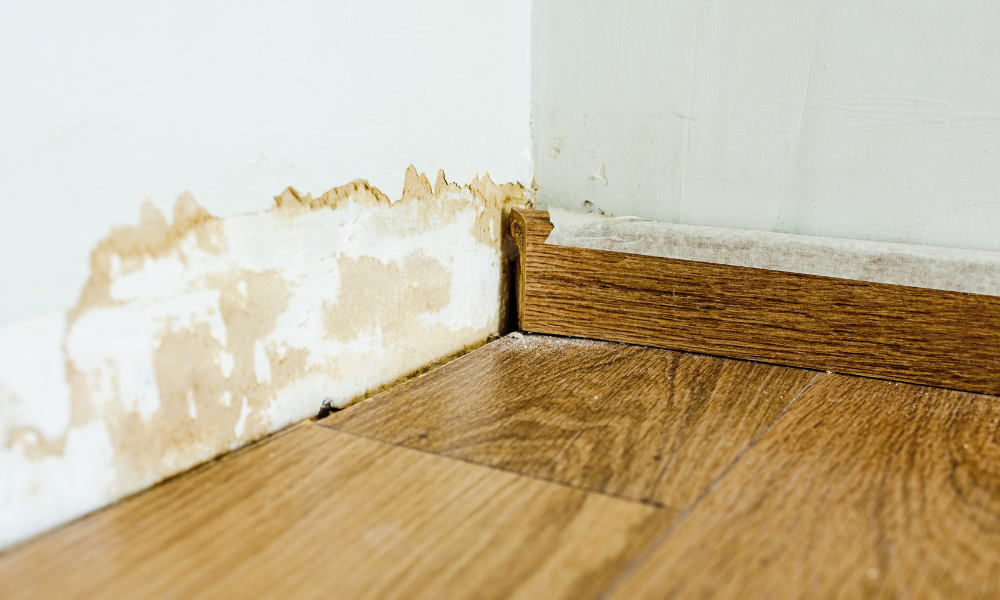
Not only does mold growth on caulking compromise indoor air quality, but it can also indicate a potential moisture issue that could lead to structural damage. Mold breaks down the caulking, reducing its effectiveness in sealing gaps and preventing water damage.

How to Remove Mold from Sink Caulking

Removing mold from caulk around the kitchen sink and other moisture prone areas is crucial due to the negative impact on the home’s structure and potential health risks. With the right materials and a step-by-step method, you can effectively eliminate mold and restore the hygiene and beauty of your kitchen sink area.

How to Remove Mold from the Caulk Around the Kitchen Sink

Mold Removal Method #1: Vinegar

Research has shown that vinegar can eliminate 82% of mold species. Vinegar does not release any toxic fumes unlike other mold-killing agents, making it a safe option for using in households. The first step in killing and mold from caulk around your kitchen sink is gathering the necessary materials.

Here is a list of materials you will need:

  • Safety Materials: Rubber Gloves, Safety Goggles, Mask
  • Ventilation (Open windows or use an exhaust fan)
  • Vinegar
  • Spray Bottle

After gathering your materials, follow these steps to remove the mold:

  1. Fill a spray bottle with undiluted mild white vinegar. The acidity of vinegar makes it effective to killing mold, so avoid diluting it for the best results.
  2. Apply the vinegar solution to the affected areas and let it sit for an hour. To provide ventilation, open bathroom windows for the air to circulate if possible.
  3. After one hour, clean the area with hot water and a towel. Ensuring surfaces are dry will prevent mold from reappearing.

While vinegar may not work on its own for more persistent mold species, it is effective at preventing mold from growing to begin with. It is recommended to store a bottle of vinegar near your kitchen sink to spray susceptible surfaces regularly.

Mold Removal Method #2: Bleach and Baking Soda

Bleach is commonly marketed as an effective solution for eliminating mold, but it specifically works best on non-porous surfaces such as sinks and tiles. The active ingredient in bleach, sodium hypochlorite, reacts with water to form hypochlorous acid, which eliminates mold by breaking down proteins, enzymes, and nucleic acids.

You will need the following materials to remove mold with bleach and baking soda:

  • Safety Materials: Rubber Gloves, Safety Goggles, Mask
  • Small Scrubbing Tool (Old toothbrush, disposable paint brush, etc.)
  • Small Mixing Bowl
  • Plastic Wrap
  • Bleach
  • Baking Soda

Follow these effective steps:

  1. Create the cleaning solution by combining bleach and baking soda to form a paste. Use a small scrubbing tool to stir the solution, as bleach can ruin the tool you use.
  2. Generously apply the paste to the moldy caulk and cover the area with plastic wrap. The plastic wrap will prevent the solution from drying and not being as effective.
  3. Let the paste sit for a few hours or overnight. Remove the plastic wrap and rinse the solution.
  4. If the mold is still present after one application, it is recommended to repeat the process.
  5. (Optional) Once the mold is completely removed, apply more caulk in the affected areas to prevent it from coming back. Adding more caulk will re-seal any areas where water would rest, causing mold growth.

Mold can be a tricky situation for homeowners to face, especially if it will not go away. If you cannot fully remove the mold or notice it is growing after following these processes, it may be necessary to call professionals for mold removal services. Mold growth should be taken seriously, considering the risks it can pose to individual’s health and safety.

How Can I Prevent Mold Growth on Caulk?

It is important to implement mold prevention methods to maintain a clean and healthy environment. Mold can grow easily in damp, poorly ventilated places like the kitchen sink if it is not maintained properly, even after conducting these mold removal methods.

To prevent mold growth on the caulk around your kitchen sink, conduct regular cleaning and ensure the area is kept dry. It is essential to inspect the area regularly to address the issues early.

For extra protection, you can invest in mold-resistant sealant and caulk. Mold-resistant caulk is made with anti-mold enzymes and biocides that seal and prevent moisture from seeping into cracks. Using a protective sealant after cleaning the area further protects the caulk with its waterproof elements. Silicone sealants are a popular choice for mold resistant sealants since they bond well with nonporous surfaces.

Mold Removal and Remediation - HydroForce Cleaning & Restoration

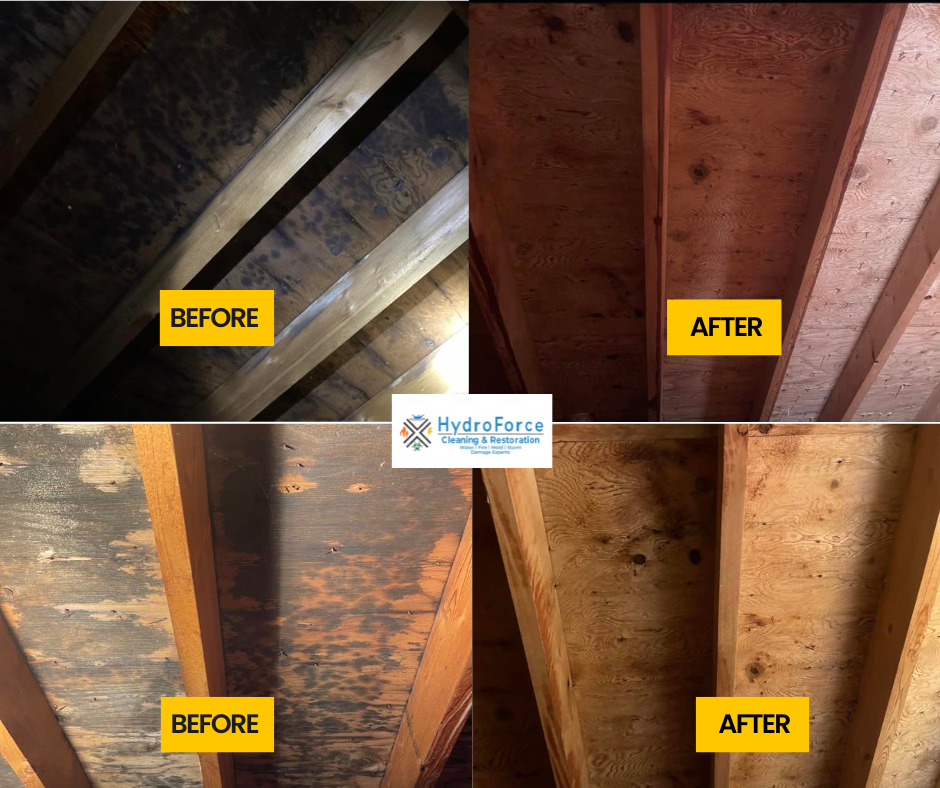
Considering professional mold remediation services may be a practical solution for addressing mold on kitchen sink caulking. Our mold remediation specialists at HydroForce Cleaning & Restoration have the training and equipment to thoroughly identify and address mold growth.

If you notice mold growth in your home, give our professionals at HydroForce Cleaning & Restoration a call today. To guarantee thorough mold removal and prevention, our team uses advanced technologies such as HEPA filtration systems and specialized cleaning agents. We will ensure the area is mold free and that the home is restored back to its safe and healthy condition.

Categories
Mold Remediation

How to Test Yourself for Mold Exposure

24/7 EMERGENCY SERVICE RESIDENTIAL & COMMERCIAL SERVICES

When residing in a home that is infested with mold, it is important to test for mold exposure. Serious health conditions, like mold toxicity, can result upon breathing in mold. Homeowners who are concerned about mold exposure should get themselves tested at a doctor’s office.

How common is mold?

Mold is naturally occurring fungi that is prevalent in the environment. The spores eat away at decayed materials, like dead trees and leaves, thereby supporting the important process of decomposition. Mold requires few nutrients to survive, making many places habitable spots.

Three nutrients are necessary to support mold colonies: a constant water source, organic materials, and darkness. A dripping water pipe produces enough moisture to feed spores. Organic materials range from clothing to carpets and drywall. When these nutrient sources combine with darkness, mold thrives.

Water damaged homes, thereby, are most susceptible to mold outbreaks. Mold colonies can develop within as little as 24 to 48 hours after exposure to moisture. Under consistently damp conditions and with a nearby food source, mold spreads rapidly and infests the home.

person overwhelmed by the sight of mold

What is mold toxicity?

Of the 100,000 species of mold, some are more harmful than others. Mold emits mycotoxins, which are toxins that mold spores naturally produce. Sensitive individuals who are exposed to mold and are unable to eliminate the mycotoxins from their bodies experience mold toxicity.

The mold toxicity that results when the body is unable to rid itself of the mycotoxins damages the body’s systems. Mold toxicity is also known as mold illness or Chronic Inflammatory Response Syndrome (CIRS). Airborne mold spores can enter a person via their skin, respiratory tract, or GI tract.

Who is most vulnerable to mold toxicity?

Mold toxicity mostly affects people who are especially sensitive to mold. Not everyone experiences symptoms of mold illness or reacts, though all individuals are exposed to mold and its mycotoxins. Certain factors or conditions must be present in order for symptoms to appear.

Mold toxicity affects individuals who have a family history of asthma or allergies. People who are diagnosed with asthma, chronic obstructive pulmonary disorder (COPD), or other respiratory conditions are likely to be sensitive to mold and may experience mold illness.

High exposure to mold spores through the environment can lead to mold toxicity. This occurs in industries, such as carpentry, greenhouses, and millwork, where mold concentrations are highest. Similarly, working in a building exposed to high moisture levels increases the risk.

Living in a home with high humidity levels (above 50%) encourages mold and mold illness. Damp areas, such as bathrooms, are prone to mold growth. When windows and doors are tightly sealed, they can trap moisture and block the ventilation needed to prevent mold.

mold in the corner of a window

What are symptoms of mold toxicity?

People who develop mold toxicity show several symptoms. Some common mild symptoms are coughing, wheezing, shortness of breath, and sore throat. Affected individuals may experience runny noses, watery eyes, and sinus congestion. Others suffer asthma attacks, nosebleeds, and skin rashes.

Severe symptoms can occur, especially in immune-compromised people. These include brain fog, fatigue, changes in mood, and headaches. Individuals may suffer memory loss, liver and kidney issues, and digestive issues. Mold toxicity symptoms can overlap with existing health conditions, making diagnosis difficult.

How do individuals test themselves for mold exposure?

Experiencing symptoms of mold illness, whether mild or severe, should prompt individuals to test themselves for mold exposure. Testing is also recommended when mold is smelled or seen in the home. Musty scents may emerge or staining on walls may develop—both signs of mold growth.

A physician can order tests to determine if mold toxicity is present. Inflammation occurs alongside mold toxicity. Respiratory disease often results when mycotoxins are prevalent indoors and act as pro-inflammatory mediators. A mycotoxin test can be performed to check for toxins in the urine.

Alternately, a blood test might be ordered at the doctor’s office. The blood sample is taken and sent to a laboratory to measure the number of antibodies present in the bloodstream. The count of antibodies indicates the immune system’s sensitivity to various mold species.

How do homeowners address a mold infestation?

The first line of treatment after mold illness is to reduce exposure to the indoor mold. Homeowners must locate and repair the moisture source, without which mold cannot flourish. This may mean fixing a roof leak, a leaky pipe, or improving the home’s ventilation.

Maintaining ideal humidity levels in the home is also key to preventing mold growth and alleviating existing mold illness symptoms. Humidity levels should be kept lower than 50 percent. Be extra-cautious during the summer months and in humid climates.

Mold Remediation Services

Mold Remediation - HydroForce Cleaning & Restoration

Eliminate an existing mold infestation with professional help from HydroForce Cleaning & Restoration, an efficient, local mold remediation company. We provide thorough mold removal services in residential homes and commercial properties, returning them to a clean, habitable, and mold-free condition.

Our highly skilled team of technicians arrives quickly to assess the extent of mold growth and develop a mold remediation plan. We contain the affected spaces to prevent cross-contamination to other parts of the home or business. Specialists begin the cleanup process by first fixing the water source.

Removing mold spores in the air is a central part of our process. We run HEPA filtration equipment to clean the air and filter mold spores. When mold infests surfaces, our techs use HEPA vacuums and cleaning products to remove the spores and stains.

Anti-microbial solutions are applied to further treat affected areas. Any unsalvageable building materials are properly disposed of. The property is thoroughly dried, air quality is tested, and a final inspection is performed. We work with your property insurance company to accelerate claims.

HydroForce Cleaning & Restoration is Chicagoland’s first choice for quality and efficient mold removal. As a comprehensive service, we remove hidden and visible mold from your property. Same-day appointments are available for emergencies. Call our Bridgeview, Illinois, office as soon as you spot mold.

Categories
water damage water restoration

How to Fix a Leaking Water Heater

24/7 EMERGENCY SERVICE RESIDENTIAL & COMMERCIAL SERVICES

A water heater is an essential part of the home. It’s responsible for creating hot water for use in bathrooms, kitchens, and laundry rooms. However, when a water heater springs a leak, it can lead to costly water damage. It is crucial to address the issue promptly to avoid further damage. This includes shutting off the water, identifying the source of the leak, securing leaky connections, and fixing or replacing faulty valves. While some repairs can be done by homeowners, it is important to prioritize safety and consult a professional if needed.

How common are water leaks?

In the US, household water leaks are common. About 10,000 gallons of water are wasted each year due to leaks. When plumbing leaks go unfixed, 32,850 gallons of water are wasted. A water heater leak is also a part of these dismal statistics.

How much does it cost to repair the water heater?

Fixing a leaky water heater can vary in price. On average, homeowners spend as low as $90 to upwards of $1,700. The actual repair price depends on the cost of the parts, the water heater technician’s charges, and how long it takes to perform the repair.

leaky pipe water heater

How much does it cost to fix water damage?

The cost to repair a leaky water heater is minimal compared to the price of fixing the extensive water damage that results. The average price for water damage restoration is $3,638. However, homeowners can pay as high as $15,000 depending on the source of the water and extent of damage.

How do homeowners fix a leaky water heater?

The cost of repairing water damage makes it clear that addressing a leaky water heater is a priority. Homeowners can tackle the repair themselves when the leak involves replacing a broken part. Some repairs are simple and inexpensive. Potential fixes can extend the life of the water heater for years.

How do homeowners fix a leaky water heater

Shut Off the Water

Upon discovering the leak, close the water shutoff valve. Turning off the water prevents additional cold water from flowing in and ruining the tank. Ensure the water is turned off by opening the hot water faucet elsewhere in the home; hot water shouldn’t be flowing.

Pinpoint the Source of the Leak

Fix a leaky water heater by locating the source of the leak. The water supply lines above the water heater can leak, which cause it to appear like the leak stems from the tank. Water supply lines are notorious for wearing out long before the water heater needs replacing.

Secure Leaky Water Connections

The cold and hot water inlets connect to the tank. When either of these loosen, water leaks from the water heater. Tighten the connections with a pipe wrench. Turn off the power supply prior to performing this task, as working with a hot water outlet can be dangerous.

Tighten or Replace the Drain Valve

The drain valve at the bottom of the water heater can leak if it becomes loose over time. This valve allows the homeowner to drain the tank during routine maintenance, such as draining or flushing. Use a pipe wrench to tighten the valve and stop the leak.

Alternately, cap the drain valve with a hose cap to prevent water from dripping out. If the leak continues, the valve may need to be replaced by a professional plumber who will shut off the hot water and drain down the water heater before installing the replacement valve.

Loosen the Temperature and Pressure Release Valve

The temperature or pressure inside the water heater can rise to high levels, prompting the temperature and pressure release valve to kick in. The valve can become stuck in a partially open position, leading to a leak from the water heater.

water shut off valve

Homeowners are advised to consult a licensed plumber to repair a temperature and pressure release valve that has become stuck. Safety is paramount since handling this valve involves leaks, temperature, and extremely high pressure. A mistake can lead to serious hazards.

Replace the Water Heater

Water escapes through the bottom of the tank when the inner components begin to leak. If the tank itself is ruptured, the leak will be significant, leading to a major flood instead of a steady drip. The leak can’t be fixed and replacing the water heater is the only option.

Regular and preventative maintenance can extend a water heater’s lifespan. Delay the onset of internal water heater leaks by installing a powered anode rod, adding a water heater pan that catches water and reduces water damage to the surrounding areas and cleaning the water heater parts.

Fixing a leaky water heater can be a DIY task. However, homeowners may prefer to consult a plumber due to the risks of electric shocks, burns, and water damage. Prioritize safety when repairing the water heater by following the manufacturer’s guidelines.

When a leaky water heater causes extensive flooding or even a stubborn drip, significant water damage results. Even a water heater that drips once per second spills over eight gallons of water per day. Professionally repair existing water damage with the help of HydroForce Cleaning and Restoration.

Our crews of skilled water damage cleanup technicians arrive promptly, locate the source of the leak and begin the restoration process. We set up powerful water extraction machinery to eliminate all excess moisture, both hidden and visible, from the property. Our drying equipment fully dries the area.

Along with air movers, industrial-grade dehumidifiers are placed throughout the water damaged spaces to accelerate the drying process. Thorough drying and an application of anti-microbials prevent mold colonies from developing. We also deodorize all surfaces and steam sanitize contaminated materials.

Water Damage Restoration - HydroForce Cleaning & Restoration

Specialists at HydroForce Cleaning and Restoration work quickly to return your water damaged home to its pre-loss state. Water damage restoration is typically completed in three days but varies depending on the severity and extent of the damage. We work with your homeowner’s insurance on claims, too.

Water damage spreads fast, compromising the structural integrity of the home and jeopardizing safety. Consult HydroForce Cleaning and Restoration for emergency service 24 hours a day. We’re proud to serve Chicago, Illinois, and the surrounding areas. Call today for expert, efficient water damage cleanup.

Categories
water damage water restoration

Can I Break My Lease Due to Water Damage?

24/7 EMERGENCY SERVICE RESIDENTIAL & COMMERCIAL SERVICES

Water damage is not an uncommon problem in rented homes, condos, and apartments. The devastation in a rental can prompt the tenant to ask if they can break their lease. The answer depends on what is specified in the lease agreement. Tenants are advised to know their rights beforehand.

What are examples of water damage?

Different types of water damage can affect a rental unit. An appliance, such as a dishwasher or washing machine, can leak and cause major water damage to the surrounding floors. A pipe can burst and gush hundreds of gallons of water into the unit.

Water damage can occur in bathrooms, which contains an abundance of moisture. A toilet might overflow and cause water damage to not only the rental but the unit below. Apartments in close proximity to a river can be flooded if water overflows its banks.

Any of the abovementioned common scenarios can lead to moisture saturating belongings and damaging the walls, ceilings, and carpeting. The unexpected water damage may be so severe that it becomes impossible for the tenant to live in the unit safely and comfortably.

The landlord may outrightly refuse to perform the necessary repairs to maintain the livability of the unit. Or, the landlord may delay fixing the water damage, allowing the water damage to spread and making it difficult for the tenant to continue residing in the rental.

water damage on ceiling

Does the lease stipulate the right to cancel?

Renters are urged to understand the terms of their lease and be aware of their rights. If the landlord has insurance, it may cover the water damage to the building. When this vital information is unclear, it is the renter’s responsibility to ask beforehand who is responsible for water damage.

Total or partial water damage can give the landlord the right to evict the tenant. Conversely, the renter has the right to cancel the lease if the unit is partially or completely destroyed by water damage and the place is uninhabitable. This scenario applies to significant, not minor, water damage.

How does the Illinois RLTA protect tenants?

In Illinois, rental units must be properly maintained per the Illinois Residential Property Manager and Tenant Act (RLTA). This means property managers are required to ensure their rental units are safe, sanitary, and do not pose security threats, including water damage.

Per the RLTA, the landlord must respond to the tenant’s request for repairs within a reasonable time frame. If repairs are significantly delayed or the landlord fails to make proper repairs, the tenant may have the legal right to break the lease and leave the unit without further penalties.

Can the lease be broken if mold develops after water damage?

Especially when toxic substances, like mold, are present in the water damaged property, the tenant has legal grounds to terminate the lease. Prior to canceling the lease, the renter should make sure they are compliant with state and local statutes, plus take a series of steps.

mold from water damage

What steps should the tenant take after water damage?

When water damage occurs and makes the rental uninhabitable, the tenant should document the condition of their unit. Take photos and videos of the damage. Keep detailed records of when the water damage incident occurred, when the landlord was notified and how long they took to repair it.

The tenant must also prove that the landlord failed to make adequate repairs within a reasonable time frame. If the landlord did not act to fix the water damage at all, the tenant is responsible for documenting this negligence as well.

As a last step before terminating the lease, the tenant must notify the landlord immediately upon noticing the water damage that has affected their unit. A formal, written notification is advised. The tenant should give the landlord an opportunity to make proper repairs.

What if the tenant is at fault?

If water damage occurs, the tenant is responsible for mitigating the ruin. The tenant is expected to turn off the water supply and call the landlord soon after the water damage event. The landlord is responsible for maintaining the property and ensuring it remains functional and habitable.

Rental units are typically covered by the landlord’s property insurance. When the walls, floors, or interior structures become water damaged due to no fault of the tenant, the landlord’s insurance should cover it. Of course, if the tenant is at fault, a different scenario ensues.

In some cases, the tenant may have caused the water damage. An example is when the renter accidentally leaves the bathwater running, causing the water to overflow and seep into the unit below. In instances like this, the tenant is held accountable for the damages.

Water damage is costly and time-consuming to fix. Take the hassle out of the repairs by consulting Hydroforce Cleaning and Restoration for efficient, professional water damage restoration. Our technicians perform prompt water damage cleanup services to prevent damage from spreading.

Whether your water damage event is due to an appliance malfunction, a burst pipe, or a flood, our specialists are equipped to return your rental to its pre-loss condition fast. Technicians run powerful water extraction equipment to eliminate the moisture as well as drying machines to fully dry the area.

Call Our Professionals at Hydroforce Cleaning and Restoration

Our IICRC certified technicians locate the source of the moisture and repair it to prevent further damage. Any objects contaminated by water are removed. We also dry and reinstall carpets affected by water damage. Once the excess moisture is removed, we deodorize and sanitize the premises.

Hydroforce Cleaning and Restoration specialists offer pack-out services. As an added convenience, our crews work with your insurance to speed up claims. Our swift response to water damage emergencies helps prevent further damage and reduces the chances of a mold infestation.

Renters, homeowners, and commercial property owners choose Hydroforce Cleaning and Restoration for all their water damage mitigation needs. We are proud to serve Chicago, Illinois, 24/7. When you are faced with water damage and need immediate professional help, call our cleanup experts.

Categories
Mold Remediation

What Does Mold on Carpet Look Like?

24/7 EMERGENCY SERVICE RESIDENTIAL & COMMERCIAL SERVICES

How to Recognize When Your Carpet is Affected by Mold

The cozy ambiance of our homes is often linked to warmth, relaxation, and a sense of security. However, within the routine of our daily lives, a silent intruder exists that can compromise not only the aesthetics of our living spaces but also pose potential health risks – mold. While mold can manifest in various places within our homes, one of its favored hiding spots is often right beneath our feet: the carpet.

Are you worried about the possibility of having a moldy carpet? Well, there are various potential reasons that might indicate your carpet is affected by mold. Knowing these signals is essential for maintaining a healthy home. But before we explore that, let’s understand what mold is and how it appears.

What is Mold and What Does it Look Like?

Mold look on carpet

Mold is a type of fungus that can appear in various colors, such as black, white, or green. It often shows up as fuzzy patches or spots and may have a musty, moldy odor. If you see discoloration on surfaces, especially under carpets, it could be a sign of mold growth.

Why Mold Grows on The Carpet?

Mold and mildew, both belonging to the fungi family, thrive in environments with excess moisture and inadequate ventilation. When porous materials, like carpet pads, become saturated with water and are not promptly dried or ventilated within 48 to 72 hours, it creates an optimal breeding ground for mold and mildew. The porous nature of materials such as carpet pads provides an ideal surface for these fungi to attach and penetrate.

Moreover, the presence of organic matter within the carpet, such as dust or debris, can serve as a nutrient source for the proliferation of mold and mildew. While carpet mold is typically visible, in cases where it goes unnoticed, certain indicators may serve as warnings.

How to Tell If Your Carpets Have Been Affected By Mold? 

How to Tell If Your Carpets Have Been Affected By Mold? 

Here are key indicators that mold may be present in your carpet, signaling the need for effective mold remediation.

  • Damp and Wet Carpet: If you’ve recently faced water damage or spilled something on your carpet, mold may have found its way in – that’s a 100% possibility. Moreover, even in the absence of direct water damage, if your living space is consistently damp and humid, your carpet is still at a high risk of hosting and encouraging mold growth. Whether it’s an immediate spill or the ongoing environmental conditions, both situations pose a serious threat to the well-being of your carpet.
  • Allergy Symptoms: If you or others nearby unexpectedly develop allergies or health problems, it could be a sign of mold in the carpet. Mold might affect breathing, leading to symptoms like coughing or difficulty breathing. It can also trigger allergic reactions, including a stuffy nose, throat irritation, or skin rashes.
  • Foul odor: When there is mold on the carpet, you will notice an unpleasant smell whenever you’re around it or in the room where the carpet is laid. This foul odor, often described as musty or damp, is a primary indicator of mold presence.
  • Green, Brown, and Black Spots: When you notice discoloration on your carpet, especially in the form of green, brown, or black fuzzy spots, it serves as a significant warning sign, indicating the need for further investigation. In such cases, it becomes essential to promptly address the potential for mold growth.

There are mold testing kits available that can aid in identifying mold in the carpet. These kits come in different types, including Petri dishes, tapes, and color-changing pens. They are effective in revealing the presence of mold growth. Alternatively, hiring a professional mold removal company can provide testing and identification services to comprehensively address the issue.

What kills Mold in Carpets?

Use baking soda to kill mold on carpet

To effectively kill mold on carpet, you can use a combination of cleaning and disinfecting methods. Here’s what you can try:

  • Vinegar and Water: Create a solution by mixing equal parts white vinegar and water. White vinegar possesses natural antifungal properties, making it effective in killing mold. Pour the solution into a spray bottle for easy application. Once sprayed, allow the solution to sit for at least 10-15 minutes, providing ample time for the vinegar to penetrate and eliminate the mold.
  • Scrubbing: Gently clean the moldy area with a brush or sponge, using a mild detergent or a solution of water and white vinegar (equal parts). The natural antifungal properties of vinegar make it effective for this purpose. After allowing the cleaning solution to sit for the recommended time, delicately scrub the carpet with a brush or sponge to loosen and eliminate the mold from the fibers. Take care to avoid any damage, particularly if the carpet has a delicate or sensitive texture.
  • Vinegar and Baking Soda: Another alternative is to mix vinegar and baking soda. Combine equal parts of both, apply the mixture to the mold on your carpet, let it sit, and gently scrub to eliminate the mold. This natural solution provides an effective way to keep your carpet free from mold.

How to Get Rid of Mold Smell Off the Carpet?

If you’ve already removed the mold but are still dealing with lingering musty odors in your carpet, consider the following steps to eliminate the smell:

  • Provide Adequate Ventilation: Make sure to regularly ventilate the affected area by opening doors and windows. This promotes better air circulation and helps dissipate any remaining odors. Using fans can further enhance the ventilation process and expedite the removal of lingering musty smells.
  • Use an Air Purifier: Invest in an air purifier equipped with a HEPA (High-Efficiency Particulate Air) filter. These devices are effective in capturing and neutralizing mold spores and odorous particles. Place the air purifier in the room with the treated carpet and let it operate consistently to improve overall air quality and eliminate any persistent mold odors.
  • Use Air Fresheners: Opt for natural or chemical-free air fresheners designed to neutralize odors rather than simply masking them. Consider using essential oil diffusers with antimicrobial properties, such as tea tree oil or eucalyptus, to introduce a pleasant fragrance to the air while combating any residual musty odors.
  • Sunlight: Consider taking the carpet outside on a sunny day if you can. Sunlight works like a natural disinfectant, and it’s great for getting rid of lingering mold smells. Just let the carpet breathe in the fresh air and sunlight for a few hours. Make sure to flip it over to expose both sides, allowing the sunlight to reach all areas.
  • Activated Charcoal: Try putting bowls of activated charcoal around the carpet. Activated charcoal is fantastic at soaking up and getting rid of odors. Just leave the bowls in the room for a while, and if you notice the smell lingering, swap out the charcoal. It’s a simple trick that can do wonders in neutralizing any unwanted scents from your carpet.

Seek Professional Help for Mold Remediation

Mold Remediation - HydroForce Cleaning & Restoration

When grappling with mold troubles, it’s wise to bring in the experts. For those in the Chicago, IL area, Hydroforce Cleaning and Restoration is the name you can trust for exceptional mold removal. Our expert team is well-versed in the intricacies of efficient mold mitigation. It’s time to say goodbye to lingering concerns as we deliver a comprehensive solution, ensuring your living space remains fresh and healthy.

For mold remediation in Chicago, IL, and surrounding areas, give us a call at 630-835-0862.

Categories
Mold Remediation

How to Test for Mold in My Apartment

24/7 EMERGENCY SERVICE RESIDENTIAL & COMMERCIAL SERVICES

Mold at your apartment can be noticed via a musty smell or spots and patches around windows and other areas. There are various ways to test for mold which can be costly, however you can also use a home kit as a cheaper alternative.

How to Figure Out if You Have Mold in Your Apartment

The best way to test for mold in your apartment is to use a home test. Also, if you have obvious brown, black, or even gray spots on various surfaces in your home, you may have mold. The most dangerous type of mold is black mold. It usually appears on wood, paper, fabric, and even insulation. It does not always look black as it can also be blue or gray. However, mold sometimes hides in different areas such as between cupboards and the wall, corners of walls, or any area that may have little air ventilation. You should also be sure to check areas that have plumbing pipes as they can leak and create a moist area that may allow mold to grow. Leaving mold unattended can cause various health issues so it is always best to deal with it right away to avoid further problems.

How to Test for Mold in Your Apartment

You can have your home either tested by professionals or you can use a home kit and test for mold yourself. No matter what type of test you use, if you do find that you have mold present at your property, you should make sure it is remediated right away before it spreads further and causes damage to your property.

Professional Mold Testing:

If you have a professional mold inspector test your home, they will take a sample from three different areas including the air, surface, and the surrounding dust. The sample will then be sent to a third-party lab which will figure out the concentration and the type of mold you have in the affected areas.

mold growing on the apartment ceiling

Mold Testing:

You can use a store-bought mold testing kit to figure out if you have mold present at your apartment. The mold you will usually see indoors includes Cladosporium, Alternaria, Penicillium, and Aspergillus or even black mold or Stachybotrys.

Here are a few common mold testing kits you should know about if you decide to do mold testing yourself:

5-Minute Mold Test:

This test is quick and easy and uses one test swab and one test strip for Stachybotrys and Penicillium/Aspergillus. You can test multiple samples for the lab, and you get a pre-paid mailer. Basically, you will need to swab the area, wet it in the provided solution, and apply it to the test strip. If you have one line, your test is negative and if you have two, then you have the specified type of mold present at your property.

Mold Armor FG500 Do It Yourself Mold Test Kit:

In this mold testing kit, you will get a test swab, a petri dish, and a bottle of medium that grows mold. You can use the kit in three ways. This means you can test the air, test the air quality of your HVAC duct, or test the surface for mold. The process of testing is simple. You will need to pour the growth medium into the petri dish, replace the lid, and allow it to grow gel for one hour. Next, you have the option to stay open to the atmosphere to test the quality of air, you can tape it to your air duct for an HVAC test or use the swab to remove the sample and apply it to the growth medium so you can do a surface test. It will take 48-96 hours for mold to grow in your dish. You can also send it to the lab for analysis for $40. The test kit itself is under $10.

mold test kits

Do it Yourself Mold Test:

With this test kit you get three tapes to get samples from surfaces. You will then need to mail them back for analysis. All the instructions are included in the kit. The usual cost of the kit is around $45 which includes the lab fees to test for all mold types. You will simply need to apply the tape to wherever you see mold in your home, lift it off, and adhere to the sample card included with the kit. You will get a full lab analysis report in the mail.

Keep in mind that you should always wear protective gear if you plan on testing for mold. It is important to wear long sleeves and pants, proper shoes, gloves, and goggles without vent holes and an N95 respirator. If you do one of the home kits and get positive results, at that point you can decide whether to get the mold removed yourself or hire a professional to do so.

Common Areas for Mold to Appear

  • Area around the plumbing lines
  • Under the sink
  • Within walls or around windows that may be leaking
  • In closets
  • Under the carpet if you’ve had a flood
  • Behind the fridge
  • Between furniture, on the exterior of walls
  • Coils of HVAS or ductwork

Common Causes of Mold in Apartments

Water Leak Causing Mold in bathroom

Mold thrives in cool and damp spaces. There are various reasons why you may experience a mold infestation. Here are a few:

  • Water leak

When you have a mold infestation, it may be caused by a leak. Even if you fix the leak,

mold can linger inside walls and floors; the mold spores grow quickly and cause it to spread.

  • Water that enters from the outside:

If you have badly fitting windows or cracks in your walls or doors, you may end up with some moisture inside your home.

  • Water from condensation

Condensation is caused by the water we exhale and from showering and cooking. It condenses on cool surfaces such as on walls and can cause mold. Also, if you have indoor humidity that is higher than 60 percent or an indoor temperature of 60 F or lower, this can also be a cause of mold.

Preventing Mold

You can prevent mold by using dehumidifiers or air conditioners to get rid of extra moisture from air indoors, you can also run exhaust fans in your kitchen and bathroom and make sure to heat your home during cold weather.

Have you experienced mold at your apartment? If so, make sure to give HydroForce Cleaning and Restorations a call today. Our highly trained professionals will provide you with all the needed mold testing and remediation services right away to ensure your space is safe for you to inhabit. For more information about our mold removal services you can call us today at 630-835-0862.

Categories
Mold Remediation

Steps to Remove Mold from Plywood in the Attic

24/7 EMERGENCY SERVICE RESIDENTIAL & COMMERCIAL SERVICES

Steps to Remove Mold from Plywood in the Attic

The attic is a part of the home that often gets neglected. However, you should not ignore your attic as it is a prime spot for water damage and mold growth. It is important to regularly check the walls, floors, sides, and corners of the attic to make sure there is no mold forming anywhere. If you do notice mold, it is crucial to address it right away as it can cause significant damage and have an effect on your health.

Why does plywood get moldy?

Mold can appear on treated or untreated plywood. The causes of mold on plywood include temperature, humidity, extra moisture, and the presence of mold spores. Mold on plywood is typically black in color, and it spreads quickly if it has the right conditions, especially if it is wet and humid. Mold and algae affect only the surface and do not get into the plywood structure itself. However, when there is decay in the plywood, the mold can penetrate the surface.

Removing Mold in the Attic

What does mold on plywood look like?

Mold on plywood is typically black or green in color. It can appear on untreated plywood and on H3.1 LOSP and H3.2 treated plywood. This is most likely to happen if the plywood becomes wet or the attic has the proper conditions for mold to form. Sometimes weather conditions involving heat or humidity can create the right conditions for mold to form.

Here are some things you should look out for if you think you have mold on the plywood in the attic:

  • If there is moisture present, you may already have mold.
  • The wood looks damaged and discolored.
  • If you see spores on the surface of the wood packaging, you may have mold.

Identifying mold on your plywood can be tricky as you may mistake it for simple iron stains, mineral discoloration, or sun exposure. Make sure to consult a professional to determine if you have mold and start the remediation process right away. Also, speak to them about future preventative measures you can take to avoid mold.

Preventing Mold

Mold in your attic happens due to excess moisture from a leak in your roof, or an issue with the structure that is causing the extra moisture. The mold spores in the attic will spread to the rest of the home quickly and exposure to mold can trigger allergic reactions. It is important to prevent mold in your attic to avoid property damage and the possible health effects.

Here are some steps to follow so you can be sure to prevent mold in your attic.

  • Keep a minimal difference in exterior and interior temperature:

Make sure that you keep the temperature inside similar to the temperature outside so that you do not create condensation on the underside of roof sheathing.

  • Work with a professional to identify air leaks:

A professional will be able to identify any air leaks in the interior of your attic.

  • Get any points of entry air sealed:

You should make sure to air seal any points of entry such as bathroom fans and hoses, recessed lighting etc. Also, if you have any holes or gaps where there is wiring, plumbing, vents, pipes, or ducts, make sure to get those sealed.

  • Check for ventilation that is damaged or blocked:

Check all the rafter ventilation and make sure it is not blocked or damaged.

  • Repair the baffles:

If your rafter ventilation is broken or improperly installed, make sure to repair it.

  • Allow for proper ventilation:

You can decide on the proper amount of ventilation in your attic by figuring out the amount of roof ventilation that is needed for your attic space.

  • Fix the roof if needed:

If you have leaks in the roof or any damage, make sure to get it repaired.

  • Decrease moisture:

If you have moisture coming in from a gap or a crack, make sure to get it fixed.

  • The appliance vents should be on the outside:

The vents for your appliances coming from the bathroom, kitchen, and the dryer should blow air to the outside.

  • Use insulation:

Make sure you are using the proper insulation like cellulose to prevent the formation of mold growth.

Removing Mold in the Attic

Even if you take all the abovementioned precautions, you may end up with mold in your attic. It is always easier to have it removed by professionals, however, if the surface area is not too large, you can attempt to remove it yourself. Here are the steps to follow:

Remove Mold in the Attic before and after

1.  Seal the area and use protective gear:

Cover the surrounding area with plastic sheeting so that mold spores don’t spread. Use protective gear such as googles, masks, and rubber gloves to protect yourself.

2. Vacuum the area:

If there is water present, make sure to use a wet vacuum to get rid of it. Then dry out the area with fans, dehumidifiers, and heaters. Next, dry vacuum to get rid of the mold spores.  Make sure to empty the vacuum outside and seal the bag you’ve used to dispose of it, so the spores do not spread.

3. Clean off the mold:

If the mold hasn’t gotten through very deep into the wood, it can probably be killed with dish soap and warm water. Take a teaspoon of soap and fill a spray bottle with water and shake it up. Next, spray the area and scrub it with a brush to get rid of the mold. Finally, dry the area with a towel. You can also use distilled white vinegar. Make sure to use equal parts vinegar and warm water in a spray bottle and spray it on the mold. Next, let the solution dry for an hour and then wipe it with a wet cloth and then a dry one.

The final option is using borax, which is a more natural and safer way to clean than bleach. Use a tablespoon of borax with a cup of water, then put this solution on the molded area with a brush. Make sure to scrub the mold away which will leave the borax solution in the wood. Do not sponge up the extra liquid. You want to make sure leave as much solution as possible so that future mold growth can be prevented.  Finally, use a humidifier or a fan so that the wood can dry quickly.

4. Sand the wood:

The mentioned cleaning solutions should get rid of the mold issue, however, if you are unable to get rid of it, the final solution is sanding. Make sure to use 100-grit sandpaper on the affected area while making sure to not sand away too much of the surrounding area. Keep repeating this process until the mold spores have loosened.

Mold can happen at any time in your attic, especially if it is not maintained. If you’ve experienced mold at your home or business, we can help. Mold in your attic can cause costly damage. We provide complete mold remediation to ensure that the mold is fully removed, and that it does not come back. For all of your mold removal needs make sure to reach out to HydroForce Cleaning and Restoration at 630-835-0862.

Categories
disaster recovery water restoration

Nationwide Flooding Causing Mold Issues For U.S. Homeowners

24/7 EMERGENCY SERVICE RESIDENTIAL & COMMERCIAL SERVICES

NATIONWIDE FLOODING CAUSING MOLD ISSUES FOR U.S. HOMEOWNERS

According to Farmers Insurance, there has been a 1,100 increase in mold-related insurance claims over the past 10 years. As more and more storms strike communities around the country, these problems aren’t going away any time soon. In many major cities, hurricanes and flooding are becoming part of life. As a result, all U.S. homeowners need to remember to hire storm damage specialists and professional mold inspection and consultation professionals to prevent further physical damage and expensive repair bills.

According to CityLab, when Hurricane Florence made landfall in the Carolinas, it brought with it more than 30 inches of rain in some areas, leading to flooded roads all over the region. Similarly, Hurricane Michael caused major flooding problems in the Florida Panhandle. Now, many of these U.S. residents have to tear out their home’s drywall and flooring in order to identify and get rid of any residential mold.

Additionally, The Bay Net reports that more than 50 inches of rain has fallen onto Baltimore streets in recent months, causing all sorts of mold outbreaks.

Nationwide Flooding Causing Mold Issues For U.S. Homeowners

“All the major storms we’ve had recently, and the ground got so saturated and had nowhere to go. It just came into the basements,” said Sol Kruk, owner of Property Inspection Pros.

Whenever a household has water or moisture damage, mold and mildew can start to form within 24 to 48 hours of water exposure on surfaces like ceiling tiles, wallpaper, wood, drywall, insulation, and carpets.

So what happens when mold is neglected and remains inside a home? If mold growth is not stopped within a 48-hour time period, there are some major problems on the horizon — and we’re not just talking about damage to your home. Mold can cause coughing, wheezing, respiratory issues, and other eye and skin irritations, as well as some other serious health concerns. Pregnant women, the elderly, as well as infants and young children are at much higher risk of having detrimental health effects as a result of mold exposure.

Because of these health concerns, storm damage specialists need to be consulted with right away after a hurricane or significant flooding. Water damage cleanup can not only prevent your home from being destroyed and save you money in the long run, but it can also ensure your family’s safety.

Don’t neglect your home after a major storm because even the slightest moisture issue can result in major water damage and mold. If you’re in need of plumbing professionals and storm damage specialists here in Chicago, give Hydroforce Cleaning Systems a call right away.

Categories
disaster recovery

4 FAQs: The Importance of Mold Cleanup and Prevention

24/7 EMERGENCY SERVICE RESIDENTIAL & COMMERCIAL SERVICES

4 FAQS: THE IMPORTANCE OF MOLD CLEANUP AND PREVENTION

If you’re living in a brand new home, you’re probably enjoying every second of it, which is great, but you should know that you could be living alongside some serious dangers. Over 30% of brand new homes constructed currently have some sort of mold inside of them.

Living in a home with even a little bit of mold can cause some major health concerns for you and your family, as well as damage your home over time and even hinder its overall value. Understanding how to identify mold and knowing when to consult residential services can help solve all your household mold-related issues.

Here are some important frequently asked questions pertaining to residential mold:

4 FAQs The Importance of Mold Cleanup and Prevention

  • So… what is mold? — Mold is a fungus that can be found both outdoors and indoors. There are tens of thousands of mold from can these spores can thrive in warm, damp, and humid conditions. So if there are any signs of water damage inside your home — mold is likely an issue, as well.
  • Can mold survive in harsh environments? — Unfortunately, yes. Mold spores can survive extremely harsh conditions and even dry environments, which would otherwise not support mold growth. That’s why it’s imperative to address any household molding issues right away.
  • How can I address mold problems? — As soon as you notice any mold inside your home, you have to act quickly to limit damage and prevent further issues. Your best bet is to consult with water damage cleanup residential services that specialize in mold cleanup. These professionals can quickly identify all the locations of your home with mold and get rid of the mold in a quick and efficient manner.
  • What are some of the health effects that mold causes? — The effects of mold exposure to individuals inside a home can range from minor irritations to serious health issues. Here are some of the most common health effects of mold: sneezing, eye irritation, nasal congestion, coughing, skin rash, and difficulty breathing.

Make sure you and your family are safe from the dangers of mold at all times. If you want to learn more about mold cleanup and water damage residential services, give Hydroforce Cleaning Systems a call right away.