
Categories
property damage water damage

The 3 Categories of Water Damage Explained: Cleanup, Cost, and Insurance

24/7 EMERGENCY SERVICE RESIDENTIAL & COMMERCIAL SERVICES

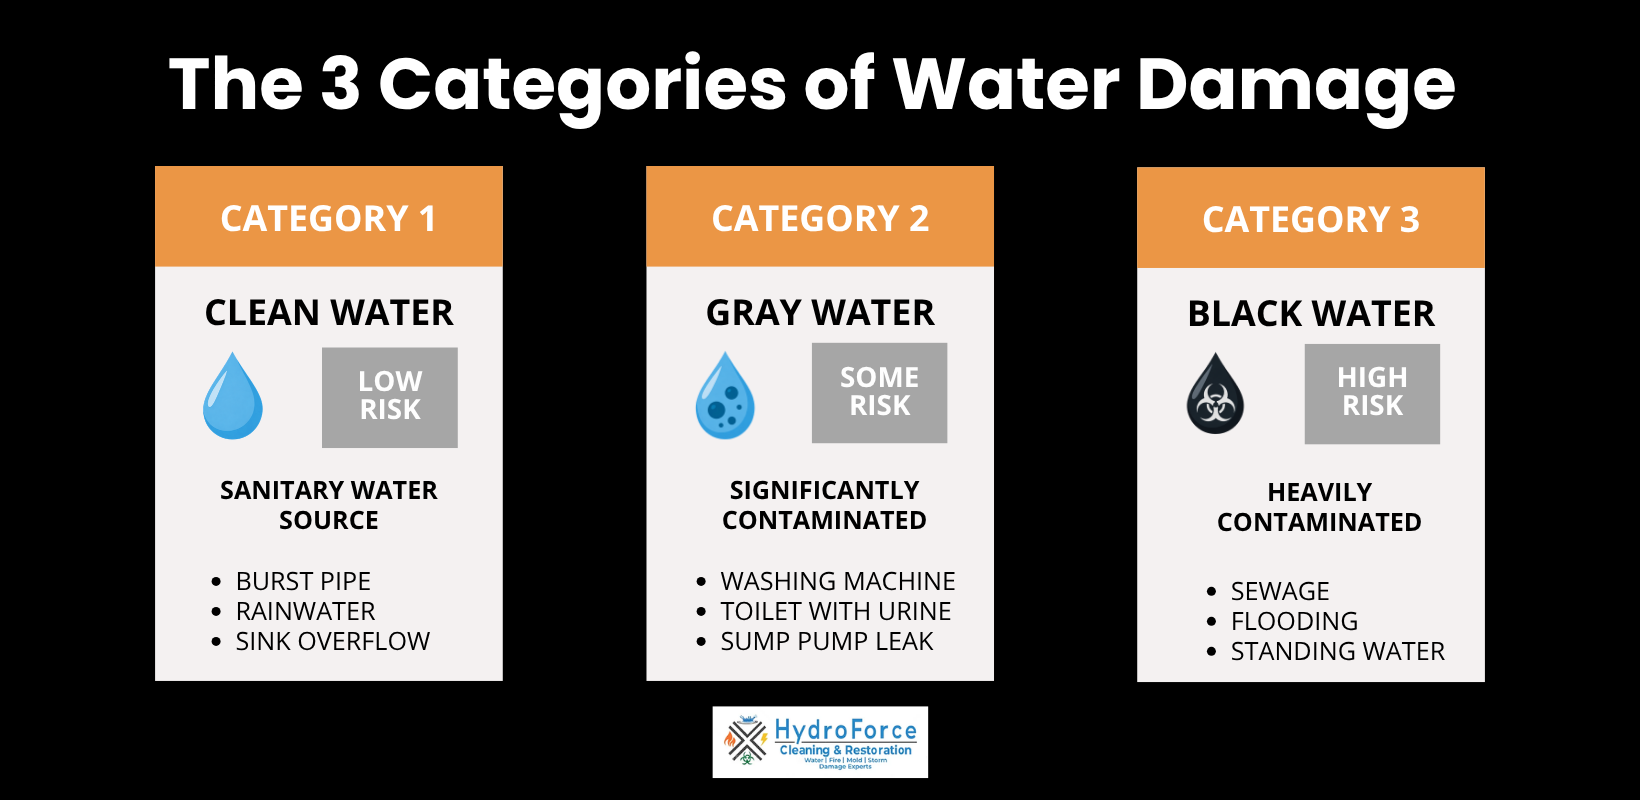
Quick answer: Water damage is classified into three categories under the ANSI/IICRC S500 standard, based on how contaminated the water is rather than how much water is present.

  • Category 1 is clean, sanitary water from a source like a broken supply line.
  • Category 2, or gray water, carries significant contamination that can cause illness, from sources like washing machine discharge or a sump pump failure.
  • Category 3, or black water, is grossly contaminated and can contain pathogenic or toxigenic agents, from sources like sewage or rising river water.

Categories escalate over time, typically within 24 to 48 hours. The category determines what gets dried, what gets removed, what protective equipment is required, and how large your insurance claim becomes. There is no Category 4.

When a technician walks into your flooded basement and says “this is a Category 2 loss,” that is not just restoration jargon. That single word changes almost everything that happens next: what gets dried, what gets thrown in a dumpster, what protective equipment the crew wears, how long the job takes, what it costs, and how your insurance adjuster looks at your claim.

Water damage is classified by contamination level, not by how much water is on the floor. Three categories exist under the ANSI/IICRC S500 standard, the industry document professional restorers work from. Most homeowners have never heard of it until the day they need it.

Here is what each category means, how quickly one turns into the next, what each one costs, and why the answer matters for your property and your claim.

What Are the Three Categories of Water Damage?

The category tells you the contamination level of the water. It is based on where the water came from, what it has touched since, and how long it has been sitting there. A slow drip from a supply line and a basement full of that same clean water share a category, even though one is a two-hour job, and the other is a week of drying equipment.

CategoryCommon NameContamination LevelExample SourcesTypical Salvageability
Category 1Clean waterSanitary at the source, no substantial health threatBroken supply lines, tub and sink overflows with no additives, broken toilet tanks, melting snow or ice, rainwater before ground contactMost materials can be dried in place if the response is fast
Category 2Gray waterSignificant chemical, biological, or physical contamination, can cause illness on contact or ingestionWashing machine and dishwasher discharge, toilet overflow with urine but no feces, sump pump failure, hydrostatic seepage, fire sprinkler discharge, chilled water and condensateHard surfaces usually cleaned and saved, carpet pad and lower drywall often removed
Category 3Black waterGrossly contaminated, can contain pathogenic, toxigenic, or other harmful agentsSewage, waste line backflows originating beyond the trap, rising river or stream water, seawater flooding, water that has picked up gross contamination indoorsPorous materials that contacted the water are almost always removed and discarded

One note before we go further, because it comes up constantly: there is no Category 4. If someone tells you your loss is Category 4, they are either thinking of Class 4, a drying classification we cover below, or mixing up hurricane categories with water classification.

Category 1 Water Damage (Clean Water)

Category 1 is water from a sanitary source that does not pose a substantial threat to people at the moment it escapes. Think of a burst copper supply line, an ice maker line that lets go behind the refrigerator, a bathtub someone forgot about, or snowmelt working its way into a basement.

Common Category 1 sources:

  • Broken or leaking supply lines
  • Tub and sink overflows with no soap, cleaner, or other additives
  • Broken toilet tanks (the tank, not the bowl)
  • Appliance water line failures
  • Rainwater and melting snow or ice that has not contacted the ground or contaminated surfaces

Category 1 describes the water at the source. It is not a permanent grade. Clean water stops being clean the moment it starts feeding on a building. It soaks into carpet backing, wicks up drywall, dissolves the paper facing and the organic dust inside the wall cavity, and warms to room temperature in the dark. Bacteria already present in every indoor environment do the rest.

The EPA guidance on drying water-damaged materials suggests that wet materials should be dried within 24-48 hours to prevent mold growth. Past that point, a Category 1 loss is frequently no longer a Category 1 loss.

So “clean water” does not mean “leave it and see.” It means you have the best odds of saving your flooring, your baseboards, and your drywall, and those odds shrink by the hour. A burst pipe or flooded basement caught the same day is a different project than the same failure discovered on Monday morning.

Category 2 Water Damage (Gray Water)

Category 2 water carries a meaningful degree of chemical, biological, or physical contamination. It will not necessarily make a healthy adult sick from brief skin contact, but it contains both microorganisms and the nutrients those microorganisms need to multiply. You do not want it aerosolized in your living space, and you do not want children or pets in it.

Typical Category 2 sources:

  • Washing machine and dishwasher discharge
  • Toilet bowl overflow containing urine but no feces
  • Sump pump failure or backup
  • Hydrostatic pressure seepage through foundation walls or floors
  • Fire sprinkler discharge
  • Condensate and chilled water lines
  • Aquarium and waterbed water

What usually gets saved: hard, non-porous surfaces. Tile, sealed concrete, glass, metal, solid wood cabinetry, and structural framing can typically be cleaned, disinfected, and dried in place. Personal contents made of hard materials clean up fine.

What usually gets removed: carpet padding almost always goes. Carpet itself is a judgment call that depends on how long it sat and whether the backing delaminated. The EPA’s guidance on drying carpet and backing describes a 48-hour window, and on a gray water loss the padding underneath rarely survives it.

The bottom section of drywall often comes out, partly because gray water wicks upward inside the cavity and partly because you cannot effectively clean the back side of a wall you cannot reach. Wet fiberglass or cellulose insulation is removed rather than dried, since it loses its R-value and holds contamination.

The health note matters here. Category 2 water supports bacterial growth, and if drying stretches past that 24-to-48-hour window, you are no longer dealing with a water problem alone. You are likely dealing with a mold problem layered on top of it. That is also the reason Category 2 does not stay Category 2 indefinitely.

Category 3 Water Damage (Black Water)

Category 3 is grossly contaminated water that can contain pathogenic, toxic, or other harmful agents, and can cause significant adverse reactions in people who contact or consume it. The S500 standard names sewage, waste line backflows that originate beyond any trap regardless of what you can see in the water, all forms of seawater flooding, and rising water from rivers or streams.

In Chicago and the surrounding suburbs, the everyday version of Category 3 is a sewage backup through a floor drain during a heavy rain event. Much of the older housing stock here is served by a combined sewer system, meaning one pipe carries both sanitary flow and stormwater, and a hard rain can push that mix back up through a basement drain.

Porous materials that contact black water do not get cleaned; they get removed. Carpet, carpet pad, insulation, particleboard, unsealed wood products, and drywall come out and go in a dumpster, because contamination penetrates the material rather than sitting on the surface. There is no cleaning process that reliably decontaminates the inside of a piece of wet drywall. Attempting to save it is how people end up with a persistent odor, a recurring mold problem, or both, six months later. When a restorer tells you the bottom two feet of your finished basement must go, that is not upselling. It is the standard.

The safety side is just as real. Category 3 work requires full personal protective equipment, containment of the affected area, negative air pressure so contaminants do not migrate into clean parts of the house, HEPA filtration, and antimicrobial application after removal. Homeowners should not enter standing sewage and should not run a household box fan in it, which turns a contained contamination problem into an airborne one. If sewage has backed up into your home, the correct first move is getting people and pets out of that space and calling a certified crew.

The 3 Categories of Water Damage - HydroForce Cleaning and Restoration

How Water Categories Change Over Time

The S500 standard is explicit that category considers both the water’s source and its quality after it contacts materials on the job site, and that time and temperature can affect the amplification of contaminants and therefore the category itself. In plain terms: category is a moving target, and it only moves in one direction.

Three variables push it upward:

  • Time: Every hour that water sits in contact with building materials, it picks up more organic material and supports more bacterial growth. Category 2 water that is not removed efficiently from a structure can be reclassified as Category 3.
  • Temperature: Warm water in a warm house amplifies contamination faster than cold water in an unheated crawl space. A July basement flood in Chicago deteriorates considerably faster than the same event in February.
  • Contact: What the water touches changes what is in it. Clean water that runs across a garage floor, through a crawl space, or over the contents of a storage room is not clean anymore. Water that sits on drywall paper and carpet backing has a food source.

There is also a myth worth retiring here, sometimes called the drink test: the idea that if you would not drink it, it must be Category 3. Category is not determined by how the water looks or smells. It is determined by the source, what the water has contacted, how long it has been present, and the temperature conditions it sat in.

The reclassification is not a paperwork exercise. When a loss moves from Category 1 to Category 2, materials that would have been dried get cut out instead. When it moves to Category 3, the removal scope expands, containment gets built, and the crew suits up. Cost, timeline, and disruption all climb with it.

Which is the whole reason restoration companies sound like broken records about calling immediately. It is not about booking the job. It is that the version of your loss we can respond to tonight is cheaper and less invasive than the version we would respond to on Friday.

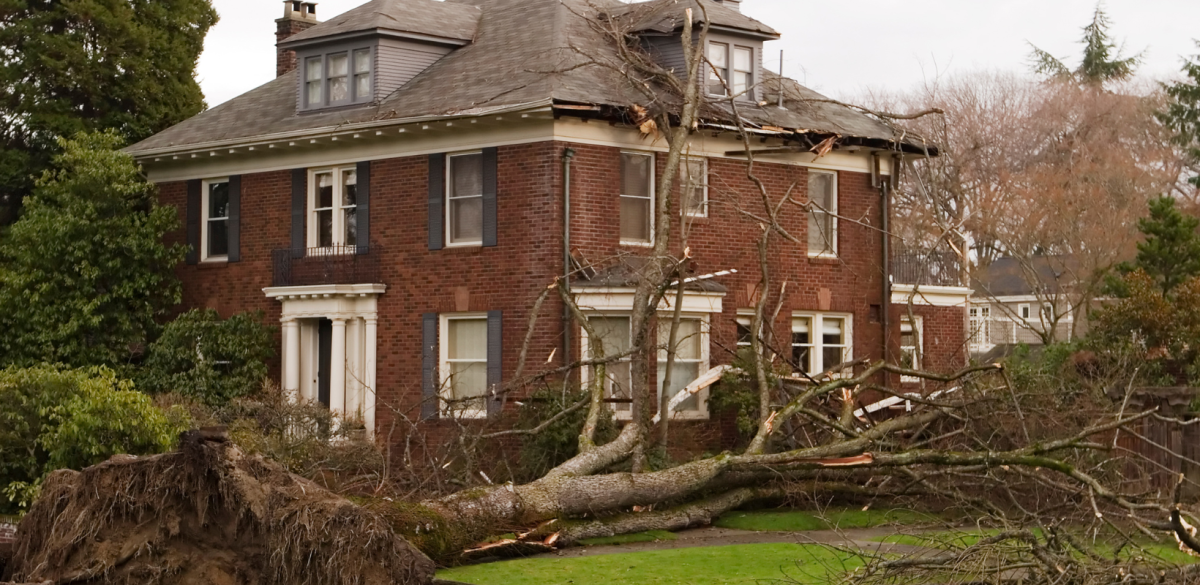
Is Storm Water Automatically Category 3?

No. On February 10, 2026, the ANSI/IICRC S500 Consensus Body issued a position statement addressing this directly: top-down water ingress, wind-driven rain, and water from weather-related events are not automatically considered Category 3.

The confusion comes from the S500 definition itself, which says examples of Category 3 water can include contaminated water entering the indoor environment, such as wind-driven rain from hurricanes, tropical storms, or other weather-related events. Many people read that as a rule. The Consensus Body clarified that “can” is a defined term in the standard, signifying a possibility open to the user of the document rather than a component of the accepted standard of care. The operative words in that example are contaminated water, not wind-driven rain.

In plain terms: how the water got in does not set the category. Whether it is grossly contaminated does. Rain that comes through a storm-damaged roof and lands on your ceiling may well be Category 1 or 2.

This matters for your wallet. A loss classified Category 3 by assumption instead of by inspection carries removal and disposal of porous materials, containment, PPE, and antimicrobial treatment that a Category 1 or 2 loss of the same footprint does not. The position statement requires a determination based on inspection and information gathering, not on how the weather looked outside.

What Each Category Costs to Clean Up

Contamination level is the primary cost driver, ahead of square footage. A Category 3 loss carries removal and disposal of porous materials, containment, PPE, antimicrobial treatment, and a larger rebuild afterward. A Category 1 loss of the same footprint may be extraction, drying, and a paint touch-up.

Water TypeRelative Cost Per Square FootWhat Drives the Number
Category 1, clean waterLowestAffected area, drying class, whether materials can stay in place
Category 2, gray waterMidAdded cleaning and disinfection labor, carpet pad and lower drywall removal
Category 3, black waterHighestFull PPE, containment, extensive disposal, decontamination, larger rebuild scope

Does the Water Damage Category Affect Your Insurance Claim?

The short answer is yes, the category affects your claim, though usually not in the way homeowners expect.

Your policy does not contain a clause that says “Category 2 losses are covered, and Category 3 losses are not.” Coverage turns on the cause of loss and your policy language. But the category shapes the claim in several concrete ways, which is why adjusters ask about it early.

Category Drives the Scope, and Scope Drives the Dollars

A Category 3 loss requires removal and disposal of porous materials, containment, PPE, antimicrobial treatment, and a larger rebuild. A Category 1 loss of the same square footage may be extraction, drying, and paint. Same footprint, very different estimate. When an adjuster reviews a scope that includes flood cuts and material disposal, the category is the justification for it.

Category Interacts with the Sudden-Versus-Gradual Distinction

Most standard homeowners policies cover water damage that is sudden and accidental, such as a burst pipe or a failed water heater. Damage from long-term seepage, deferred maintenance, or a leak that was left alone is commonly excluded.

Here is the trap. A slow leak that finally shows itself has usually been degrading for weeks, which means it presents as contaminated water with existing microbial growth. That contamination is evidence of duration, and duration is exactly what an insurer uses to argue gradual damage. Sudden failures caught fast tend to present as clean water. The category, in effect, tells a timeline story, and it tells that story to someone whose job includes looking for reasons a loss was not sudden.

Flood and Sewer Backups Are Separate Conversations

Rising surface water and sewer backup are generally not covered under a standard homeowners policy. Rising water is Category 3 by definition, and sewer or drain backup coverage is typically an endorsement you either purchased or did not.

What This Means for Chicago and Cook County Homeowners

Sewer and drain backup coverage is an endorsement, not part of a standard policy, and it usually carries its own dollar limit that is far lower than your dwelling coverage. In older Chicago neighborhoods and inner-ring suburbs served by combined sewers, a heavy rain event can push water back through a floor drain, and that is Category 3 by definition.

If you have a basement with a history of backups and you have never specifically asked your agent about a backup endorsement and its limit, assume you do not have one. Many Chicago-area homeowners with backup history carry it. Many others assume they have it because they have “water damage coverage,” which is a different thing.

If your carrier delays or denies a claim you believe is covered, the Illinois Department of Insurance accepts written consumer complaints against insurers and assigns each one a file number.

Documentation is the Whole Game

The category is established by the restorer’s preliminary determination, which under the S500 is supposed to be based on inspection and information gathering rather than a guess. That determination needs to be written down, along with photos taken before anything is removed, moisture readings, the identified source, the date and time the intrusion started, and an itemized list of what came out and why. Claims get reduced or denied far more often for thin documentation than for the wrong category.

Take your own photos before any cleanup begins, even if a crew is already on the way.

We are a restoration company, not insurance advisors, and none of the above is a coverage opinion on your specific policy. Read your declarations page and call your carrier or agent to confirm what applies to your situation. What we can do is document the loss thoroughly, classify it correctly, and communicate directly with your adjuster so the scope we submit is defensible.

Water Damage Categories vs. Classes (The Difference Most People Miss)

Two separate classification systems exist under the S500, and they get conflated constantly, including by people who should know better.

Category (1 through 3) describes contamination. It answers: how safe is this water, what PPE is required, what gets cleaned versus discarded, and can people be in the space.

Class (1 through 4) describes the drying problem. It answers: how much water is in the structure, how fast will it evaporate, how much equipment does this need, and how long will it take.

ClassWhat it meansRough identifier
Class 1Least water, minimal absorptionSmall affected area, low-absorption materials
Class 2An entire room, moderate absorptionWicking up walls, typically under 24 inches
Class 3Greatest volume, fastest evaporation loadWater from overhead, saturated ceilings, walls, and insulation
Class 4Specialty drying, low-permeance materialsHardwood, plaster, brick, concrete, stone that release moisture slowly

Any category can pair with any class. That is the part people miss, and it explains most of the confusion homeowners have about why a “clean water” job turned into demolition.

This is also the answer to a question we get all the time: why does a clean water loss sometimes require cutting drywall?

Because clean water can still saturate the inside of a wall cavity, and the only way to dry a cavity effectively is to open it. A flood cut is a horizontal cut in the lower section of drywall, usually 12 to 24 inches above the floor, that lets us remove wet material, get airflow behind the wall, and see what we are drying. The water being sanitary does not make the structure dry.

A large share of the housing stock in Chicago and the inner suburbs is Class 4 territory. Plaster over lath, brick, and slab-on-grade concrete hold moisture deep inside and release it slowly, which is why a loss in a 1920s bungalow takes longer to dry than the same loss in new construction.

How Professionals Determine and Handle Each Category

The determination is not made by looking at the water. Under the S500, the restorer performs an inspection and information gathering process, then arrives at a preliminary determination that sets the scope of work. That process includes verifying the source, establishing when the intrusion started, identifying how far the water migrated, and noting suspected contaminants and any pre-existing damage.

In practice, that means:

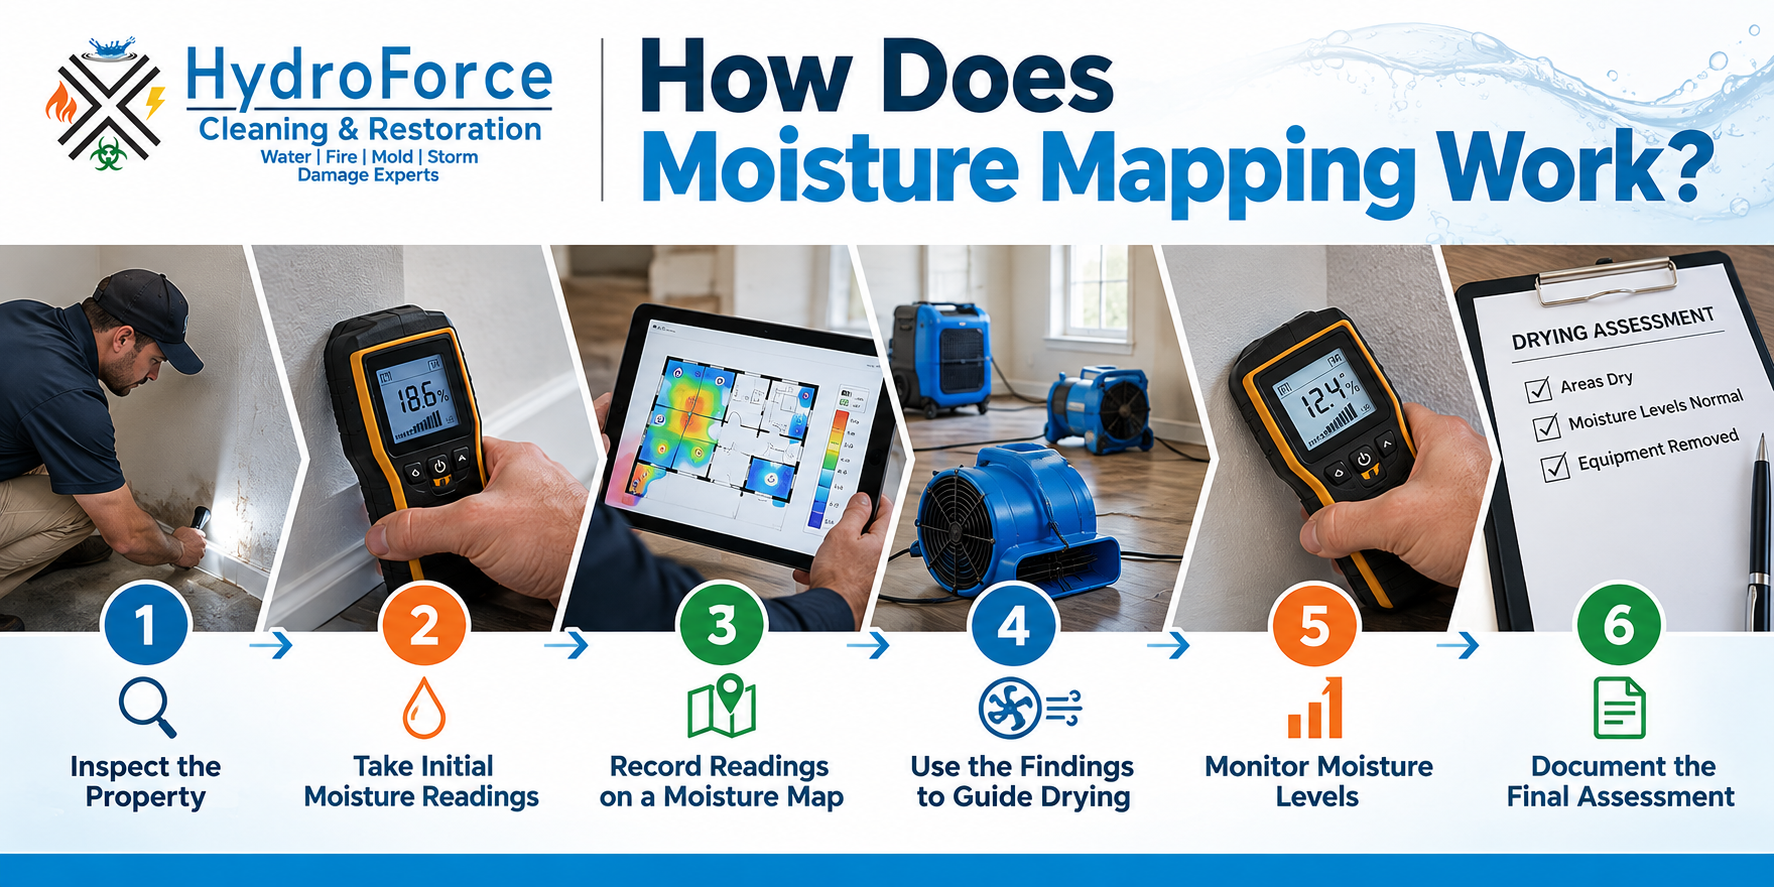
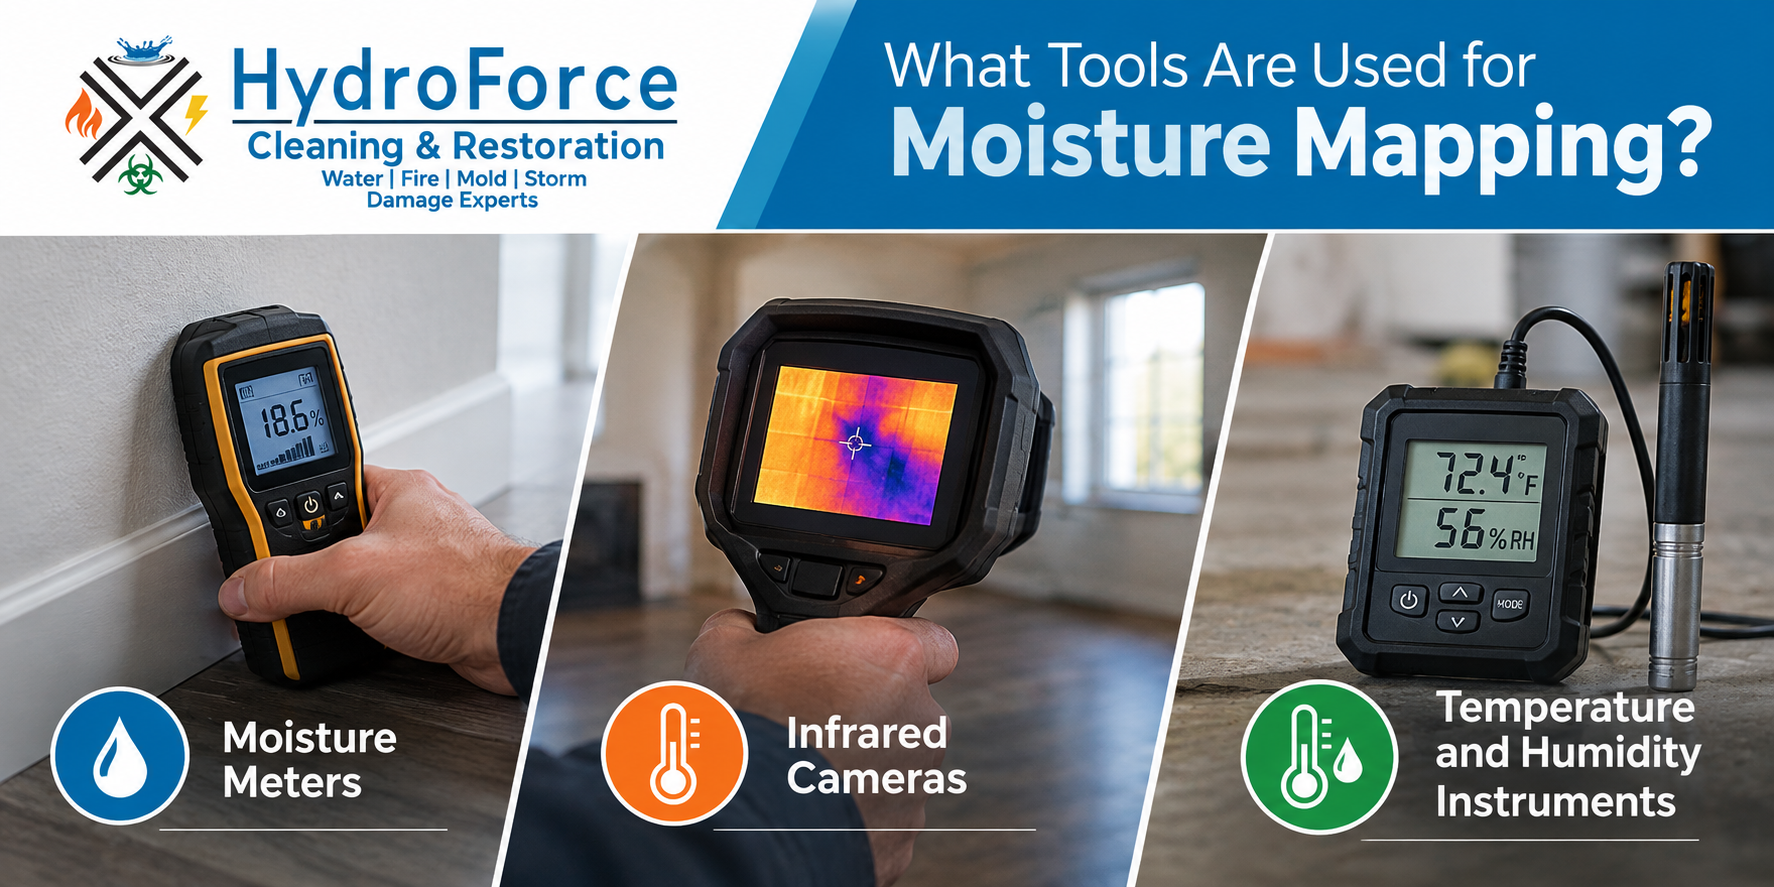
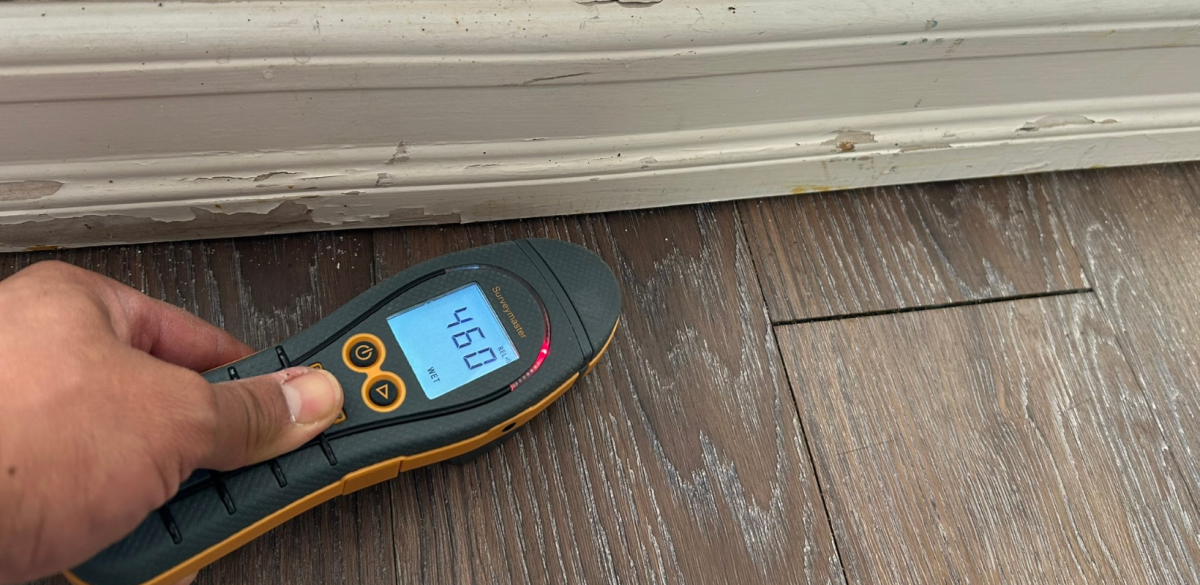
  • Moisture mapping: Penetrating and non-penetrating meters, thermal imaging, and hygrometer readings to find how far and how deep the water traveled. Visible wet flooring is rarely the full extent. Water follows framing and gravity into places you cannot see, and drying decisions depend on knowing where it went.
  • Source and timeline verification: Two identical wet basements with different start times are two different categories and two different scopes.
  • Contamination assessment: For elevated-risk situations, such as high-risk occupants, public health settings, or a need to confirm whether contamination is present, an indoor environmental professional may be brought in to sample and interpret lab results rather than relying on visual assessment alone.
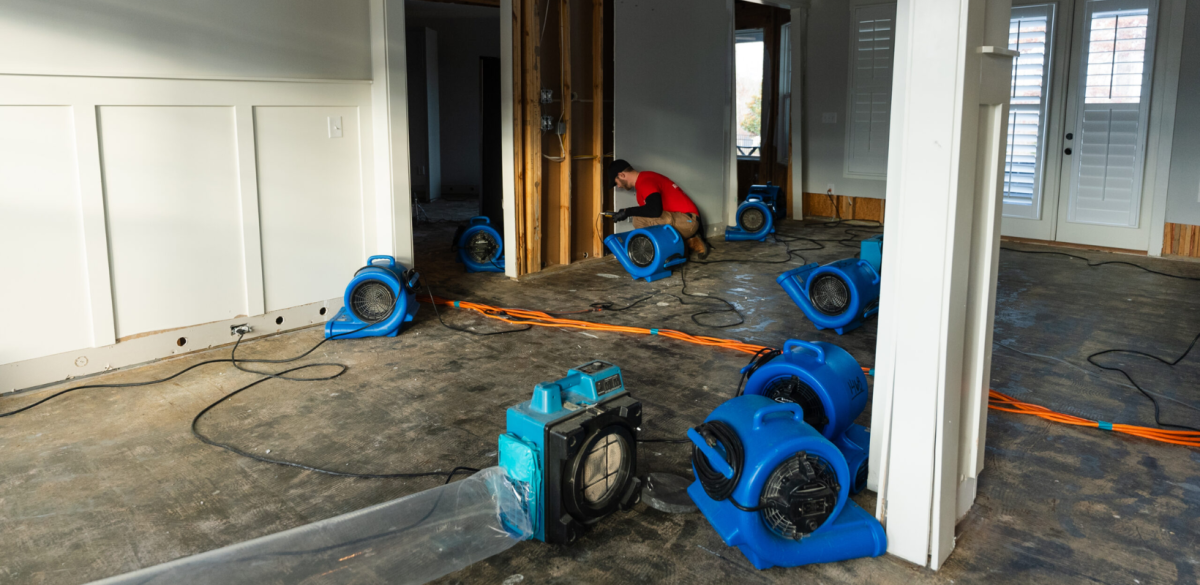
  • Containment for Category 2 and 3: Physical barriers, negative air pressure, HEPA air scrubbers, and worker protection are established before drying begins rather than after. Remediation comes first, then restorative drying.
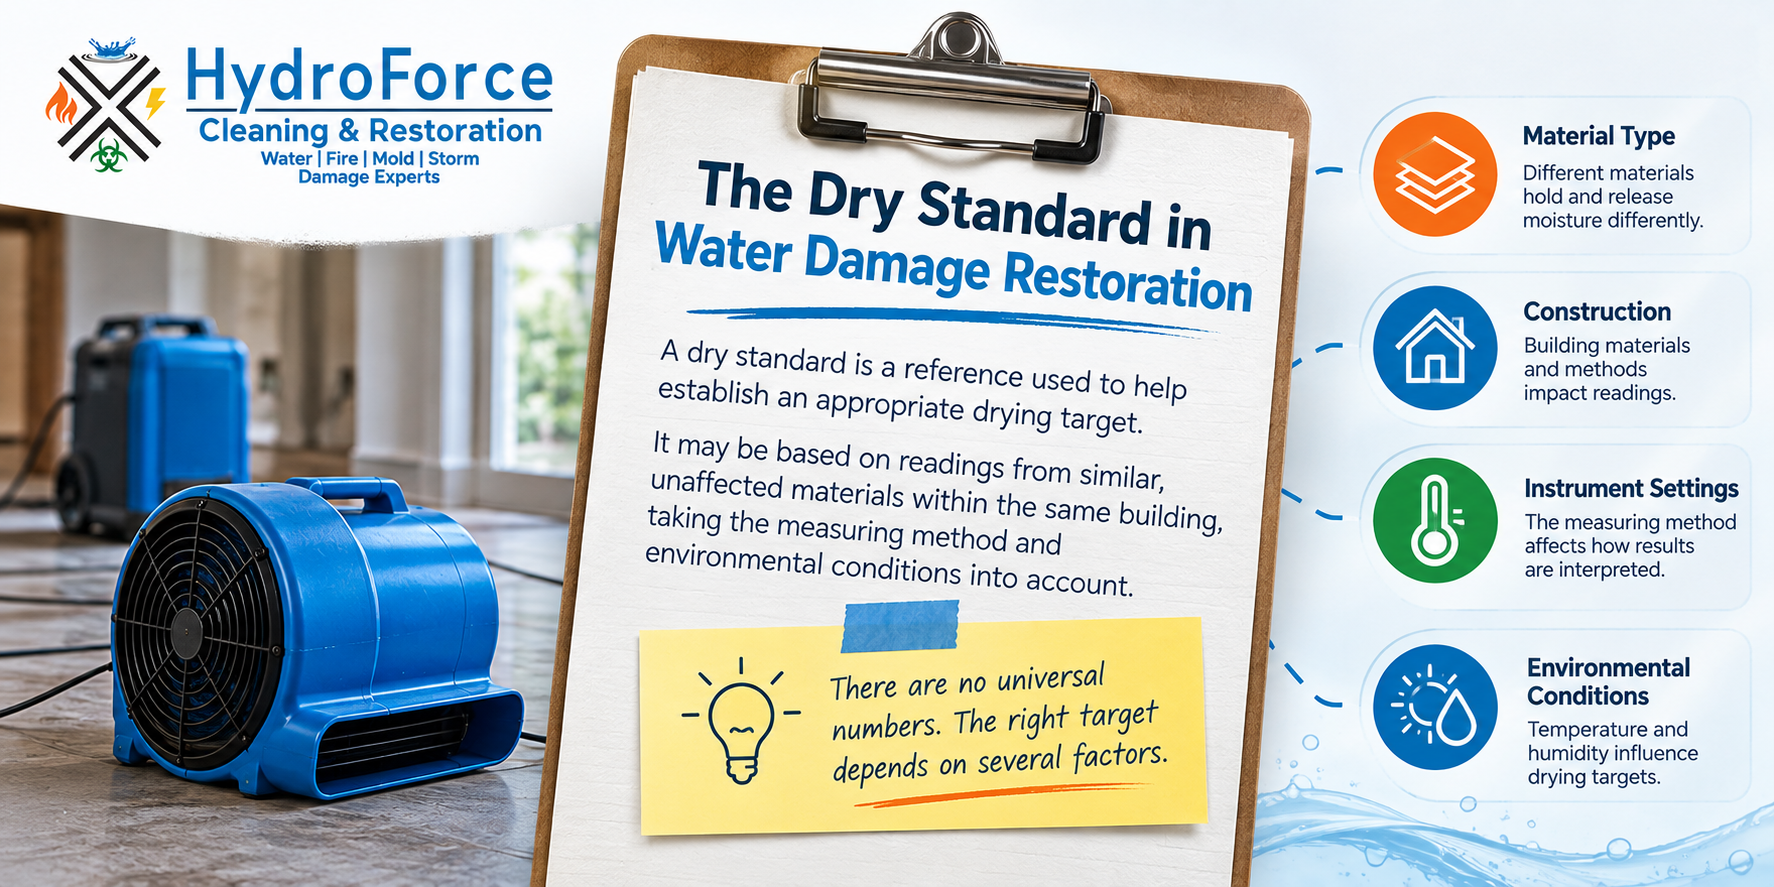
  • Documented dry standards: A drying goal set against unaffected materials in the same building, with daily readings until the structure hits it, so nothing gets closed up wet.

Our IICRC-certified technicians handle this on every loss, from a Category 1 supply line break to a Category 3 sewage backup. We serve Chicago, Bridgeview, Burbank, and Cicero, along with the surrounding south and southwest suburbs.

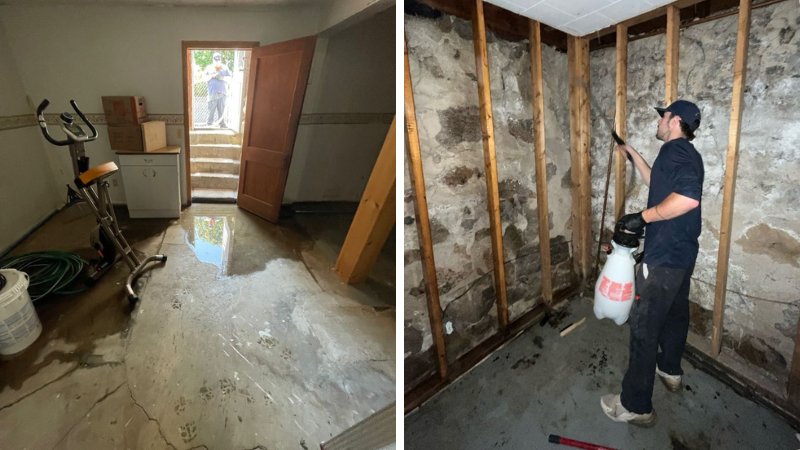
Sewage backup cleaning technician

What to Do Right Now If You Have Water Damage

If water is in your home as you read this, work through these in order.

  1. Stop the source if you can safely reach a shutoff valve. Know where your main is before you need it.
  2. Kill the power to affected areas at the breaker if water is anywhere near outlets, cords, or the panel. If you cannot reach the panel safely, stay out and call an electrician or the utility.
  3. Get people and pets out of any space with sewage, drain backup, or unidentified standing water. Do not wade in to assess it.
  4. Photograph everything before you move or remove a single item. Take wide shots of each room, close-ups of the source, and video walking the affected area. Note the time you discovered it.
  5. Do not run household fans on anything other than clean water. On Category 2 or 3 losses, a box fan spreads contamination through your air.
  6. Move what you can save. Lift furniture off wet carpet, get documents and electronics out of the area, and pull up rugs if they are light enough to handle.
  7. Call a certified restoration company immediately, not after the weekend. The category is climbing while you wait.
  8. Call your insurance carrier to open a claim and get a claim number.

If your basement took on water during a widespread storm event rather than an isolated failure, the Metropolitan Water Reclamation District publishes a Cook County flood response resource guide covering reporting, cleanup, and available assistance.

Water Damage in Chicago and Cook County

HydroForce Cleaning & Restoration has been handling water losses across Chicago and Cook County since 2011. We are IICRC-certified, on-site in 60 minutes or less, available 24/7 including holidays, and we bill your insurance directly. Every project gets a dedicated Project Manager who documents the loss and stays in contact with your adjuster from the first day.

Call (630) 835-0862 now to learn more about our 24/7 water damage restoration in Chicago, IL, and get a free, no-obligation estimate.


Water Damage Category FAQs

What are the three categories of water damage?

Category 1 is clean, sanitary water from sources like broken supply lines and tub overflows. Category 2, or gray water, carries significant contamination that can cause illness, from sources like washing machine discharge and sump pump failures. Category 3, or black water, is grossly contaminated and may contain harmful agents, from sources like sewage, waste line backflows beyond the trap, and rising river water. The categories are defined by the ANSI/IICRC S500 standard.

What is the difference between clean water, gray water, and black water?

They are the common names for Categories 1, 2, and 3. Clean water poses no substantial health threat at its source. Gray water contains chemical, biological, or physical contamination that can cause illness on contact. Black water is grossly contaminated and can carry pathogenic or toxigenic agents. The distinction determines what protective equipment is required, what materials can be saved, and whether containment is needed.

Can Category 1 water turn into Category 2 or 3?

Yes, and it commonly does. The S500 standard notes that category depends on the water’s source and its quality after contacting materials on site, and that time and temperature affect contaminant amplification. Clean water sitting on drywall and carpet in a warm house picks up organic material and supports bacterial growth. Category 2 water that is not removed efficiently can be reclassified as Category 3. This is why the 24-to-48-hour window matters.

Does the water category affect my insurance claim?

Indirectly, and significantly. Your policy covers based on the cause of loss rather than the category, but the category drives the scope of work, which drives the cost of the claim. Contamination can also suggest that a leak was present for a long time, which insurers use when distinguishing sudden and accidental damage from gradual damage that is often excluded. Rising floodwater and sewer backup generally require separate coverage. Confirm your specific coverage with your carrier or agent.

Is there a Category 4 water damage?

No. The IICRC S500 recognizes only Categories 1 through 3. People saying “Category 4” usually mean Class 4, which describes specialty drying for dense materials like hardwood, plaster, brick, and concrete. Others are confusing hurricane categories with water damage classification. If a contractor tells you your loss is Category 4, ask them to clarify.

What is the difference between a water damage category and a water damage class?

Category (1 to 3) describes how contaminated the water is and drives safety and cleaning decisions. Class (1 to 4) describes how much water is in the structure and how difficult drying will be, which drives equipment and timeline. Any category can pair with any class, so a clean water loss can still be a large, expensive drying project.

Is storm damage automatically Category 3 water?

No. A February 2026 position statement from the ANSI/IICRC S500 Consensus Body clarified that top-down water ingress, wind-driven rain, and water from weather-related events are not automatically Category 3. The determination depends on whether the water is grossly contaminated, which requires inspection rather than assumption.

Can I clean up Category 3 water myself?

No. Category 3 water can contain pathogenic and toxigenic agents, and cleanup requires full personal protective equipment, containment, negative air pressure, HEPA filtration, and proper disposal of contaminated porous materials. Running a household fan in it spreads contamination through your air. Keep people and pets out of the space and call a certified restoration company.

Categories
Restoration Tips water damage

How to Protect Your Chicago Home from Severe Storms

24/7 EMERGENCY SERVICE RESIDENTIAL & COMMERCIAL SERVICES

How To Protect Your Chicago Home from Severe Storms

Severe storms are no longer a rare event in Chicagoland. The National Weather Service confirmed a record 63 tornadoes in the Chicago forecast area in 2024, breaking the record of 58 set just one year earlier. The July 15, 2024 derecho alone produced 32 tornadoes and left more than 430,000 homes without power.

The pattern has not slowed. Flooding in late July 2025 damaged homes across Chicago’s Southwest Side and suburbs, including Burbank, Justice, and Summit, prompting disaster proclamations from the city, Cook County, and the State of Illinois. And 2026 has already delivered an EF-3 tornado and record hail in March, a June outbreak with multiple EF-2 and EF-3 tornadoes, and flash flooding over the July 4th weekend.

In this guide, we cover why Chicago homes are vulnerable to storm damage, the biggest storm risks in the region, how to prepare your home before storm season, and what to do after a storm passes. It is based on what our restoration crews see in Chicago basements, roofs, and attics after every major storm.

Why Are Chicago Homes Vulnerable to Severe Storm Damage?

Chicago homes are vulnerable to storm damage because much of the housing stock is older, basements are common, mature trees line most neighborhoods, and Lake Michigan drives fast-changing weather.

Here is a closer look at each factor:

  • Aging housing stock: Classic Chicago bungalows and two-flats come with specific storm weaknesses. Flat and low-slope roofs hold standing water after heavy rain, original clay drain tiles crack and fail, and brick parapet walls take the brunt of high winds.
  • Basements and combined sewers: Most Chicago homes have basements, and much of the city is served by a combined sewer system that carries stormwater and sewage through the same pipes. During heavy rain, that system can back up into basements even in homes that have never flooded before. According to the Federal Reserve Bank of Chicago, the overwhelming majority of flood damage claims in Chicago are for basement flooding caused by heavy rain overwhelming sewers, not rivers overflowing their banks.
  • Tree-lined neighborhoods: Mature trees are one of the best things about Chicago’s residential streets, but they become the biggest hazard in high winds. The July 15, 2024, derecho generated more than 7,100 reports of fallen trees in the city alone.
  • Lake-effect weather: Proximity to Lake Michigan means conditions can change quickly, and storms can intensify with little warning.

What Are the Biggest Storm Risks in Chicago?

The biggest storm risks for Chicago homeowners are thunderstorms with heavy rain, high winds, hailstorms, and tornadoes. Each causes a different type of damage, so it helps to understand what to watch for.

Biggest Storm Risks in Chicago - HydroForce Cleaning and Restoration

Heavy Rain and Basement Flooding

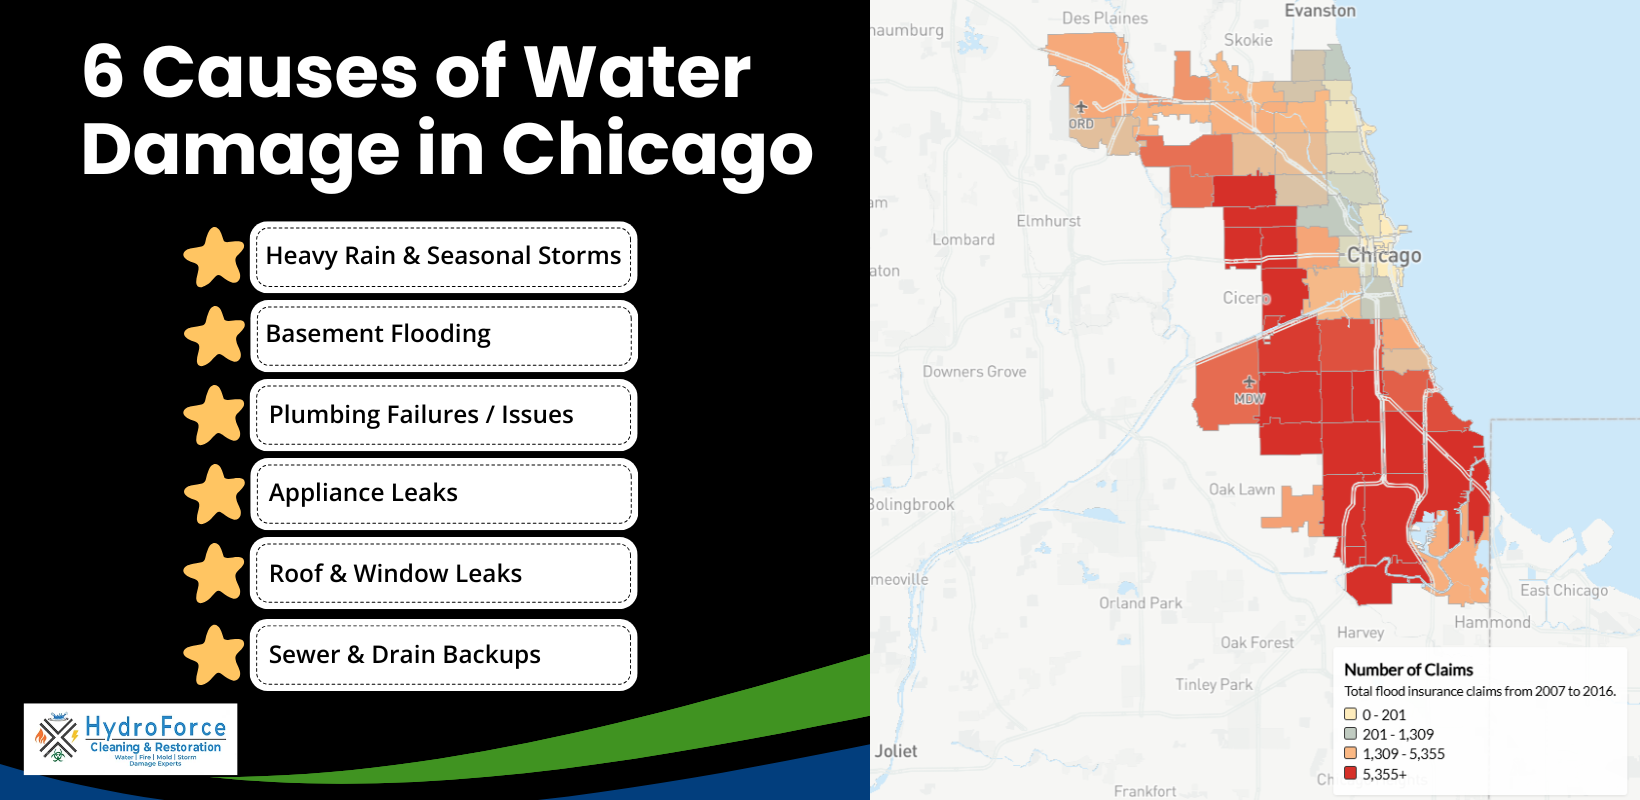
Thunderstorms and heavy rain are the region’s most frequent and most expensive sources of home damage. Chicago logged nearly 230,000 flood-related claims and $433 million in payouts between 2007 and 2016, according to the Center for Neighborhood Technology.

Here is what heavy rain can do to your home:

  • Flash flooding: If you experience flash flooding at home, move to higher ground to stay safe. Property can be repaired; people come first.
  • Roof leaks: Leaks are common with heavy rain. Fix them promptly so you do not end up with hidden water damage or mold inside walls and ceilings.
  • Sump pump failure: Sump pump failure is the most common cause of basement flooding calls our crews respond to after heavy rain. In most cases, the pump did not break. It lost power mid-storm or could not keep up with the inflow. A battery backup pump costs a few hundred dollars. A flooded basement extraction and drying job typically costs several thousand.
  • Sewer backup: Water rising from floor drains is sewer backup, not groundwater, and it is a health hazard that requires professional cleanup. Do not handle Category 3 water yourself.

High Winds and Derechos

High winds are one of the most common causes of storm damage in the Chicago area, and derechos have made them a defining local threat. The July 15, 2024, derecho brought straight-line winds of 60 to over 100 mph across northern Illinois. Here is what to be aware of:

  • Wind can tear or lift shingles, opening the roof to leaks. Wind damage often is not visible from the ground, so have a professional inspect after any storm with significant gusts.
  • High winds can snap branches or bring entire trees down onto roofs, fences, and vehicles. Stay clear of downed limbs near power lines and call for emergency board-up or tarping if the structure is opened up.
  • Siding and gutters can pull away in strong gusts. Fix them promptly so water does not collect against the walls and foundation.

Hail Damage

Hail is an underestimated risk in northern Illinois. The March 10, 2026 storm system that produced an EF-3 tornado in the Kankakee River Valley also dropped record-large hail in the region.

Hail damage includes:

  • Bruised or cracked shingles and dented siding. This damage is easy to miss from the ground, but shortens the life of your roof and is often claimable if documented promptly.
  • Cracked skylights and windows that let water into the home.
  • Damaged outdoor HVAC equipment. Have an HVAC company inspect the unit before running it again.

Read: How Does Hail Cause Damage to Roofs?

Tornadoes

Tornadoes in the Chicago area are more common than most homeowners believe, and recent years have proven it. The National Weather Service confirmed four tornadoes inside Chicago city limits on July 15, 2024, including one at O’Hare. The June 2021 EF-3 that tracked through Naperville and Woodridge and the June 2026 outbreak with multiple EF-2 and EF-3 tornadoes show that strong tornadoes reach the metro, not just downstate.

Key points:

  • Tornadoes can cause major structural damage. Shelter in the basement or an interior room on the lowest floor, away from windows.
  • Flying debris breaks windows and tears off roofing. This damage needs to be secured quickly with emergency board-up and roof tarping to prevent water intrusion, which often causes more total damage than the initial impact.
  • Keep an emergency plan and kit ready: a designated family meeting place, radio, flashlight, important documents, and essentials.

How Do You Prepare Your Home Before Storm Season?

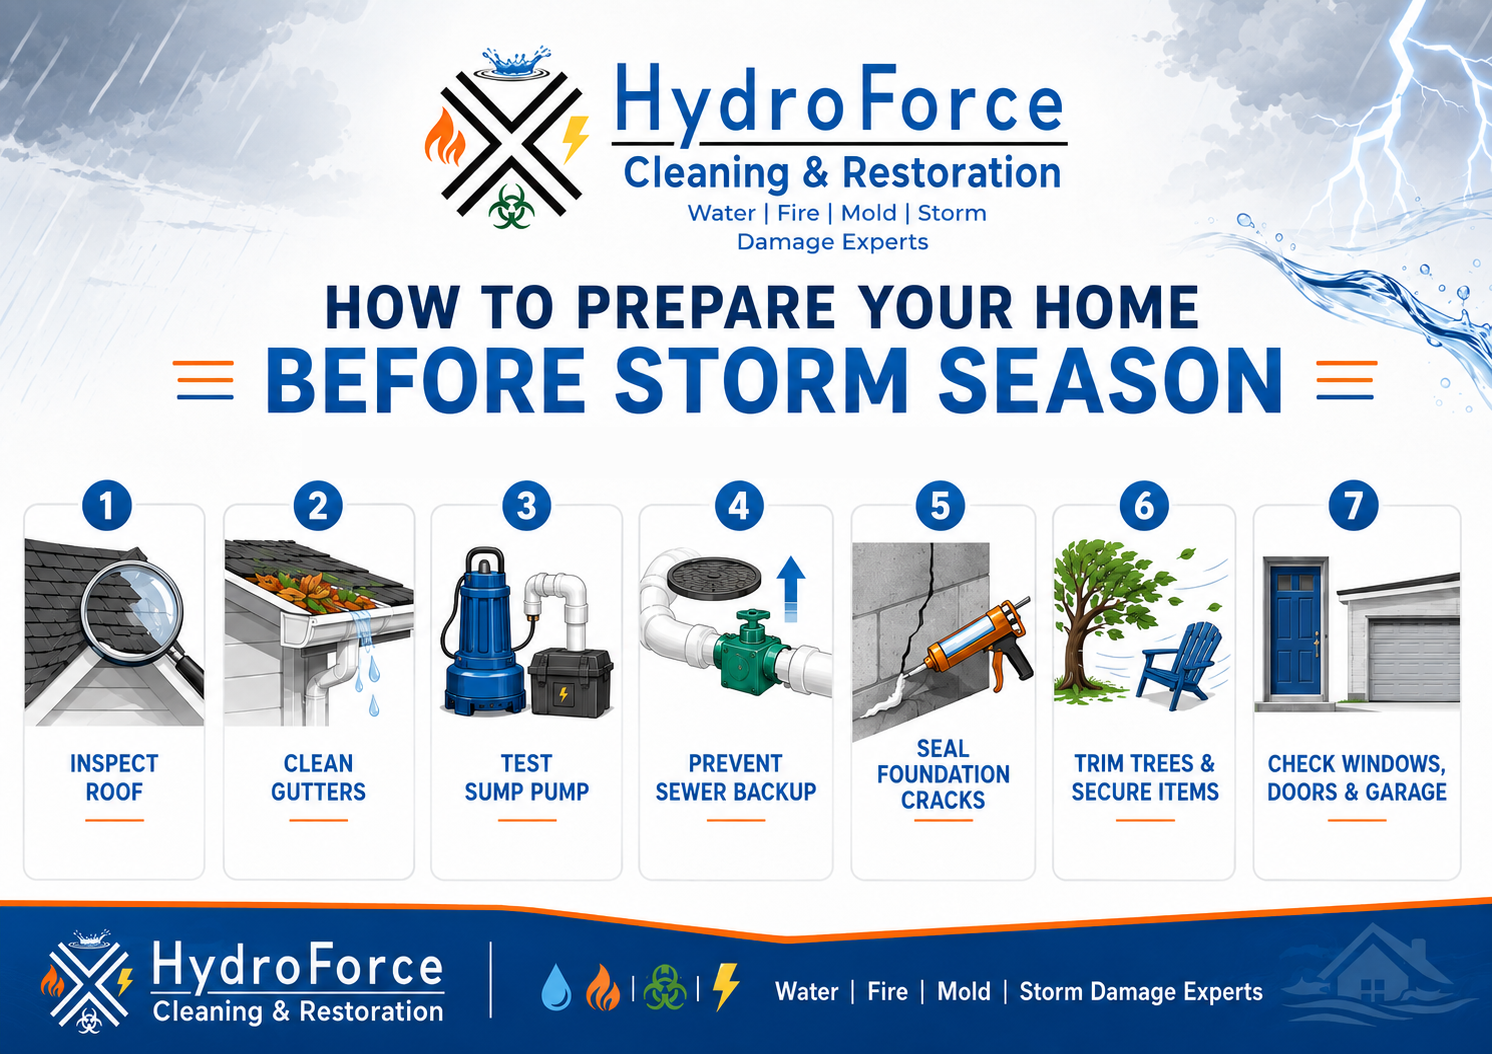
Prepare your home for storm season each year by inspecting the roof, clearing gutters, testing the sump pump, sealing foundation cracks, and trimming trees.

How to Protect Your Home from Storm Damage - HydroForce Cleaning and Restoration

Work through this checklist every spring, before the June and July peak of Chicago’s severe weather season:

  • Have your roof inspected and repair loose or damaged shingles before the wind finds them.
  • Clean gutters and downspouts so water flows away from the home instead of pooling at the foundation.
  • Test your sump pump by pouring water into the pit and strongly consider a battery backup. Power outages and heavy rain arrive together.
  • Ask your plumber about overhead sewers or a backflow prevention valve if your basement has ever taken on sewer water. These are the two upgrades that stop combined sewer backups.
  • Seal foundation cracks so water does not seep in during saturating rains.
  • Trim trees and remove loose furniture, dead limbs, and unsecured equipment that become projectiles in high winds.
  • Check windows, doors, and garage doors for gaps or worn seals.

What Should a Storm Emergency Plan Include?

A storm preparedness plan should include an emergency supply kit, protected copies of important documents, a clear understanding of your insurance coverage, and enrollment in local weather alerts.

Every family’s plan will look a little different, but these are the essentials:

  • Build an emergency supply kit with a flashlight, radio, water, non-perishable food, blankets, and any medications your family needs.
  • Protect important documents and valuables in a waterproof, fireproof container so they survive a fire or flood.
  • Know what your insurance actually covers. Standard homeowner policies in Illinois cover wind and hail damage but exclude the two things Chicago basements need most: flood damage and sewer backup or sump pump overflow. Flood coverage requires a separate NFIP or private flood policy. Sewer and sump backup coverage is an endorsement added to your existing policy, usually for a modest premium. In our experience working claims with homeowners after major storms, a missing sewer backup endorsement is one of the most common reasons a basement claim gets denied.
  • Sign up for local weather alerts through your phone and your village or county notification system so warnings reach you before the storm does.

What Should You Do During a Severe Storm?

During a severe storm, shelter in the basement or an interior room away from windows, stay out of floodwater, never run a generator indoors, and keep clear of downed power lines.

The hours during and immediately after a storm are when most injuries happen:

  • Shelter correctly. For a tornado warning, get to the basement or an interior room on the lowest floor, away from windows. If flash flooding threatens the basement, shelter on the ground floor instead.
  • Stay out of a flooded basement. Standing water can be energized by submerged outlets, appliances, or the furnace. Do not enter until power to the area is shut off, and call a professional if you cannot reach the breaker safely.
  • Never run a generator indoors or in an attached garage. Carbon monoxide from portable generators kills people after storms every year. Run generators outside, at least 20 feet from the home, away from windows and vents.
  • Do not drive through flooded streets or viaducts. Chicago’s viaducts flood fast during heavy rain and were the site of numerous water rescues during the July 2025 storms. Twelve inches of moving water can carry a car.
  • Stay away from downed power lines and anything touching them, including fences and tree limbs, and report them to ComEd.

How Do You Inspect Your Home After a Storm?

After a storm passes, inspect your home for roof and gutter damage, water intrusion, fallen trees or structures, and early signs of moisture or mold:

  • Look at the roof and gutters from the ground for visible damage, then have a professional check for lifted shingles and hail bruising you cannot see.
  • Walk the perimeter and check the basement, garage, and around windows for water intrusion or active leaks.
  • Check for fallen trees, fences, and exterior structures, and address hazards immediately. Stay away from anything touching power lines.
  • Watch for moisture and mold. Mold growth can begin within 24 to 48 hours of water intrusion, so a small leak found today is a much cheaper problem than the same leak found next month.

What Should You Do Right After Storm Damage?

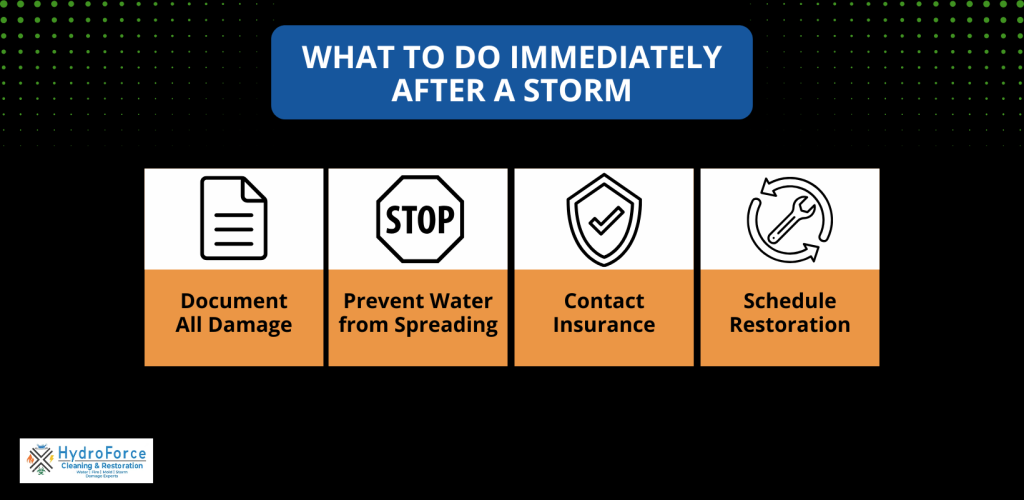
Immediately after storm damage, document everything, stop water from spreading if you can do so safely, notify your insurance company, and schedule professional restoration.

What to Do Immediately After a Storm - HydroForce Cleaning and Restoration

Follow these steps in order:

  1. Document all damage with photos and video before touching anything. This is the foundation of your insurance claim.
  2. Prevent water from spreading if you can do so safely, using tarps and buckets and moving belongings out of the way.
  3. Contact your insurance company as soon as you see storm damage and share your photos and videos.
  4. Schedule professional restoration. Call right away and describe what happened. A restoration crew will arrive with the equipment to stop damage from getting worse, and every hour matters when water is involved.

Dealing with storm damage right now? HydroForce responds 24/7 across Chicagoland. Call (630) 835-0862.

Frequently Asked Questions

How fast does mold grow after storm damage?

Mold can begin growing within 24 to 48 hours of water intrusion. That window is why fast water extraction and structural drying matter more than any other step after a flood or leak.

Does homeowners insurance cover storm damage in Illinois?

Wind, hail, and tornado damage are covered by standard homeowner policies. Flooding from rising water and sewer or sump pump backups are not. Flood damage requires separate flood insurance, and backup coverage requires an endorsement on your existing policy.

Who pays if my neighbor’s tree falls on my house?

In most cases, your own homeowner’s insurance covers the damage to your home, regardless of whose tree fell. The exception is negligence: if the tree was visibly dead or hazardous and your neighbor ignored documented warnings, their insurer may be responsible. File with your own insurance company first and let the insurers sort out liability between themselves.

When is storm season in Chicago?

Severe weather in the Chicago area historically peaks from May through August, with June and July the most active months. Recent years have stretched that window: the region has seen tornadoes in March and even February. Treat spring as your preparation deadline, but do not assume the calendar protects you outside of summer.

What does emergency board-up and roof tarping include?

Emergency board-up secures broken windows, doors, and wall openings with plywood, and roof tarping covers damaged roof sections with heavy-duty tarps anchored to sound decking. Both are temporary protections that stop rain and intruders until permanent repairs are made, and both are typically covered by insurance as damage mitigation.

How quickly should I call a restoration company after a storm?

Immediately, even before the insurance adjuster visits. Insurance policies require you to mitigate further damage, and restoration crews document conditions in a way that supports your claim rather than hurting it.

Get Emergency Storm Damage Support

Even a well-maintained home can experience damage when a severe storm rolls off the lake. When that happens, the speed of your response makes the difference between a minor repair and a major restoration project.

Has your home been damaged by a storm? HydroForce Cleaning & Restoration provides complete storm damage restoration in Chicago, IL, and the surrounding areas, including emergency roof tarping, board-up service, debris cleanup, water extraction and structural drying, and full roof, siding, and gutter repair. Our technicians respond 24/7, and our team works directly with your insurance provider to help you document the damage and secure fair compensation for your claim.

Call HydroForce today at (630) 835-0862 for a free estimate, or request a quote online. The sooner we get to your property, the more damage we can prevent.

Categories
Disaster Recovery Fire and smoke damage restoration

Does Renters Insurance Cover Fire Damage in Illinois? What Renters Need to Know

24/7 EMERGENCY SERVICE RESIDENTIAL & COMMERCIAL SERVICES

Residential fires happen fast and leave renters facing serious financial loss. In Illinois, apartment fires, kitchen accidents, electrical malfunctions, and other emergencies can destroy your belongings and make a rental temporarily unlivable. Knowing what renters insurance covers before a fire happens helps you recover faster and avoid costly surprises.

The risk is real. According to the Illinois State Fire Marshall, there were 17,256 structure fires reported in 2025, resulting in over $1.4 billion in property damage. Fire claims also occur at higher rates in apartments and condos than in single-family rentals, because a fire in one unit can spread to the units next to it. That makes coverage especially important for Illinois renters living in multi-unit buildings.

Despite the risk, many renters either skip insurance or misunderstand what it covers. The good news: renters’ insurance does typically cover fire damage. But there are limits, exclusions, and policy details every renter should understand before disaster strikes.

This article is general information, not insurance advice. Coverage varies by policy, so confirm the specifics with your insurer or agent. For a neutral overview of renters coverage in Illinois, the Illinois Department of Insurance publishes a consumer guide on renters insurance.

Quick Answer: Does Renters Insurance Cover Fire Damage in Illinois?

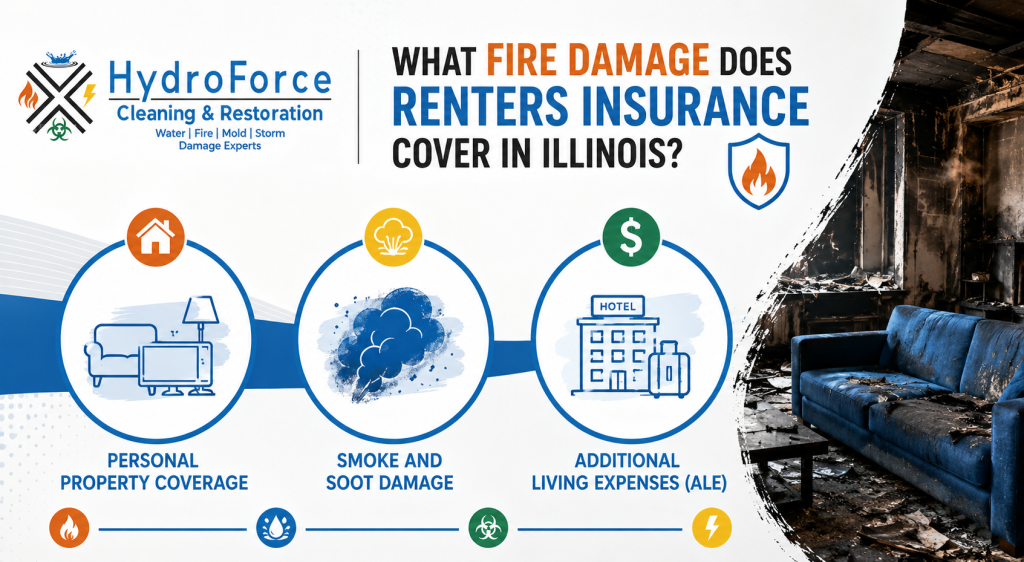
Yes. In most cases, renters insurance in Illinois covers fire damage caused by a sudden and accidental covered event. A standard policy typically pays for damaged personal belongings, smoke and soot damage, and additional living expenses if your rental becomes temporarily uninhabitable.

What it does not cover is the building itself, intentional acts, or losses beyond your policy limits. The landlord’s insurance is responsible for repairing the physical structure.

Understanding Renter’s Insurance Coverage in Illinois

Most renters insurance policies in Illinois are HO-4 policies designed specifically for tenants. They generally include:

  • Personal property coverage
  • Personal liability protection
  • Additional Living Expenses (ALE), also called Loss of Use coverage
  • Medical payments coverage in certain situations

Illinois law does not require renters to buy renters insurance. However, many Chicago and suburban landlords make it a condition of the lease, and failing to show proof of coverage can lead to penalties or lease termination. Even when it is optional, the math favors carrying it: your landlord’s policy covers the building and nothing you own.

What Fire Damage Does Renters Insurance Cover in Illinois?

Renters Insurance Fire Damage Coverage in Illinois - HydroForce

Personal Property Coverage

One of the biggest benefits of renters insurance is protection for your personal belongings. If a covered fire damages or destroys your possessions, your insurer may reimburse you up to your policy limits after your deductible is met.

Commonly covered belongings include:

  • Furniture
  • Clothing
  • Electronics
  • Kitchenware
  • Home décor
  • Books
  • Small appliances
  • Personal items

Coverage is based on one of two methods:

  • Replacement Cost Value (RCV): Pays the cost to replace damaged items with comparable new ones.
  • Actual Cash Value (ACV): Pays the depreciated value based on age and condition.

One detail that catches renters off guard: sublimits. High-value items such as jewelry, watches, firearms, art, and collectibles usually have a per-category cap, often $1,000 to $2,500. If the replacement cost exceeds that sublimit, you only recover the capped amount unless you have added scheduled personal property coverage for those items. If you own anything with significant value, ask your agent about a rider before a fire happens.

Smoke and Soot Damage

Fire damage extends beyond visible flames. Left on surfaces for even 24 to 48 hours, it etches glass, corrodes metal fixtures, and yellows painted walls permanently. Smoke also travels through the HVAC system and settles inside the ductwork, which is why a surface wipe-down is never enough to remove the odor. Proper restoration means sealing the system, cleaning the ducts, and using hydroxyl or ozone treatment to pull odor out of drywall and subfloor before it sets in for good.

Smoke and soot can spread throughout a rental property and damage:

  • Clothing and fabrics
  • Upholstered furniture
  • Electronics
  • Artwork and photographs
  • Documents
  • HVAC systems through circulating particles

The takeaway for your claim: Smoke and soot damage is typically covered under the same personal property coverage that applies to fire, but the cleanup is specialized work, not a weekend project.

Additional Living Expenses (ALE)

If your rental home cannot be safely occupied after a covered fire, Additional Living Expenses coverage may reimburse reasonable extra costs incurred while repairs are underway, including:

  • Hotel accommodations
  • Temporary rental housing
  • Restaurant meals when you cannot cook
  • Laundry expenses
  • Increased transportation costs in certain situations

ALE coverage helps maintain your normal standard of living while your residence is being restored.

Water Damage From Firefighting Efforts

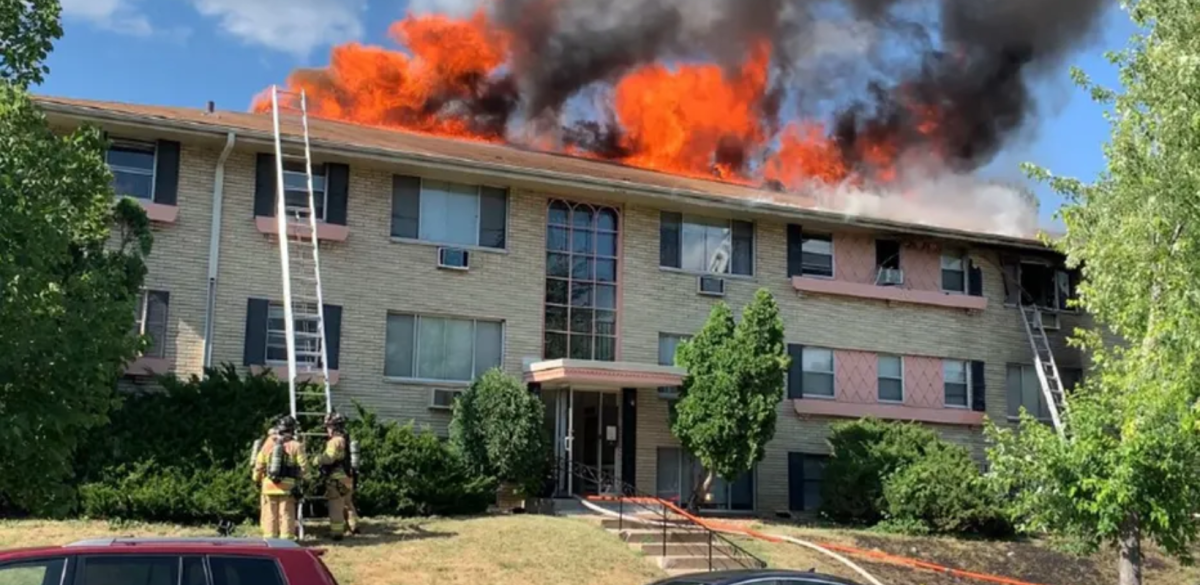
This is a coverage point many renters miss. When the fire department puts out a fire, the water from hoses and sprinklers often causes as much damage as the flames. That water damage is typically covered because it is a direct result of a covered fire. The same goes for water from a sprinkler system that activates during the fire. In practice, fire restoration and water damage mitigation almost always happen together, and both can fall under your claim.

Does Renters Insurance Cover a Fire I Accidentally Caused?

Yes. If you accidentally start a fire, the personal liability portion of your renters policy can pay for damage to your landlord’s property and to neighboring units, up to your liability limit.

For example, if a kitchen fire spreads to the apartment next door, or if it triggers the sprinklers in a shared hallway, liability coverage can pay those repair costs so you are not paying out of pocket. This matters in Illinois apartment buildings, where a single accidental fire can affect several units at once.

Standard policies often include $100,000 in liability coverage, but many renters carry $300,000 or more for better protection. Liability does not apply to fires that are set intentionally or caused by gross negligence.

What Fire Damage Is Not Covered by Renters Insurance?

Renters insurance is broad, but it does not cover every fire-related loss. Knowing the exclusions helps you avoid surprises at claim time.

  • Damage to the building structure: Renter’s insurance does not cover the physical structure of the rental property, including the roof, walls, floors, or other structural components. These are the responsibility of the landlord’s insurance policy.
  • Intentional or preventable fires: Most policies exclude coverage for fires that are intentionally set (such as arson) or caused by gross negligence or reckless behavior. Coverage is intended for sudden and accidental events, not deliberate or avoidable damage.
  • Policy deductible requirements: Even when a fire loss is covered, you are responsible for paying your deductible before insurance benefits apply. The insurer will then reimburse covered losses up to your policy’s personal property limits.
  • High-value items above sublimits: Jewelry, art, and collectables may only be partially covered without a rider.
  • Business-related property losses: Personal renter’s insurance policies typically do not cover business equipment, inventory, or other commercial property kept in the rental unit. If you operate a business from home, you may need additional or specialized coverage.

Does Renters Insurance Cover Smoke Damage After a Fire?

Yes, in most cases renters insurance covers smoke damage after a fire, as long as the fire itself is a covered peril. Smoke damage is usually included under the same personal property coverage that applies to fire damage.

Smoke can be as destructive as flames. Even when items are not directly burned, smoke particles seep into fabrics and porous materials, leaving odors and residue that are difficult to remove. Smoke damage may also trigger your ALE coverage: if heavy smoke makes the unit unsafe to live in, your policy may help pay for temporary housing while the property is cleaned and restored.

Coverage depends on your specific policy. Gradual damage, poor maintenance, or excluded perils may not be covered, so review your plan details.

How Much Does Renters Insurance Cost in Illinois, and Is It Required?

Renters insurance in Illinois is one of the most affordable coverages you can buy, often around $15 to $20 per month, depending on your location, coverage limits, and deductible. Rates in Chicago tend to sit near the lower end because of the volume of policies written there.

No Illinois state law requires renters’ insurance. But many landlords and property management companies, especially in Chicago and the suburbs, require it in the lease. Compared with the cost of replacing everything you own after a fire, a policy of $15 to $20 per month is inexpensive protection.

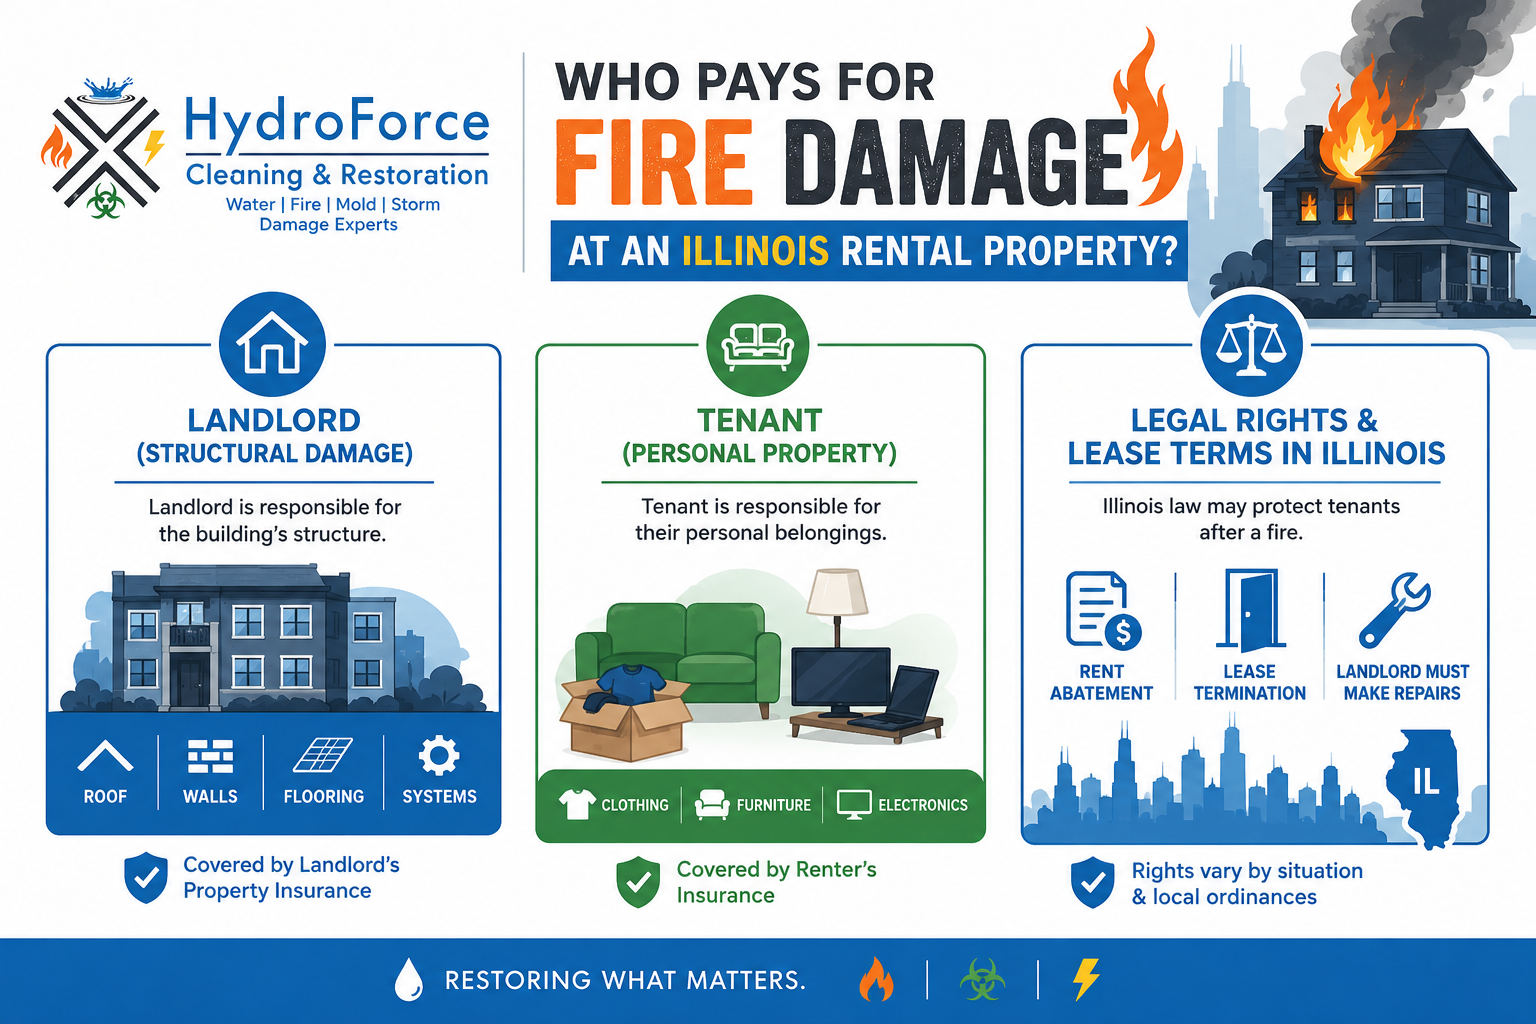
Who Pays for Fire Damage at an Illinois Rental Property?

Who Is Responsible for Fire Damage in an Illinois Rental - HydroForce

After a fire in a rental property, responsibility for costs is typically shared between the landlord and the tenant’s insurance policies, depending on what was damaged and how the fire occurred. Understanding this distinction is key to knowing what to expect during the recovery process.

  • Landlord (structural damage): The landlord is generally responsible for repairing or restoring the physical structure of the building, including the roof, walls, flooring, and essential building systems. This coverage is typically handled through the landlord’s property insurance policy.
  • Tenant (personal property): A standard renter’s insurance policy covers a tenant’s personal belongings in the event of an accidental fire or related damage, such as smoke damage. This includes items like clothing, furniture, and electronics, up to the limits of the policy.
  • Legal rights and lease terms in Illinois: Illinois law and local ordinances, such as the Chicago Residential Landlord and Tenant Ordinance (RLTO), may apply after a fire. If a unit becomes uninhabitable, tenants may have rights such as rent abatement or lease termination, while landlords are generally required to make necessary repairs within a reasonable timeframe.

Common Causes of Apartment and Rental Home Fires in Illinois

Fires in rental properties are unfortunately common across Illinois, often caused by everyday household activities or preventable hazards. Understanding the most frequent causes can help tenants reduce their risk.

  • Cooking-related incidents are the leading cause of residential fires, often due to unattended stoves or grease fires.
  • Space heaters placed too close to flammable materials or left running unattended can quickly ignite nearby objects.
  • Electrical issues, such as overloaded outlets, damaged wiring, or faulty appliances, are another common source of fire.
  • Candles left burning unattended and smoking indoors also contribute significantly to fire risk in rental homes.

What Should You Do After a Fire in Your Apartment or Rental Home?

Acting quickly protects your safety and strengthens your insurance claim. The U.S. Fire Administration provides a guide for property owners covering what to do after a fire.

  • Get to safety and call emergency services from outside the property.
  • Notify your insurance company as soon as possible to start the claim.
  • Document the damage thoroughly with photos and videos of both fire and smoke-affected areas.
  • Arrange temporary housing, whether with family, friends, or a hotel.

How to File a Renters Insurance Fire Claim in Illinois

Filing a claim after a fire involves several steps to make sure your losses are documented and reimbursed.

  • Take detailed photos and videos of all damaged property before anything is moved or discarded.
  • Contact your insurance provider promptly to report the fire and open your claim.
  • If it is safe, take reasonable steps to prevent further damage, but always follow the fire department instructions first.
  • Keep all receipts for temporary living expenses, including hotels, meals, and transportation, since these may be reimbursable under ALE.
  • Work with qualified fire damage restoration professionals to assess, clean, and restore your property. A restoration company that documents conditions for your adjuster can help support your claim.

How Fire Damage Restoration Helps After an Insurance Claim

Professional fire damage restoration services play a critical role in returning your rental unit to a safe and livable condition after a fire. These specialists use advanced equipment and techniques to address both visible and hidden damage.

  • Smoke odor removal using specialized equipment and deodorization methods to restore indoor air quality.
  • Soot cleanup and surface restoration to prevent long-term staining and corrosion of affected materials.
  • Water damage mitigation and drying services, since firefighting efforts often leave behind significant water exposure.
  • Structural repair and full property restoration to rebuild damaged areas and return the unit to its pre-loss condition whenever possible.

Acting fast matters. The sooner soot and water are removed, the less permanent damage sets in, and the smoother your insurance claim tends to go.

Fire Damage Restoration and Repair - HydroForce Cleaning & Restoration

Get Expert Insurance Claims Support After Fire Damage

A fire in a rental is a devastating event that disrupts every part of daily life. Renters insurance in Illinois provides essential financial protection, but understanding your coverage, limits, and responsibilities is just as important as having a policy.

Even with insurance, recovery goes beyond filing a claim. Smoke, soot, water, and structural contamination linger long after the fire is out, and acting quickly reduces long-term damage while supporting a smoother claims process.

If you are dealing with fire damage in your rental, HydroForce Cleaning & Restoration provides comprehensive fire damage restoration designed to help you recover quickly and safely. Our team handles smoke damage, soot cleanup, water mitigation, odor removal, and full structural restoration, and we document conditions to support your insurance claim. Call us at (630) 835-0862 for emergency fire damage restoration in Chicago and the surrounding suburbs.


Frequently Asked Questions (FAQs)

Yes. A standard renters insurance policy in Illinois covers fire damage to your personal belongings, smoke and soot damage, and additional living expenses if your rental becomes uninhabitable, up to your policy limits and after your deductible. It does not cover the building structure, which is the landlord’s responsibility.

Yes. Smoke damage is typically covered under the same personal property coverage as fire, as long as the fire was a covered peril. Smoke particles can ruin clothing, electronics, and furniture without any direct flame contact.

Yes. Personal liability coverage can pay for damage to your landlord’s property or neighboring units if you accidentally cause a fire. Intentional fires and gross negligence are excluded.

Yes. Water damage that results from putting out a covered fire, including fire hoses and sprinkler systems, is typically covered because it is a direct result of the fire.

No state law requires it, but many Illinois landlords require it in the lease. It typically costs around $15 to $20 per month.

Only people named on the policy are covered. A roommate who is not listed needs their own policy. If an unlisted roommate causes a fire, your insurer may still cover your losses and then pursue the roommate for repayment.

Categories
Mold Remediation Restoration Tips

Mold Removal vs. Mold Remediation: What’s the Difference and Which Do You Need?

24/7 EMERGENCY SERVICE RESIDENTIAL & COMMERCIAL SERVICES

Mold Removal vs. Mold Remediation: What's the Difference?

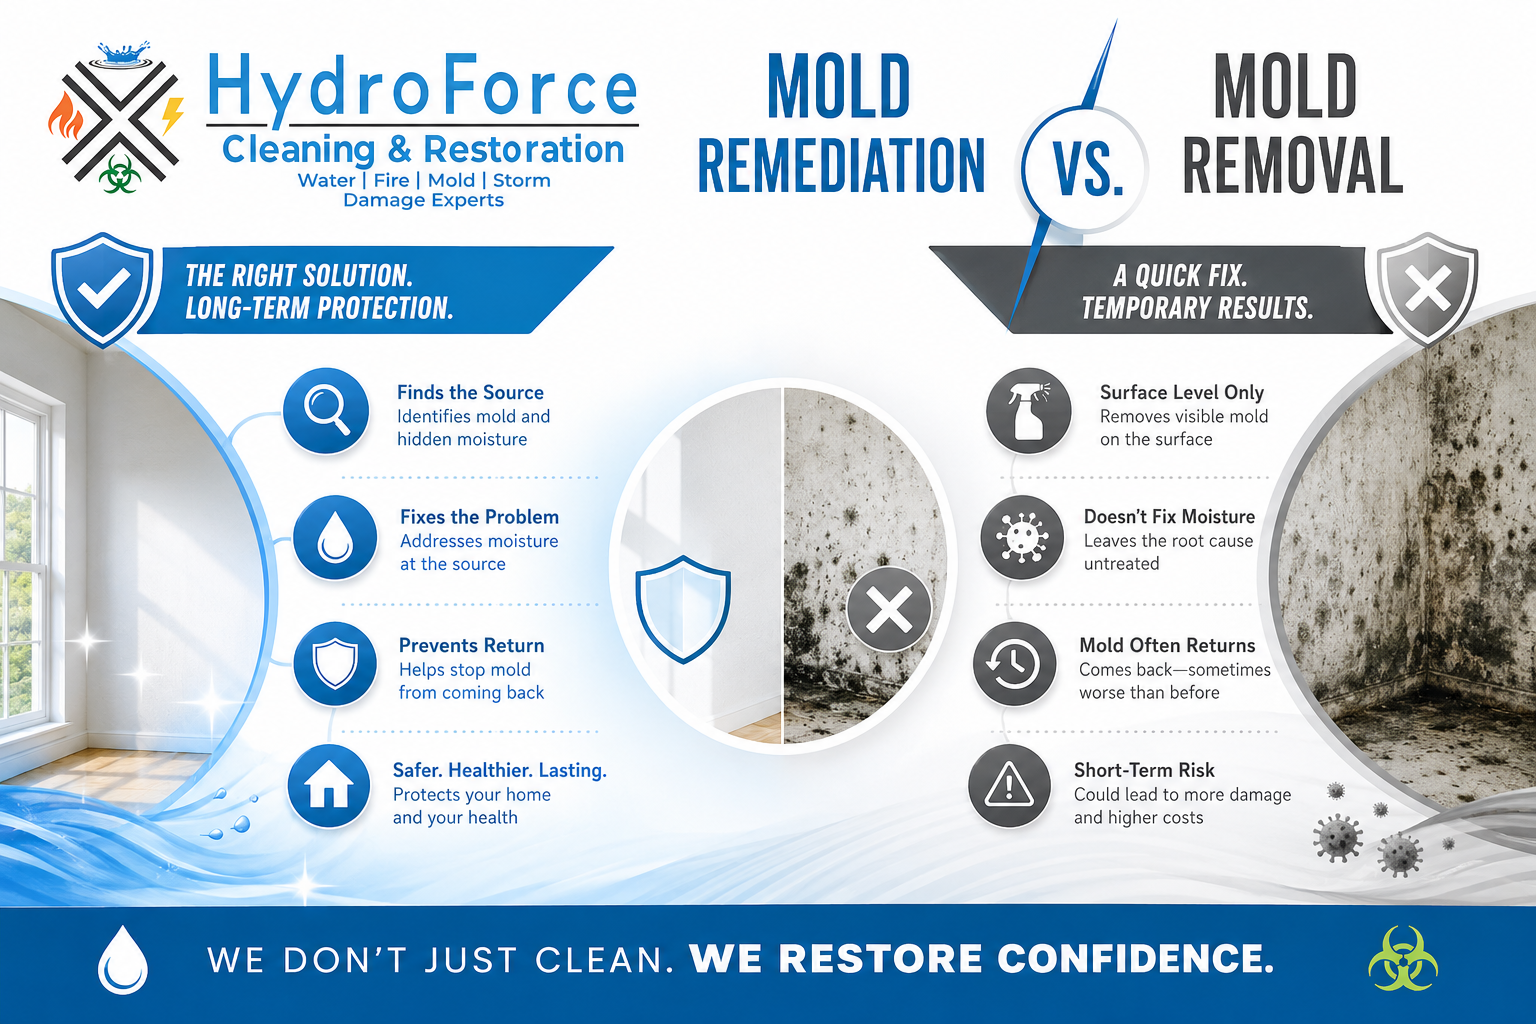
As a homeowner, it’s important to understand that mold problems may require professional mold removal or mold remediation services at some point. While these terms are often used interchangeably, they are not the same. Mold removal focuses on physically removing mold growth from affected surfaces, while mold remediation involves identifying and addressing the underlying moisture source to help prevent the mold from returning.

Homeowners in Chicago, IL, and surrounding areas commonly experience mold issues after flooding, plumbing leaks, excess humidity, roof leaks, or water damage that goes untreated.

In this article, we’ll explain the difference between mold removal and mold remediation, why understanding the distinction matters, and what each process involves. We’ll also cover the key differences between mold removal and remediation, how to determine which service you may need, what to expect during the process, and whether mold can be safely handled on your own or if it’s best to hire a professional.

Quick Answer: The Difference Between Mold Removal & Remediation

Mold removal focuses on cleaning and eliminating visible mold from surfaces, while mold remediation addresses both the mold and the moisture issue causing it. Mold remediation is considered the more complete long-term solution because it helps prevent mold from returning and improves indoor air quality.

What Is the Difference Between Mold Removal and Mold Remediation?

Although the terms “mold removal” and “mold remediation” are often used interchangeably, they refer to different processes. Understanding the difference is important because simply removing visible mold may not fully solve the problem if the underlying cause is left untreated.

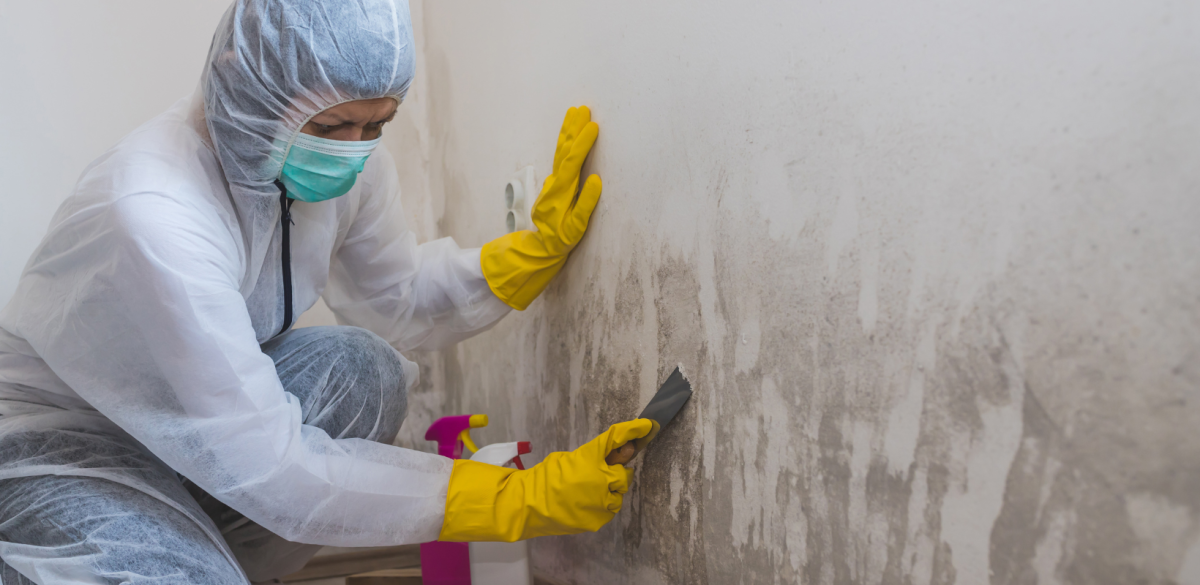
Mold removal focuses on physically removing mold growth from affected surfaces and materials. This may include cleaning or disposing of contaminated drywall, carpeting, insulation, or other porous materials. While mold removal can eliminate visible mold, it does not necessarily address the moisture issue that allowed the mold to grow in the first place.

Mold remediation is a more comprehensive process. In addition to removing and cleaning mold-contaminated areas, remediation involves identifying and correcting the source of moisture, such as leaks, humidity issues, or water damage. The goal of mold remediation is not only to clean up existing mold but also to help prevent it from returning in the future.

In many cases, effective mold remediation includes mold removal as one step within the overall process. By addressing both the mold itself and the conditions causing it, remediation provides a more complete and long-term solution for protecting your home and indoor air quality.

Difference Between Mold Removal and Mold Remediation - HydroForce Cleaning and Restoration

Why the Difference Between Mold Removal and Remediation Matters

Understanding the difference between mold removal and mold remediation is essential for addressing mold problems effectively. Mold removal may be sufficient for small, isolated areas of mold growth, but mold remediation is often necessary for persistent, recurring, or widespread mold issues. Remediation not only removes the mold but also addresses the underlying moisture problem to help create a healthier and safer indoor environment.

Working with certified mold professionals is important to ensure the problem is handled properly and thoroughly. A complete remediation process helps prevent mold from returning, protects your property from further damage, and improves the overall air quality within your home.

What Is Mold Removal?

Mold removal is the process of eliminating visible mold growth from affected surfaces and materials. This typically involves cleaning, scrubbing, and treating contaminated areas using specialized products and techniques designed to remove mold safely and effectively.

Mold removal is often used for smaller or isolated mold problems where the growth has not spread extensively throughout the property.

What Does Mold Removal Include?

The mold removal process generally includes several important steps to help clean and restore the affected area, including:

  • Inspection of the affected areas to identify visible mold growth
  • Containment measures to help prevent mold spores from spreading
  • Cleaning and disinfecting contaminated surfaces
  • Removal of heavily damaged or contaminated materials when necessary
  • Moisture control to reduce conditions that support mold growth
  • Preventative measures to help minimize future mold problems

While mold removal can improve the appearance and cleanliness of affected surfaces, it is important to understand that it may not fully resolve the underlying issue if the moisture source is not addressed.

Limitations of Mold Removal

Although mold removal can be effective in certain situations, there are several limitations homeowners should be aware of.

Incomplete Treatment of Porous Surfaces

Many household cleaners, including bleach, may only remove mold from the surface of non-porous materials like tile and glass. However, porous materials such as drywall, wood, carpeting, and insulation can absorb moisture and allow mold to continue growing beneath the surface.

Failure to Address the Moisture Source

Removing visible mold does not guarantee that the problem is gone permanently. If the underlying moisture issue such as a leak, humidity problem, or water intrusion is not corrected, mold is likely to return.

Airborne Mold Spores and Health Risks

Cleaning or disturbing mold can release microscopic spores into the air. Without proper containment and protective equipment, these spores can spread throughout the home and potentially trigger respiratory issues, allergic reactions, headaches, coughing, or eye irritation.

Limited Effectiveness of Certain Cleaning Products

Some cleaning products and biocides lose effectiveness as they dry or evaporate, potentially leaving moisture behind that can contribute to future mold growth. In some cases, these products may only provide a temporary cosmetic improvement.

Heavily Contaminated Materials May Need Replacement

When mold growth is extensive or deeply embedded in porous materials, cleaning alone may not be enough. Materials such as drywall, carpeting, insulation, or upholstered furniture may need to be removed and replaced.

Hidden Mold Growth

Mold is not always visible. It can grow behind walls, beneath flooring, inside crawl spaces, attics, or within HVAC systems, making it difficult to fully address without a professional inspection.

Safety and Regulatory Concerns

Using strong chemicals or biocides improperly indoors can create additional health risks. Professional mold remediation companies use HEPA filtration systems, containment barriers, and industry-approved procedures to help protect occupants during cleanup.

When Is Mold a Serious Health Risk?

Mold exposure can affect people differently depending on the type of mold, the amount of contamination, and individual sensitivities. While not all mold is considered toxic, prolonged exposure to mold spores can negatively impact indoor air quality and contribute to health concerns.

People who may be more vulnerable to mold exposure include:

  • Children and infants
  • Seniors
  • Individuals with asthma
  • People with allergies
  • Those with weakened immune systems
  • Individuals with respiratory conditions

If mold contamination is extensive or continues returning after cleaning, professional remediation is strongly recommended.

How Mold Affects Indoor Air Quality

How Mold Impacts Indoor Air Quality - HydroForce Cleaning and Restoration

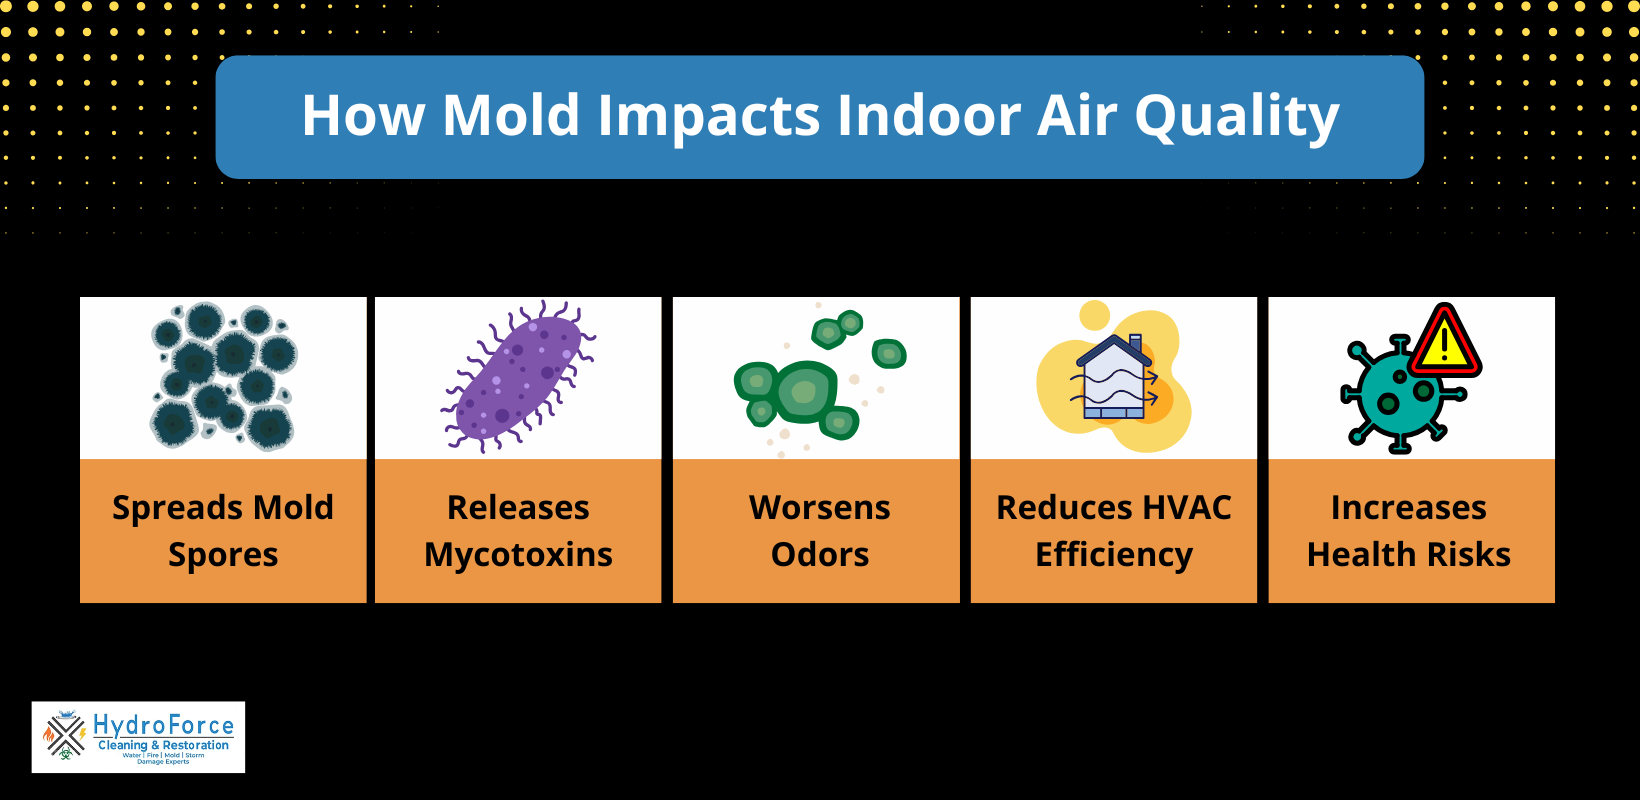
Mold can significantly impact indoor air quality by releasing microscopic spores into the air. These airborne particles can spread throughout the property through airflow, HVAC systems, and ventilation pathways.

Poor indoor air quality caused by mold contamination may contribute to:

  • Persistent musty odors
  • Increased allergy symptoms
  • Respiratory irritation
  • Reduced comfort within the home
  • Ongoing airborne contamination

Professional remediation often includes HEPA air filtration, containment systems, and moisture control measures to help restore healthier indoor air conditions.

What Is Mold Remediation?

Mold remediation is a comprehensive process designed to identify, contain, remove, and prevent mold growth in a home or building. Unlike basic mold removal, remediation focuses not only on cleaning visible mold but also on addressing the underlying moisture problem that allowed the mold to develop in the first place.

The goal of mold remediation is to restore a safe and healthy indoor environment while helping prevent future mold outbreaks.

What Does Mold Remediation Include?

Mold remediation involves several important steps to protect both the property and the health of those inside the home. The process typically includes:

  • Identifying the source of moisture contributing to mold growth
  • Inspecting visible and hidden areas for contamination
  • Containing affected areas to prevent the spread of spores
  • Removing mold-damaged materials when necessary
  • Cleaning and disinfecting affected surfaces
  • Drying and dehumidifying the space
  • Conducting post-remediation inspections or testing if needed

Because mold can spread quickly and hide behind walls, under flooring, or inside HVAC systems, professional remediation is often recommended for safe and effective treatment.

Step-by-Step Mold Remediation Process

Professional mold remediation companies follow a structured process to properly address mold contamination and reduce the risk of recurrence.

Assessment and Inspection

The first step is a thorough inspection to determine the presence and extent of mold growth. Professionals inspect both visible and hidden areas and may use moisture meters, hygrometers, and thermal imaging cameras to detect damp materials and elevated humidity levels.

Containment of the Affected Area

Once mold is identified, the affected area is contained to help prevent mold spores from spreading to other parts of the property. This may involve sealing rooms with plastic sheeting, creating negative air pressure, and limiting access to contaminated spaces.

Removal of Mold-Infested Materials

Porous materials heavily contaminated with mold, such as drywall, insulation, carpeting, or ceiling tiles, may need to be removed and safely discarded. Non-porous or semi-porous materials can often be cleaned using specialized mold-cleaning solutions and techniques.

Cleaning and Disinfection

After contaminated materials are removed, remaining surfaces are thoroughly cleaned and disinfected to eliminate residual mold spores and contaminants. Professionals may also use HEPA vacuums and air filtration equipment to improve indoor air quality during the process.

Drying and Moisture Control

Drying the affected area is a critical step in mold remediation. Professionals use dehumidifiers, fans, and proper ventilation to remove excess moisture and lower humidity levels, helping prevent mold from returning.

Post-Remediation Inspection and Prevention

Once remediation is complete and moisture levels are stabilized, additional air or surface testing may be performed to confirm that mold levels are safe. Professionals may also recommend repairs or preventative measures to reduce the risk of future mold growth.

Do You Need Mold Removal or Mold Remediation?

To determine whether you need mold removal or mold remediation in your home, it’s important to understand what each process involves.

Small, isolated mold spots on hard surfaces may only require mold removal. However, larger infestations, recurring mold growth, hidden contamination, or mold associated with water damage often require professional mold remediation.

In general:

  • Small isolated mold = mold removal may be sufficient
  • Recurring or widespread mold = remediation is usually recommended
  • Hidden mold growth = professional remediation is often necessary
  • Water damage-related mold = remediation is strongly advised

Mold Removal vs. Remediation Cost: What to Expect

Mold removal involves professionals physically eliminating visible mold, while mold remediation is a more comprehensive process that also identifies and addresses the underlying moisture source to help prevent future growth.

Because of this difference in scope, costs can vary significantly depending on the severity of the problem and the extent of the damage.

  • The national average of mold removal typically costs between $1,200 and $3,750, with the average homeowner spending approximately $2,368.
  • Professional mold remediation generally ranges from $1,500 to $9,000, with most homeowners paying around $3,500, depending on the size of the affected area and the complexity of the issue.

Can You Remove Mold Yourself or Should You Hire a Professional?

Mold removal may be handled as a DIY project when the affected area is small (generally less than 10 square feet) and located on non-porous, hard surfaces such as tile or glass. In these cases, careful cleaning with appropriate products may be sufficient.

However, if the mold covers a larger area, is hidden behind walls or under flooring, or is associated with structural damage or ongoing moisture issues, it is important to hire a professional mold remediation specialist. Professionals have the training and equipment to safely contain the contamination, address the underlying cause, and help prevent the mold from returning.

Read: Eco-Friendly Mold Removal & Prevention: Natural Ways to Stop Mold Growth

Protecting Your Home with Professional Mold Remediation

Mold Remediation in Chicago, IL- HydroForce Cleaning & Restoration

Mold issues should never be ignored, as even small growths can quickly develop into larger problems if moisture conditions remain unresolved. Understanding the difference between mold removal and mold remediation is the first step in choosing the right solution for your home. While mold removal may address visible growth on the surface, it does not always correct the underlying moisture issue that allowed the mold to develop. Mold remediation, on the other hand, provides a more complete approach by treating both the mold and its source, helping to reduce the risk of it returning.

For homeowners dealing with recurring, widespread, or hidden mold problems, professional remediation is often the safest and most effective option. Certified experts have the tools, training, and experience needed to properly contain contamination, eliminate affected materials, and restore healthy indoor air quality.

If you’re dealing with mold in your home, don’t wait for the problem to get worse. The team at HydroForce Cleaning & Restoration offers professional mold damage restoration services designed to fully address the issue at its source and help protect your property long-term.

Taking action early can help prevent costly repairs, protect your home’s structure, and ensure a safer living environment for you and your family. Give us a call at (630) 835-0862 if you need mold remediation in Chicago, IL or the surrounding areas.


Frequently Asked Questions (FAQs)

Mold removal focuses on physically cleaning or eliminating visible mold from surfaces. Mold remediation is a more comprehensive process that not only removes mold but also identifies and addresses the underlying moisture source to help prevent it from returning.

Yes. If the moisture problem that caused the mold is not resolved, mold can return even after cleaning or removal. This is why remediation is often necessary for long-term prevention.

Small, isolated mold spots on hard surfaces may only require removal. However, larger infestations, recurring mold, or hidden growth behind walls or under flooring typically require professional mold remediation.

DIY mold removal may be safe for very small areas (under 10 square feet) on non-porous surfaces. Larger areas can release airborne spores and may pose health risks, making professional remediation the safer option.

Categories
Mold Remediation Restoration Tips

How to Remove Mold from Concrete: Step-By-Step Mold Removal Guide

24/7 EMERGENCY SERVICE RESIDENTIAL & COMMERCIAL SERVICES

Mold on concrete is a common issue in basements, garages, patios, and crawl spaces where moisture tends to accumulate. Because concrete is porous, it can absorb water and trap organic debris, creating the perfect environment for mold growth. According to the EPA, mold exposure can trigger allergic reactions, respiratory irritation, and asthma symptoms in sensitive individuals.

In this article, we’ll cover how mold forms on concrete, key safety precautions to take before removal, effective DIY cleaning methods, deeper treatment options for porous concrete, strategies to prevent regrowth, and when it’s time to seek professional help for a mold infestation.

Quick Answer: How to Remove Mold from Concrete (Step-by-Step)

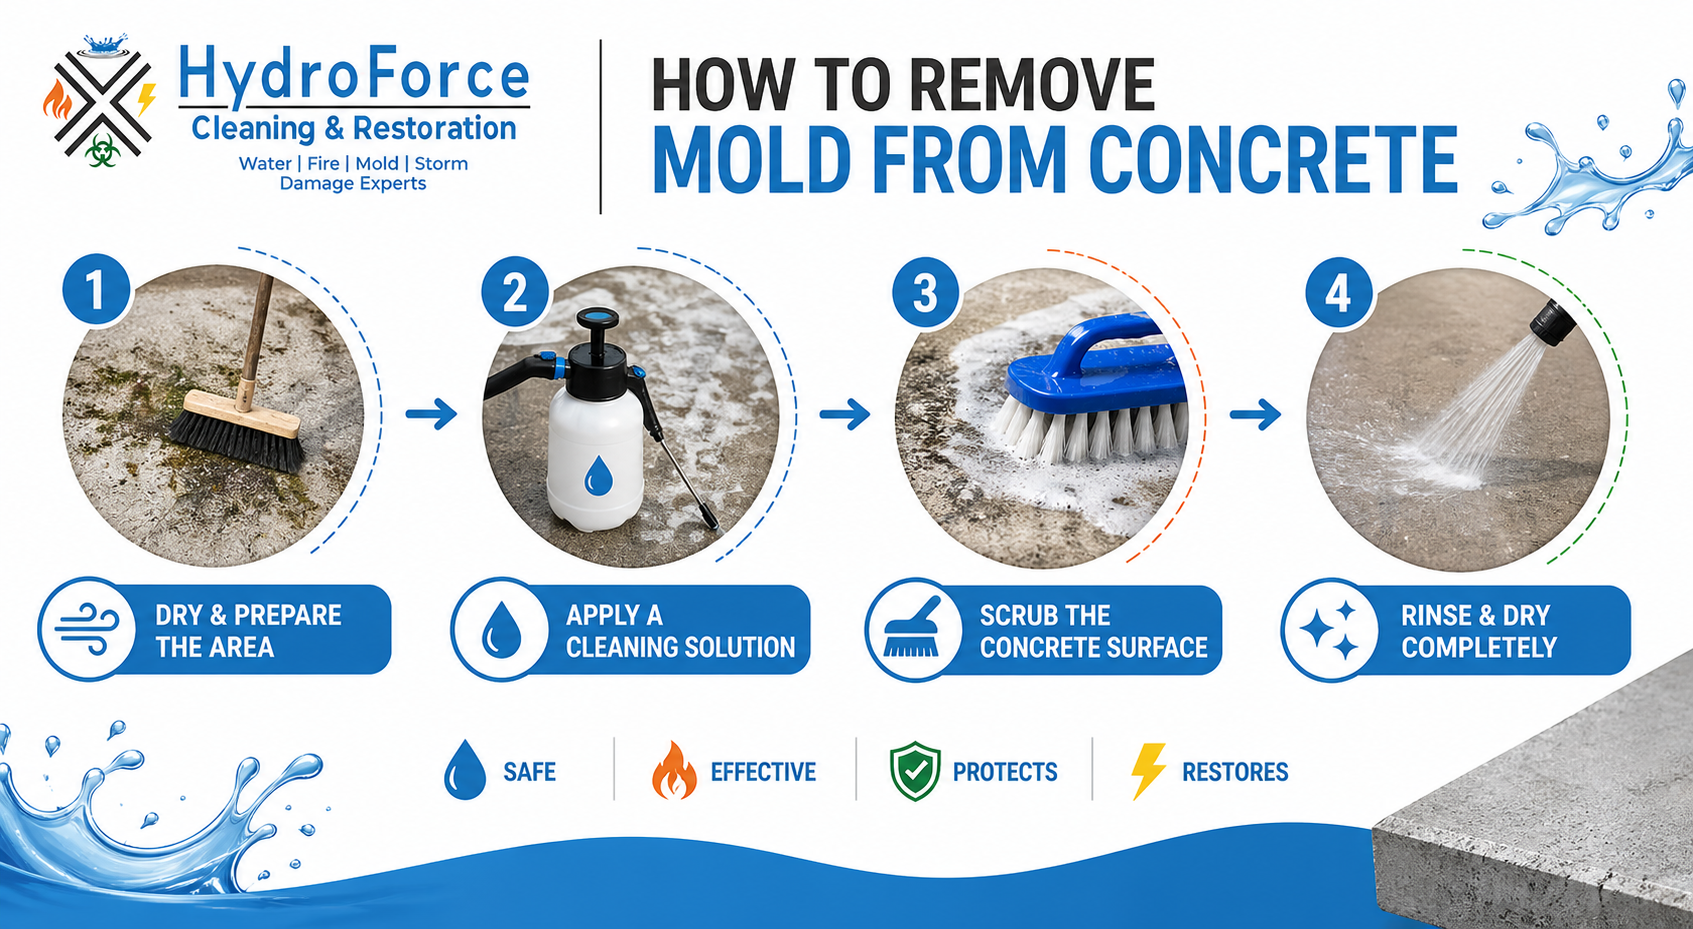
Mold can often be removed from concrete using household or commercial cleaners. However, because concrete is porous, deep or recurring mold growth usually requires addressing the underlying moisture problem or professional remediation.

  1. Dry the concrete surface completely
  2. Apply a mold-killing solution (vinegar, bleach, or commercial cleaner)
  3. Let it sit for 10–60 minutes, depending on the solution
  4. Scrub with a stiff-bristle brush
  5. Rinse thoroughly with clean water
  6. Dry the area completely to prevent regrowth

What Kills Mold on Concrete Instantly?

Different cleaning solutions work at different speeds and depths:

  • Bleach: Kills surface mold quickly but does not penetrate porous concrete
  • Vinegar: Slower acting, but penetrates deeper and helps prevent regrowth
  • Hydrogen peroxide: Effective for disinfecting and breaking down mold structure
  • Commercial mold removers: Designed for deep or stubborn mold infestations

For fast visible results, bleach works quickly. For long-term effectiveness, deeper-penetrating solutions or professional treatment are more reliable.

Read: Eco-Friendly Mold Removal & Prevention Methods

Why Mold Grows on Concrete Surfaces

Concrete may appear solid, but it is naturally porous. This means it can absorb moisture from leaks, humidity, condensation, or flooding.

Concrete Porosity and Moisture Absorption

When moisture enters concrete, it creates damp conditions where mold spores can thrive. Dust, dirt, and organic matter trapped in the surface also provide nutrients that support mold growth. Mold can begin growing within 24 to 48 hours after moisture exposure if conditions are right.

Common Areas Where Mold Grows on Concrete

Mold is most common in areas with poor airflow and high humidity, including:

  • Basement floors and walls
  • Garage floors
  • Crawl spaces
  • Concrete patios and sidewalks
  • Foundation walls

Without proper moisture control, mold can quickly spread across these surfaces and return even after cleaning.

Is Mold on Concrete Dangerous?

Mold on concrete is not just a cosmetic issue. It can impact both health and property:

  • Health risks: Allergies, respiratory irritation, asthma flare-ups
  • Air quality issues: Mold spores can spread indoors
  • Structural concerns: Long-term moisture can weaken surrounding materials

If mold growth is extensive or recurring, it may indicate a larger moisture problem that needs to be addressed.

Safety Precautions Before Mold Removal

Before starting any mold removal process, safety is critical.

Protective Equipment You Should Always Wear

Use the following:

  • N95 mask or respirator
  • Gloves
  • Long sleeves and long pants
  • Protective goggles

Ventilation and Containment

  • Open windows and doors for airflow
  • Use fans if possible
  • Seal off the affected area to prevent spores from spreading

If mold coverage is extensive or exposure causes irritation, avoid DIY cleanup and contact your local mold remediation experts.

How to Remove Mold from Concrete (DIY Methods That Work)

How to Remove Mold from Concrete - HydroForce Cleaning and Restoration

There are several ways to remove mold from concrete, and the best method depends on the size and severity of the affected area.

Step 1: Dry and Prepare the Area

Remove any standing water and dry the surface as much as possible. Mold is easier to remove from a dry surface.

Step 2: Apply a Cleaning Solution

Choose one of the following based on severity:

Soap and Water (Light Mold)

  • Mix 1 cup dish soap with 1 gallon water
  • Scrub with a stiff brush
  • Rinse thoroughly

Vinegar Solution (Natural Option)

  • Mix equal parts white vinegar and water
  • Spray onto the surface
  • Let sit for 60 minutes
  • Scrub and rinse

Bleach Solution (Heavy Mold)

  • Mix 1 part bleach with 3 parts water
  • Apply and let sit for 10 to 15 minutes
  • Scrub thoroughly and rinse well

Important: Never mix bleach with other cleaners.

Commercial Mold Removers (Severe Cases)

These are stronger formulations designed for deep or recurring mold issues on concrete.

Step 3: Scrub the Concrete Surface

Use a stiff-bristle, non-metal brush to lift mold from the porous surface. Apply firm pressure but avoid damaging the concrete.

Step 4: Rinse and Dry Completely

Rinse the area thoroughly with clean water and allow it to dry fully. Proper drying is critical to prevent regrowth.

Comparison of Mold Cleaning Solutions

SolutionBest ForProsCons
VinegarLight to moderate moldNatural, penetrates porous surfaces, helps prevent regrowthSlower results, strong odor
BleachSurface moldFast-acting, widely availableDoes not penetrate concrete, can leave moisture behind
Hydrogen PeroxideDisinfection and moderate moldKills mold spores, less harsh than bleachMay require multiple applications
Commercial Mold CleanerHeavy or recurring moldStrong, designed for deep penetration and long-term resultsHigher cost, may contain harsh chemicals

Deep Mold Removal from Concrete

Concrete can allow mold to penetrate below the surface, especially in humid or flooded environments.

Pressure Washing vs Manual Scrubbing

A pressure washer can help remove embedded mold, but it should be used carefully:

  • Pre-treat with detergent
  • Use moderate pressure only
  • Avoid surface damage

When Mold Has Penetrated the Surface

If mold keeps returning after cleaning, it may have reached deeper layers of concrete. This usually indicates a moisture issue that needs correction, not just surface cleaning.

Cost to Remove Mold from Concrete

The cost depends on severity and whether you choose DIY or professional services:

  • DIY cleaning: $10 to $50 for supplies
  • Professional remediation: $500 to $3,000+ depending on size and severity

If mold covers a large area or keeps returning, professional treatment is typically more cost-effective long term.

DIY vs Professional Mold Removal on Concrete

DIY is effective when:

  • Mold covers a small area
  • Growth is surface-level
  • No ongoing moisture issue

Professional remediation is needed when:

  • Mold covers more than 10 square feet
  • Mold keeps returning
  • There is a strong musty odor
  • Moisture problems are ongoing

Professionals can identify hidden moisture sources and ensure mold is fully removed, not just cleaned from the surface.

How to Prevent Mold From Coming Back on Concrete

How to Prevent Mold on Concrete - HydroForce Cleaning and Restoration

Preventing regrowth is just as important as removal.

Control Moisture Sources

  • Fix leaks and water intrusion
  • Improve drainage around the foundation
  • Reduce humidity in basements and crawl spaces

Seal the Concrete Surface

Apply mold-resistant sealants or coatings to reduce moisture absorption.

Improve Ventilation

  • Use exhaust fans in basements and garages
  • Increase airflow in enclosed areas
  • Reduce condensation buildup

Regular Cleaning

Routine cleaning helps remove dust and organic buildup that supports mold growth.

When to Call a Professional Mold Remediation Company

DIY methods are only effective for small surface mold. You should contact a professional if:

  • Mold covers more than 10 square feet
  • Mold keeps returning after cleaning
  • There is a strong musty odor
  • You suspect hidden mold inside walls or floors
  • Moisture problems are ongoing

Attempting to clean large infestations yourself can spread spores and worsen the problem.

Protect Your Home with Mold Remediation from HydroForce

Mold on concrete often signals a deeper moisture issue that surface cleaning alone will not fix. If mold keeps coming back or continues to spread, a professional inspection can identify the root cause and prevent further damage.

HydroForce Cleaning & Restoration specializes in identifying moisture sources, removing mold safely, and restoring affected areas using advanced remediation techniques. Their team ensures mold is fully eliminated, not just temporarily cleaned.

If you’re dealing with persistent mold in your home or business, scheduling a professional mold inspection can help you avoid larger structural damage and ongoing health risks.


Frequently Asked Questions (FAQs)

To permanently remove mold from concrete, you must eliminate both the mold and the moisture source causing it. Clean the surface using a mold-killing solution such as vinegar, bleach, or a commercial cleaner, then scrub thoroughly with a stiff brush and rinse. However, long-term removal depends on fixing underlying moisture issues such as leaks, poor drainage, or high humidity. Without moisture control and proper sealing, mold will likely return even after cleaning.

White vinegar typically takes about 60 minutes to effectively kill mold on concrete surfaces. After spraying undiluted or lightly diluted vinegar onto the affected area, it should be left to sit for at least one hour so it can break down the mold structure. Once the dwell time is complete, scrub the surface with a stiff brush and rinse thoroughly. For porous concrete, multiple applications may be needed for full effectiveness.

Mold keeps coming back on concrete because the underlying moisture problem has not been resolved. Concrete is porous, so it absorbs water from humidity, leaks, condensation, or poor drainage. Even after surface cleaning, trapped moisture inside the material can allow mold spores to reactivate and regrow. Recurring mold is usually a sign that the area needs better ventilation, sealing, or professional moisture remediation.

Vinegar is generally better for routine mold removal because it is safer, eco-friendly, and can penetrate slightly into porous surfaces. Bleach is stronger and may remove visible surface mold faster, but it does not penetrate deeply into concrete and can leave moisture behind, which may allow regrowth. For light to moderate mold, vinegar is often sufficient. For heavy contamination, a professional-grade cleaner or remediation service is more effective than relying on bleach alone.

Categories
water damage

Top Causes of Water Damage in Chicago: How to Protect Your Home from Floods & Leaks

24/7 EMERGENCY SERVICE RESIDENTIAL & COMMERCIAL SERVICES

Top Causes of Water Damage in Chicago: How to Protect Your Home

In just two short months during the summer of 2023, over 12,000 cases of water damage were reported in Chicago, highlighting just how common and costly this issue can be for homeowners. Understanding the top causes of water damage in Chicago is essential not only for preventing expensive repairs but also for protecting your home and family.

In this guide, we’ll explore the most frequent culprits behind water-related disasters in Chicago homes, share tips to minimize risks, and explain when it’s time to call in professional water damage restoration experts.

What is Water Damage and Why It’s a Risk for Chicago Homes

Water damage occurs when unwanted moisture intrudes into your home, leading to both immediate problems and long-term consequences. Beyond obvious inconveniences like wet floors or damaged furniture, water can compromise your home’s structural integrity, promote mold growth, and result in costly personal property loss.

Due to aging infrastructure and increasingly intense, climate-driven storms, roughly 37.8% of properties in Chicago, over 227,000 homes, are at risk of flooding, making awareness and prevention more important than ever.

Types of water damage homeowners may encounter:

  • Clean water: Often from burst pipes or leaking faucets, this type is generally safe initially but can still cause structural damage if left untreated.
  • Gray water: Originating from appliance leaks, washing machines, or dishwashers, gray water can contain bacteria and requires prompt cleanup to prevent mold growth.
  • Black water: The most hazardous, black water comes from flooding or sewer backups and poses serious health risks along with extensive property damage.

Recognizing the type and source of water damage early is critical for mold prevention and protecting your home’s foundation.

Common Causes of Water Damage in Chicago Homes

Common Causes of Water Damage in Chicago - HydroForce Cleaning and Restoration

Understanding the top causes of water damage in Chicago homes allows homeowners to take proactive measures. Here are the most frequent culprits:

1. Heavy Rain and Seasonal Storms

Chicago’s summer storms and seasonal heavy rainfall can quickly overwhelm drainage systems, leading to basement flooding and water intrusion through foundations or exterior walls. Even moderate storms can cause significant damage in older homes without proper waterproofing.

2. Basement Flooding

Basements are particularly vulnerable to water damage. Cracks in foundations, poor soil grading, or malfunctioning sump pumps can allow water to seep in, damaging floors, walls, and stored belongings. Routine inspections and mold prevention measures are essential to protect these often-used spaces.

3. Plumbing Failures and Burst Pipes

A burst pipe or a sudden plumbing failure can release large volumes of clean water in a short time. Homes with older plumbing systems are especially at risk, and unchecked leaks can cause structural damage, ruined furniture, and flooring issues.

4. Appliance Leaks: Washing Machines, Dishwashers, and More

Leaking appliances are a common source of water damage. Washing machines, dishwashers, and water heaters can develop cracks or loose connections, producing gray water that, if ignored, may lead to mold growth and damage to cabinets, walls, and flooring.

5. Roof and Window Leaks

Damaged roofing or poorly sealed windows let rainwater enter your home, causing damage to ceilings, walls, and insulation. Over time, these leaks can compromise the home’s structure and encourage hidden mold development.

6. Sewer and Drain Backups

One of the most dangerous causes of water damage is black water from sewer backups or clogged drains. This water carries harmful bacteria and contaminants, making professional cleanup essential to protect health and property.

How Chicago Homeowners Can Prevent Water Damage

Preventing water damage in Chicago requires a combination of proactive home maintenance, flood preparedness, and regular inspections. By addressing the most common sources of water intrusion, homeowners can protect their property, prevent mold growth, and avoid costly repairs.

Here are practical steps you can take:

  • Maintain your roof, gutters, and downspouts: Ensure shingles are intact, clean debris from gutters regularly, and direct downspouts away from your foundation to prevent basement flooding. Proper waterproofing of exterior surfaces can also keep rainwater out.
  • Inspect plumbing and appliances regularly: Check pipes, faucets, and appliances like washing machines and dishwashers for leaks. Early detection of home water leaks can prevent major damage from both clean and gray water sources.
  • Install and maintain sump pumps: A functional sump pump is essential for homes with basements. Test pumps before the rainy season to ensure they’re ready to handle heavy rainfall and prevent water accumulation.
  • Seal basement cracks and grade soil away from your home: Small foundation cracks can allow water to seep in, so seal them promptly. Additionally, proper soil grading ensures rainwater flows away from your home rather than pooling near the foundation.

Regular attention to these areas is crucial for long-term home maintenance and mold prevention. By combining preventive measures with awareness of potential hazards, Chicago homeowners can significantly reduce the risk of water damage and protect both their property and their peace of mind.

Read: Best Detection Methods to Find Water Leaks in Your House

When to Call a Professional Water Damage Restoration Company in Chicago

While minor leaks can sometimes be handled DIY, professional help is essential in many situations.

You should call an expert if you experience:

  • Major flooding from storms, sewer backups, or burst pipes that overwhelm your home’s capacity to dry safely.
  • Visible or suspected mold growth can spread quickly and pose health risks if not treated properly.
  • Insurance documentation needs, where accurate records and professional reports are required to process claims efficiently.

HydroForce Cleaning & Restoration is a trusted Chicago water damage company with years of experience helping homeowners recover from water-related disasters. We provide professional water damage restoration services, including emergency water cleanup, structural drying, and comprehensive documentation for insurance purposes. With their rapid response and expert techniques, you can safeguard your home, prevent further damage, and restore your property with confidence.

Quick Checklist: Protect Your Home from Water Damage in Chicago

  1. Inspect roofs, windows, and gutters before storm season.
  2. Check plumbing, appliances, and water heaters for leaks monthly.
  3. Test sump pumps and ensure proper basement grading.
  4. Seal foundation cracks and waterproof vulnerable areas.
  5. Call HydroForce Cleaning & Restoration immediately if severe water damage occurs.

Water Damage Restoration - HydroForce Cleaning & Restoration

Protect Your Home from Water Damage in Chicago

Water damage in Chicago can strike in many forms, from heavy rains and seasonal storms to basement flooding, plumbing failures, appliance leaks, roof or window leaks, and sewer backups. Understanding these common causes is the first step in protecting your home and minimizing costly repairs.

Prevention is key. Regular home maintenance, proper waterproofing, routine inspections of plumbing and appliances, functional sump pumps, and sealed foundations can go a long way in mold prevention and keeping your property safe from water intrusion.

Even with the best precautions, some situations require professional expertise. HydroForce Cleaning & Restoration, Chicago’s trusted experts in professional water damage restoration, are ready to help with emergency water cleanup, basement cleanup, mold remediation, and storm damage repair. Our experienced team can assess the damage to your home, prevent further damage, and guide you through insurance documentation.

Don’t wait for a small leak to become a major problem. Schedule a free water damage inspection for your Chicagoland home with HydroForce today and ensure your home stays safe, dry, and protected. Call us at (630) 835-0862 today to request your free estimate.


Frequently Asked Questions (FAQs)

The most frequent causes include heavy rain and seasonal storms, basement flooding, plumbing failures, appliance leaks, roof or window leaks, and sewer or drain backups. Recognizing these sources early helps homeowners prevent costly repairs and mold growth.

Prevent basement flooding by maintaining sump pumps, sealing foundation cracks, grading soil away from your home, and ensuring gutters and downspouts are clear and functional. Regular inspections are key to protecting your property.

Common signs include wet or warped floors, musty odors, stained walls or ceilings, higher-than-normal water bills, and visible mold growth. Early detection can prevent further structural damage and health risks.

Call a professional immediately if you experience major flooding, black water from sewer backups, visible mold growth, or if insurance documentation is required. Professionals can safely restore your home and prevent long-term damage.

Yes. Appliances like washing machines, dishwashers, and water heaters can produce gray water that damages flooring, cabinets, and walls. Prompt repair or professional cleanup prevents mold and structural issues.

Categories
Fire and smoke damage restoration Restoration Tips

What Is Ghosting on Walls and Ceilings and How Do You Remove It?

24/7 EMERGENCY SERVICE RESIDENTIAL & COMMERCIAL SERVICES

Ghosting on walls and ceilings can look alarming, but it’s usually manageable and not dangerous. Whether you’re dealing with minor stains you can clean yourself or larger areas that may require professional restoration help, ghosting is a common issue with practical solutions.

In this guide, we’ll cover what ghosting is, its causes, whether it’s a health risk, how to remove it, and steps you can take to prevent future wall and ceiling discoloration.

What Is Ghosting on Walls and Ceilings?

Ghosting stains, also called thermal ghosting or soot stains, appear as dark streaks or lines on walls and ceilings. These marks are often mistaken for smoke damage or mold growth, but they are not microbial.

Ghosting forms when airborne particles like dust, soot, or dirt stick to cooler surfaces. Condensation caused by temperature differences makes these particles adhere. Over time, the patterns reveal the underlying structure behind the drywall, a process known as thermal tracking.

While ghosting is generally harmless, it can indicate humidity issues, poor ventilation, or insulation gaps that should be addressed to prevent recurrence.

Quick Definition: Ghosting is the buildup of airborne particles on cooler wall and ceiling surfaces, often forming dark streaks along studs or joists.

What is Ghosting on Walls and Ceilings - HydroForce Cleaning and Restoration

Common Causes of Ghosting Stains

Ghosting can develop for several reasons in both homes and commercial buildings. Most causes are related to airborne particles, temperature differences, and moisture conditions. Here are the most common contributors.

1. Indoor Soot and Air Particle Buildup

When soot, dust, or other fine particles circulate through the air, they eventually settle on walls and ceilings. Over time, this buildup becomes visible as dark streaks or shadowy lines. Common sources include candles, fireplaces, cooking residue, cigarette smoke, and even everyday household dust.

2. Thermal Bridging and Insulation Patterns

Gaps or inconsistencies in insulation can allow cold air to enter a building, creating cooler areas along framing members. These cold spots attract airborne particulates, which cling to the surface and form stains. This process, known as thermal bridging, often produces straight lines that mirror the studs, joists, or other structural elements behind the drywall.

3. Humidity and Poor Ventilation

High humidity makes condensation more likely to form on cooler surfaces. When moisture collects on walls or ceilings, it traps dust and soot, gradually creating visible lines or patches.

Ghosting is especially common in damp or poorly ventilated spaces such as bathrooms, kitchens, laundry rooms, and cold storage areas. In some cases, heavy staining may even point to a larger moisture problem, like a ceiling leak.

4. Indoor Air Quality Issues

If the air contains elevated levels of smoke, soot, or fine debris, ghosting becomes more likely. Activities like burning candles, cooking, or running fuel-burning appliances can increase particulate concentrations and speed up staining.

Areas with significant airflow, such as near doors, windows, and HVAC vents, are particularly vulnerable because particles are constantly moving across cooler wall and ceiling surfaces.

Are Ghosting Stains Dangerous or a Sign of Mold?

Ghosting stains are not dangerous and do not indicate mold growth. They result from condensation attracting airborne particles, not microbial activity. However, ghosting can point to underlying issues such as:

Addressing these issues prevents recurring stains and maintains a healthier home environment.

How to Remove Ghosting from Walls and Ceilings

Removing ghosting from your ceiling typically involves a combination of cleaning and, in some cases, repainting. Here’s how to tackle it safely and effectively.

Cleaning Soot and Dust Safely

There are a few effective ways to clean ghosting stains from walls and ceilings:

  • Detergent Solution: For minor ghosting caused by soot or smoke, mix warm water with a small amount of dish detergent. Use a sponge to gently scrub the stained area, rinsing the sponge frequently. Once clean, dry the surface with a towel.
  • Bleach Solution: For stubborn stains, mix one part bleach with three parts water. Always wear gloves and a mask, and ensure proper ventilation. Apply the solution with a sponge, let it sit for five minutes, then wipe it away with clean water.

Repainting to Cover Remaining Stains

If cleaning doesn’t fully remove the ghosting, repainting may be necessary. Start with a primer on the stained area, then apply paint that matches your ceiling color. This effectively hides any lingering marks.

When to Call a Professional

If ghosting covers a large area or persists despite your efforts, it’s best to contact a professional restoration company. Experts can safely clean, repair, and repaint surfaces to restore your walls and ceilings.

Ghosting on a Ceiling - HydroForce Cleaning and Restoration

How to Prevent Ghosting and Future Wall Staining

Taking proactive steps can help you avoid ghosting and long-term staining on your walls and ceilings. Here’s what you should do:

  • Improve Indoor Air Quality: Ensure your walls and attic are properly insulated to minimize temperature differences and prevent cold spots, which can attract dust and soot.
  • Reduce Soot in the Home: Maintain proper ventilation when cooking, burning candles, or using fireplaces to prevent soot buildup that can lead to ghosting.
  • Maintain Your HVAC System: Replace filters on a regular schedule to keep your HVAC system running efficiently and reduce the circulation of dust and particulates.
  • Enhance Home Ventilation: Ensure all areas of your home have adequate airflow, especially high-moisture spaces like bathrooms, kitchens, and laundry rooms. Proper ventilation reduces condensation and prevents ghosting.
  • Control Indoor Humidity: Use dehumidifiers or adjust HVAC settings to maintain low indoor humidity, which helps prevent soot and dust from sticking to walls and ceilings.
  • Use an Air Purifier: A quality air purifier can capture soot, dust, and other airborne particles before they settle on surfaces.
  • Address Insulation and Structural Gaps: Inspect and repair any gaps in insulation or framing to prevent cold air from creating thermal bridges. This helps reduce the conditions that lead to ghosting and staining over time.

Get Expert Help Today

While ghosting is generally not dangerous, it can be unsightly and, in some cases, signal underlying moisture issues that need attention. If you’re dealing with extensive stains, persistent discoloration, or signs of water damage, professional help is the safest way to restore your home or business.

HydroForce Cleaning and Restoration specializes in fire damage restoration, soot removal, wall and ceiling cleaning, and comprehensive repairs. Their experts can remove ghosting, address moisture problems, and ensure your property looks clean and safe.

Don’t let ghosting or hidden water damage compromise your home. Call HydroForce Cleaning and Restoration today at (630) 835-0862 to schedule an inspection and get professional help restoring your walls and ceilings.


Frequently Asked Questions (FAQs)

Yes, ghosting can return if the underlying causes like condensation, poor insulation, high humidity, or airborne soot are not addressed. Cleaning removes the visible stains, but preventing recurrence requires improving ventilation, controlling humidity, and addressing insulation gaps.

Black streaks or stains often appear in winter because colder surfaces attract airborne particles through thermal tracking. Dust, soot, and other particulates stick to these cooler areas, creating ghosting lines, especially in homes with poor insulation or temperature differences between walls and ceilings.

Not always, but ghosting can indicate elevated levels of dust, soot, or smoke particles in the air. Poor ventilation, frequent candle burning, fireplaces, cooking smoke, or HVAC issues can contribute to airborne particles that settle on cooler surfaces, causing ghosting.

No. Painting over ghosting without cleaning or addressing the root cause will likely only provide a temporary fix. The stains may bleed through the new paint over time. Always clean the area first, apply a primer, and resolve humidity, insulation, or air quality issues to prevent recurrence.

Black streaks in corners often result from thermal bridging or condensation in areas where walls meet ceilings or other surfaces. These cooler corners attract airborne particles such as dust, soot, and smoke, which accumulate and create visible streaks. Poor ventilation or high humidity can make this more pronounced.

Categories
Restoration Tips water damage

How to Prevent Pipes from Freezing in Chicago: Expert Winter Plumbing Guide

24/7 EMERGENCY SERVICE RESIDENTIAL & COMMERCIAL SERVICES

Frozen pipes are a common winter problem in Chicago, and they can cause expensive water damage if not prevented. Knowing how to protect your home’s plumbing during harsh Chicago winters is essential. Even with precautions, accidents can happen, so it’s important to know how to respond quickly to prevent further damage.

In this guide, we’ll explain why pipes freeze in Chicago, which pipes are most at risk, effective prevention strategies, safe ways to thaw frozen pipes, and when to call an emergency professional. By following these tips, you can keep your home safe, avoid costly repairs, and ensure your plumbing stays functional all winter long.

Why Frozen Pipes Are a Serious Problem in Chicago Winters

Chicago winters are severe, with average January lows around 18.8°F and more than 120 days each year below freezing, conditions that make pipe freezing a real threat for homeowners. When pipes freeze, water expands inside them, which can lead to cracks or bursts. A single burst pipe can flood your basement, damage walls and floors, and create costly repair bills.

When pipes freeze, water expands inside them, which can lead to cracks or bursts. A single burst pipe can flood your basement, damage walls and floors, and create costly repair bills.

Professional water damage restoration companies, like HydroForce Cleaning and Restoration, recommend proactive prevention and rapid response to protect homes. Acting quickly when a pipe freezes is essential to avoid extensive damage.

At What Temperature Do Pipes Freeze in Chicago?

Pipes typically freeze around 20°F, but wind chill and exposure can accelerate freezing. Outdoor pipes, pipes in exterior walls, basements, garages, and crawl spaces are especially vulnerable.

Tips to Protect Vulnerable Pipes:

  • Install pipe insulation sleeves or heat tape on exposed pipes.
  • Ensure basement and crawl space plumbing is properly weatherized.
  • Protect garage and outdoor water lines from fluctuating temperatures.

Frozen Pipe Water Damage - HydroForce Cleaning and Restoration

What Pipes Are Most Likely to Freeze in Chicago Homes?

Some pipes in your home are more prone to freezing than others. Understanding which pipes are most at risk helps you focus your winter plumbing precautions:

  • Exterior wall and attic pipes: Prone to freezing if the home isn’t kept warm.
  • Basement and crawl space pipes: Require insulation and sleeves.
  • Garage pipes: Risk increases with frequent garage door openings.
  • Older plumbing: Historic Chicago homes may have pipes needing extra care, like heat tape or protective sleeves.

7 Proven Ways to Prevent Frozen Pipes in Chicago

Chicago winters can be brutal, and frozen pipes are a common risk for homeowners. Fortunately, there are several effective ways to protect your plumbing and prevent costly water damage.

1. Insulate Exposed Pipes

Proper insulation is one of the most important steps in preventing frozen pipes. Use pipe insulation sleeves, heat tape, or heat cables on exposed pipes, and don’t forget areas like basements and crawl spaces, which are particularly vulnerable.

2. Maintain Consistent Indoor Temperatures

Keeping your home at a steady, warm temperature helps prevent pipes from freezing. During cold snaps, set your thermostat to at least 55°F and avoid lowering it too much, even when you’re away.

3. Let Faucets Drip During Extreme Cold

Allowing a slow, steady flow of water through your pipes can keep them from freezing. During sub-freezing temperatures, let both hot and cold-water lines drip at roughly one gallon per hour. Faucets in vulnerable areas, like kitchens and bathrooms, are especially important to keep moving.

4. Seal Drafts and Air Leaks

Cold air seeping into your home can put pipes at risk. Seal drafty basement windows, gaps in the foundation, and any exterior wall penetrations. Close crawl space vents during freezing weather and consider having a professional address larger gaps to keep your home and pipes safe.

5. Open Cabinet Doors

Air circulation can make a big difference in preventing frozen pipes. Keep cabinet doors open under sinks, vanities, and any areas along exterior walls to allow warm air to reach the plumbing. This simple step can prevent pipes from freezing and potentially bursting.

6. Protect Outdoor Spigots and Water Lines

Disconnect garden hoses, cover outdoor faucets, and insulate external pipes. Small measures can prevent major winter plumbing issues.

7. Winterize Basements and Crawl Spaces

Install insulation, close vents, and ensure heating reaches these areas. Protecting hidden pipes can prevent unseen damage that leads to costly repairs.

By taking these precautions, you can reduce the risk of frozen pipes and avoid costly water damage during Chicago’s harsh winter months.

Prevent Frozen Pipes in Your Chicago Home - HydroForce Cleaning and Restoration

How to Protect Pipes When You’re Away from Home

Heading out on a winter vacation? Take these precautions before leaving:

  • Set your thermostat to at least 60°F.
  • Shut off the main water supply to reduce flooding risk.
  • Drain pipes completely and ensure insulation is in place.

Following these steps minimizes the chance of frozen pipes while your home is unoccupied.

What to Do If Your Pipes Freeze in Chicago

Even with precautions, frozen pipes can happen. Acting quickly is key.

Signs Your Pipes Are Frozen:

  • Reduced water flow or low pressure
  • Frost on exposed pipes
  • Unusual odors from plumbing

Safe Ways to Thaw Frozen Pipes:

  1. Shut off the main water supply.
  2. Open the faucet connected to the frozen pipe to release pressure.
  3. Apply gentle heat with a hair dryer, heat lamp, or space heater.
  4. Monitor the pipe as it thaws.
  5. Never use open flames, such as blowtorches, to thaw pipes.

When to Call a Chicago Emergency Plumber:

  • If multiple pipes freeze or show damage
  • If a pipe is at risk of bursting
  • For expert advice on proper weatherization and repair

Professional plumbers can prevent extensive water damage and ensure your pipes are safe for future winters.

Common Mistakes That Lead to Frozen Pipes

Frozen pipes are often the result of preventable errors. Being aware of these common mistakes can help you protect your home during Chicago’s harsh winters.

  • Inconsistent Heating: Failing to maintain a steady indoor temperature during extreme cold is a leading cause of frozen pipes. Make sure your home stays consistently warm, even if you’re away.
  • Neglecting Crawl Spaces: Crawl spaces are particularly vulnerable to freezing. Proper insulation is essential to protect pipes located in these areas.
  • Relying Solely on Space Heaters: While space heaters provide localized warmth, they are not sufficient to keep your entire home and its pipes safe from freezing. Consistent whole-home heating is necessary.
  • Unprotected Outdoor Spigots: Outdoor faucets and water lines must be properly weatherized. Leaving them exposed can easily lead to frozen pipes and costly repairs.

Avoiding these mistakes is one of the simplest ways to prevent frozen pipes and the water damage that can result from them.

Winter Water Damage Restoration in Chicago

Water Damage Restoration

Frozen or burst pipes can still happen, and fast action is critical. HydroForce Cleaning and Restoration offers professional water damage restoration for Chicago homes. Our certified professionals can help with:

Whether it’s a flooded basement, burst pipe, or other water emergency, HydroForce provides expert solutions to minimize damage. Call 630-835-0862 today to protect your home this winter.


Frequently Asked Questions (FAQs)

Pipes typically freeze around 20°F, but wind chill and exposure can accelerate freezing.

Insulate pipes, seal vents, and ensure consistent heating reaches these areas.

Yes, using a hair dryer, heat lamp, or space heater is safe. Never use open flames.

If the frozen pipe is at risk of bursting, calling a plumber is recommended to avoid water damage.

This depends on pipe material and water pressure, but frozen pipes can burst in a few hours if not addressed promptly.

Categories
Restoration Tips water damage

How to Fix a Clogged Sink to Prevent Water Damage: Kitchen & Bathroom Guide

24/7 EMERGENCY SERVICE RESIDENTIAL & COMMERCIAL SERVICES

How to Fix a Clogged Sink to Prevent Water Damage: Kitchen & Bathroom Guide

Nothing slows down your day like a sink that won’t drain. Watching the water rise or smelling something off can be frustrating, but fixing it sooner can save you time, stress, and a bigger mess later. A clogged kitchen or bathroom sink can quickly escalate from a minor inconvenience into a serious water damage problem if left unresolved.

You can choose to tackle a clogged sink as a DIY project or call a professional plumber, but acting quickly is essential to prevent leaks, overflows, and damage to cabinets, flooring, and walls. Because kitchen sinks, bathroom sinks, and single- or double-basin sinks clog for different reasons, using the right method matters.

In this guide, we’ll explain how clogged sinks lead to water damage, identify common causes, outline safety precautions, and walk you through step-by-step solutions for both kitchen and bathroom sink clogs. We’ll also share prevention tips, warning signs of hidden water damage, and when it’s time to call a professional.


Key Takeaways


Why a Clogged Sink Can Cause Water Damage

A clogged sink can lead to water damage when backed-up water overflows, leaks under cabinets, or slowly seeps into surrounding materials. Even a slow drain can cause long-term moisture exposure that weakens your home’s structure.

If you discover a clogged sink, it’s important to address it right away, either through DIY methods or by contacting a professional. Delaying action can lead to costly consequences, including:

  • Water leaks and overflows: Blocked drains force water back up, increasing the risk of spills and leaks that can spread throughout your home.
  • Damage to surrounding areas: Cabinets, flooring, drywall, and baseboards can absorb moisture and deteriorate over time.
  • Structural repairs: Prolonged water exposure may lead to mold growth and structural damage. In severe cases, structural water damage repairs can exceed $10,000.

Taking prompt action helps homeowners prevent water damage and avoid unnecessary repair costs.

Common Causes of Kitchen and Bathroom Sink Clogs

Common Causes of Sink Clogs - HydroForce Cleaning and Restoration

Sink clogs can develop for a variety of reasons, which is why it’s important to understand their causes and how to prevent them. Understanding what causes sink clogs can help you choose the right fix and prevent future blockages.

Kitchen Sink Clog Causes

Kitchen sinks typically clog due to:

  • Food particles and scraps
  • Grease and cooking oils that harden inside pipes
  • Coffee grounds and starchy foods

Read: How to Remove Mold from the Caulk Around Your Kitchen Sink

Bathroom Sink Clog Causes

Bathroom sink clogs are often caused by:

  • Hair buildup
  • Soap scum and toothpaste residue
  • Small objects that accidentally fall into the drain

Plumbing Issues in Older Homes

In older homes, sink clogs may result from:

  • Corroded or narrowing pipes
  • Mineral buildup from hard water
  • General wear and tear in aging plumbing systems

These issues often require professional plumbing assistance.

Safety Precautions Before Fixing a Clogged Sink

Before attempting any DIY drain cleaning, take these safety steps to prevent injury or additional plumbing damage.

  • Shut off the water supply: Turn off the water at the main valve, which may be located inside or outside your home, to prevent accidental leaks or flooding.
  • Wear protective gear: Wear sturdy gloves and safety glasses, especially when using tools or cleaning products, to protect your hands and eyes.
  • Limit chemical cleaners: Avoid harsh chemical drain cleaners whenever possible, as they can damage pipes and pose health risks.

How to Fix a Clogged Kitchen Sink

If your kitchen sink becomes clogged, it’s important to address the issue promptly so water can flow freely again. Below are several effective methods you can try, starting with the simplest solutions and working your way up if needed.

Method 1: Boiling Water (Best for Grease Clogs)

Boiling water can help break down grease and residue:

  1. Allow standing water to drain, if possible.
  2. Bring a pot or kettle of water to a rolling boil.
  3. Slowly pour the hot water directly into the drain.
  4. Check drainage and repeat if necessary.

Method 2: Baking Soda and Vinegar (Best for Organic Buildup)

This natural method works well for food residue and odors:

  • Pour baking soda down the drain.
  • Follow with vinegar and allow it to bubble for several minutes.
  • Flush with hot water to clear loosened debris.

Read: Is Bleach or Vinegar Better for Killing Mold?

Method 3: Plunging a Double-Basin Sink

For double sinks, proper technique is key:

  1. Use a cup plunger that seals tightly over the drain.
  2. Seal the second drain with a wet rag.
  3. Plunge steadily for 30–60 seconds.
  4. Pull the plunger away quickly to change pressure.
  5. Flush with boiling water to confirm proper drainage.

Method 4: Drain Snake or P-Trap Cleaning

If the clog persists:

  • Carefully remove and clean the P-trap.
  • Use a drain snake to reach deeper blockages.
  • If pipes appear old or corroded, stop and call a plumber.

Methods to Unclog a Sink to Prevent Water Damage - HydroForce Cleaning and Restoration

When to Call a Plumber for a Clogged Sink

Contact a professional plumber if you notice:

  • Repeated clogs
  • Slow drainage after DIY attempts
  • Gurgling sounds or water backing up into other drains

How to Fix a Clogged Bathroom Sink

Bathroom sink clogs usually differ from kitchen clogs due to hair and soap buildup rather than grease.

  • Use a hair catcher or drain guard: This simple solution helps prevent hair and debris from entering the drain and can be installed easily with little to no experience.
  • Baking soda and vinegar: This works well for soap scum buildup or minor blockages, helping to break down residue naturally.
  • Plunger: A small sink plunger can be effective for clearing light clogs in bathroom sinks.
  • P-Trap cleaning or hand auger: If the clog is deeper in the pipe, removing and cleaning the P-trap or using a hand auger can help dislodge the blockage.
  • Professional plumber: If none of these methods resolve the issue, it’s best to contact a licensed plumber to prevent further damage and ensure the problem is properly fixed.

How to Prevent Sink Clogs and Water Damage

Preventing sink clogs starts with daily habits and routine maintenance that keep debris out of your plumbing system. Simple habits and regular maintenance can keep your drains flowing smoothly:

Kitchen Sink Prevention Tips

  • Avoid pouring grease or cooking oil down the drain.
  • Dispose of food scraps in the trash, not the sink.
  • Run hot water after use to reduce buildup.

Bathroom Sink Prevention Tips

  • Use hair strainers in sinks.
  • Rinse drains regularly to prevent soap residue.
  • Avoid flushing non-dissolvable items down drains.

Professional Drain Maintenance

  • Schedule periodic plumbing inspections.
  • Address minor issues before they escalate into major repairs.

Signs a Clogged Sink is Causing Hidden Water Damage

Some water damage isn’t immediately visible. Watch for warning signs such as:

  • Musty odors under sinks
  • Swollen or warped cabinets
  • Soft or buckling flooring
  • Mold growth near plumbing fixtures
  • Water stains on walls or ceilings

If you notice any of these issues, professional water damage restoration may be necessary.

Read: Best Detection Methods to Find Water Leaks in Your House

Tools & Products to Keep Sinks Clear

Keeping a few key tools and products on hand can help prevent clogs and make it easier to maintain your sinks:

Professional Water Damage Restoration from HydroForce

Water Damage Restoration in Chicago, IL - HydroForce Cleaning and Restoration

Homeowners often underestimate how quickly a small sink clog can turn into serious water damage. Restoration professionals frequently see damage that began with a slow drain or unnoticed leak beneath a sink. Even minor clogs should be addressed quickly to prevent damage to cabinets, flooring, walls, and your home’s structure. Regular drain maintenance is far more cost-effective than repairing water damage after it occurs.

Don’t let a clogged sink turn into a costly disaster. Acting quickly is key to preventing water damage to your cabinets, flooring, walls, and the structure of your home. At HydroForce Cleaning and Restoration, our team of experts provides fast, professional water damage restoration services to keep your home safe and your plumbing in top shape.

Whether you’re dealing with a minor clog, a severe backup, or water damage that’s already begun, we’re here to help. Contact HydroForce now to assess the situation, restore your property, and prevent future damage before it becomes a major expense.

Call HydroForce Cleaning and Restoration at (630) 835-0862 today for professional water damage restoration in Chicago, IL, and nearby areas.


Frequently Asked Questions (FAQs)

Yes. A clogged sink can cause water damage when backed-up water overflows or leaks under cabinets and into walls or flooring. Even slow leaks from clogged drains can lead to mold growth, warped cabinets, and structural damage if not addressed quickly.

The most common cause of a clogged kitchen sink is grease and food debris buildup. Cooking oils and grease solidify inside pipes, trapping food particles and restricting water flow over time.

Bathroom sinks clog frequently due to hair, soap scum, toothpaste residue, and small objects entering the drain. These materials stick to the inside of pipes and gradually reduce drainage capacity.

Yes, repeated use of chemical drain cleaners can damage pipes, especially in older plumbing systems. Harsh chemicals can corrode metal pipes and weaken plastic ones, increasing the risk of leaks and water damage.

Categories
Mold Remediation Restoration Tips

Mold in Air Ducts: How It Impacts Your Home’s Air Quality

24/7 EMERGENCY SERVICE RESIDENTIAL & COMMERCIAL SERVICES

Mold in Air Ducts: How It Impacts Your Home's Air Quality

Key Takeaways: Mold Growth in Air Ducts


Mold in your air ducts can quietly spread throughout your home, affecting the air you breathe and the efficiency of your HVAC system. Over time, this hidden issue can trigger allergies, worsen respiratory conditions, and lower your home’s indoor air quality.

According to the EPA, Americans spend about 90% of their time indoors, where pollutant levels can be two to five times higher than outdoor air. If mold spreads through your HVAC system, it can significantly worsen your home’s air quality. 

Understanding what causes mold in air ducts, how to spot the warning signs, and the best ways to remove and prevent it can help protect your family and your property. In this guide, we’ll cover how mold develops in HVAC systems, the symptoms of contamination, its health impacts, and professional solutions to eliminate it for good.

How Mold Gets Into Air Ducts

Mold in ductwork typically develops when moisture and organic matter combine under warm, humid conditions. Condensation often forms inside ducts, especially when cool air passes through warm areas of your home. Dust and debris in the ducts give mold spores a surface to cling to and feed on.

Some of the most common causes of mold in air ducts include:

  • High indoor humidity or poor ventilation
  • Leaky air ducts or inadequate insulation
  • Clogged filters or dirty evaporator coils
  • Water leaks near HVAC components

When these issues go unchecked, mold can spread quickly through the system and circulate spores throughout your home’s air supply.

Common Signs of Mold in Air Ducts

Because air ducts are hidden, mold growth isn’t always obvious at first. However, a few key warning signs can signal a problem:

  • A musty, damp odor when the air conditioner or furnace runs
  • Visible black or green spots near vents or air registers
  • Increased allergy-like symptoms such as sneezing, coughing, or congestion indoors
  • Unexplained headaches or fatigue that improve when you leave home
  • Excess humidity or condensation near ductwork

Even if you can’t see visible mold, persistent odors or respiratory irritation are strong clues that you should have your HVAC system inspected by a mold remediation professional.

Signs of Mold Growth in Your Air Ducts - HydroForce Cleaning & Restoration

What Are the Health Risks of Mold in My Air Ducts?

When mold spores are pushed through the vents, they can easily be inhaled or settle on surfaces throughout the house. For many people, this leads to allergy flare-ups, sinus irritation, or asthma attacks. Children, seniors, and individuals with weakened immune systems are particularly vulnerable.

Prolonged exposure can cause more severe symptoms such as:

  • Chronic coughing or throat irritation
  • Eye, skin, or sinus inflammation
  • Shortness of breath or chest tightness
  • Worsened asthma or respiratory infections

In serious cases, certain types of mold produce mycotoxins that may contribute to fatigue, dizziness, and immune suppression. Addressing HVAC mold growth quickly helps reduce these health risks and restores healthy indoor air.

How Mold in Air Ducts Affects Home Air Quality

Your HVAC system is designed to circulate clean air throughout the home—but when mold grows inside the ducts, it does the opposite. Every time your system runs, spores and particles are distributed into every room, contaminating surfaces and lowering indoor air quality.

This can make your home feel stuffy or damp and leave behind a persistent odor. Over time, it may lead to chronic respiratory issues and make it harder to manage allergies. The National Air Duct Cleaners Association (NADCA) notes that contaminants in HVAC systems can reduce efficiency by up to 30%, increasing energy costs and spreading pollutants like mold spores throughout the home. The longer the mold remains in your ductwork, the more spores will settle in other parts of your HVAC system and home.

How Mold Impacts Indoor Air Quality - HydroForce Cleaning and Restoration

How to Check for Mold in Air Ducts

If you suspect there’s mold in your ducts, you can perform a quick inspection:

  1. Turn off your HVAC system.
  2. Remove a vent cover and use a flashlight to look inside the duct.
  3. Look for dark spots, fuzzy growth, or visible discoloration.
  4. Take note of any musty odors that intensify near vents.

If you see visible mold or the odor persists, do not attempt to clean the ducts yourself. Scrubbing or vacuuming can spread spores throughout the house. At this stage, you need a certified mold remediation company with proper containment equipment and HEPA filtration to safely remove it.

Read: How to Test for Mold in My Apartment

Professional Mold Removal from Air Ducts

If you’re unsure how to properly clean your air ducts, it’s essential to hire professionals to remove any mold or contaminants. Here’s an overview of the process they typically follow:

  • Inspection: The first step is a thorough inspection of your ductwork. Professionals will carefully examine your HVAC system to identify any issues such as mold growth, dust buildup, or signs of moisture and contamination. This step helps them determine the extent of the problem and develop an appropriate cleaning plan.
  • Cleaning: Specialized equipment, including high-powered vacuums, rotating brushes, and air whips, is used to remove dust, debris, and other particles from the ducts. This process ensures that even hard-to-reach areas are thoroughly cleaned, preventing the spread of contaminants throughout your home.
  • Sanitizing: After cleaning, EPA-approved sanitizers are applied to the duct system to kill bacteria, mold spores, and other harmful microorganisms. This step not only removes existing contaminants but also helps prevent future growth, improving the overall health and safety of your indoor environment.
  • Sealing: All leaks, gaps, or damaged areas in the ductwork are sealed to prevent future contamination. Proper sealing ensures that the HVAC system operates efficiently, keeps dust and pollutants from re-entering the air, and protects the system from moisture-related issues that can promote mold growth.
  • Testing: After cleaning and sealing, professionals conduct tests to confirm that the ductwork is clean, and the air quality has improved. This may include visual inspections, particle counts, or microbial testing to ensure that the air circulating in your home is safe and healthy.
  • HEPA Filtration and Containment: During the cleaning process, HEPA filters are used to trap at least 99.97% of particles as small as 0.3 microns (EPA), including allergens, dust, mold spores, and other pollutants. Containment methods are also employed to prevent dust and debris from spreading into your living spaces, further improving indoor air quality.
  • Post-Remediation Air Quality Testing: Once the remediation is complete, the air is tested again to ensure it meets safety standards. Professionals confirm that contaminants have been effectively removed and that the indoor air is safe for your family, giving you peace of mind that your home environment is clean and healthy.

Why Professional Help Is Essential

Attempting to remove mold from your ducts without professional equipment can make the problem worse. Certified remediation experts follow EPA, NADCA, and IICRC standards, ensuring safe removal, proper air filtration, and thorough disinfection.

Professionals can also identify the underlying moisture sources that allowed mold to grow, whether it’s a leak, poor insulation, or excess humidity, and provide recommendations to prevent it from returning. This expertise protects your health and your HVAC investment while ensuring long-lasting results.

How to Prevent Mold Growth in Air Ducts

Preventing mold growth in your home’s air ducts is essential for maintaining healthy indoor air quality. Here are the key steps you should follow:

  • Maintain proper humidity levels: Keep indoor humidity between 30% and 50% using humidifiers or dehumidifiers as needed. Proper humidity control helps prevent the damp conditions that mold needs to grow.
  • Regular HVAC maintenance: Change your HVAC filters every 1 to 3 months and run your system regularly to ensure proper air circulation. This helps prevent stagnant moisture from accumulating in the ducts.
  • Repair leaks promptly: Fix any leaks in your home immediately to prevent water from entering the ductwork and creating an environment where mold can thrive.
  • Keep the condensate drain clear: Ensure that your HVAC condensate drain is unobstructed so moisture can drain properly, reducing the risk of mold growth.
  • Schedule annual HVAC inspections: Have your HVAC system professionally inspected at least once a year. Regular inspections help detect issues early and prevent mold from developing in your ducts.

By following these preventive steps, you can significantly reduce the risk of mold in your ducts and maintain a healthier indoor environment for your family.

Professional Mold Remediation from HydroForce Cleaning & Restoration

MOLD REMEDIATION - HYDROFORCE CLEANING AND RESTORATION

If you notice moldy odors, visible growth near vents, or allergy symptoms that seem worse indoors, it’s time to have your air ducts inspected. HydroForce Cleaning & Restoration provides certified mold remediation using advanced HEPA filtration, sanitizing agents, and industry-approved containment methods.

Our technicians identify the source of the problem, remove all traces of mold, and ensure your indoor air is safe and clean again. With years of experience in HVAC mold cleaning and air quality restoration, HydroForce delivers results you can trust.

Call HydroForce Cleaning and Restoration at (630) 835-0862 today for professional air duct mold removal and full-service mold remediation in your home.


Frequently Asked Questions (FAQs)

Mold in air ducts is a serious problem because it circulates spores throughout your entire home whenever the HVAC system runs. Over time, this can worsen allergies, cause respiratory irritation, and reduce indoor air quality. If left untreated, mold growth can spread to other areas of your HVAC system and even your walls or insulation.

It’s not recommended to clean mold in air ducts on your own. Household cleaners or bleach won’t reach the entire duct system and can release spores into the air. Professional HVAC mold remediation specialists use HEPA filtration, containment, and EPA-approved disinfectants to remove mold safely and completely.

Mold in ducts often produces a musty, earthy, or damp odor that becomes stronger when the air conditioner or furnace is on. If you notice that smell near vents, it’s a strong indicator that moisture and mold may be present inside your HVAC system.

Common signs include visible dark spots around vents, dust buildup that looks fuzzy or discolored, and an increase in allergy symptoms indoors. You may also hear complaints from family members about dry coughs or nasal irritation that disappear when they’re away from home.