Categories
Restoration Tips Sewage Backup water damage

How to Safely Clean a Sewage Backup: Step-by-Step Guide

24/7 EMERGENCY SERVICE RESIDENTIAL & COMMERCIAL SERVICES

Dealing with a sewage backup in your home or business can be both overwhelming and expensive. Beyond the unpleasant odor, it can cause wastewater to back up into drains, potentially leading to significant property damage. Acting quickly and enlisting professional help is essential to prevent the situation from worsening.

In this article, we’ll explore the major risks associated with sewage backups and provide a step-by-step guide for cleaning up the mess. From properly sanitizing affected areas and handling utilities with care to disinfecting clothing, bedding, and food, we’ll cover everything you need to know to restore your space safely and effectively.

What are the Hazards of Sewage Backups?

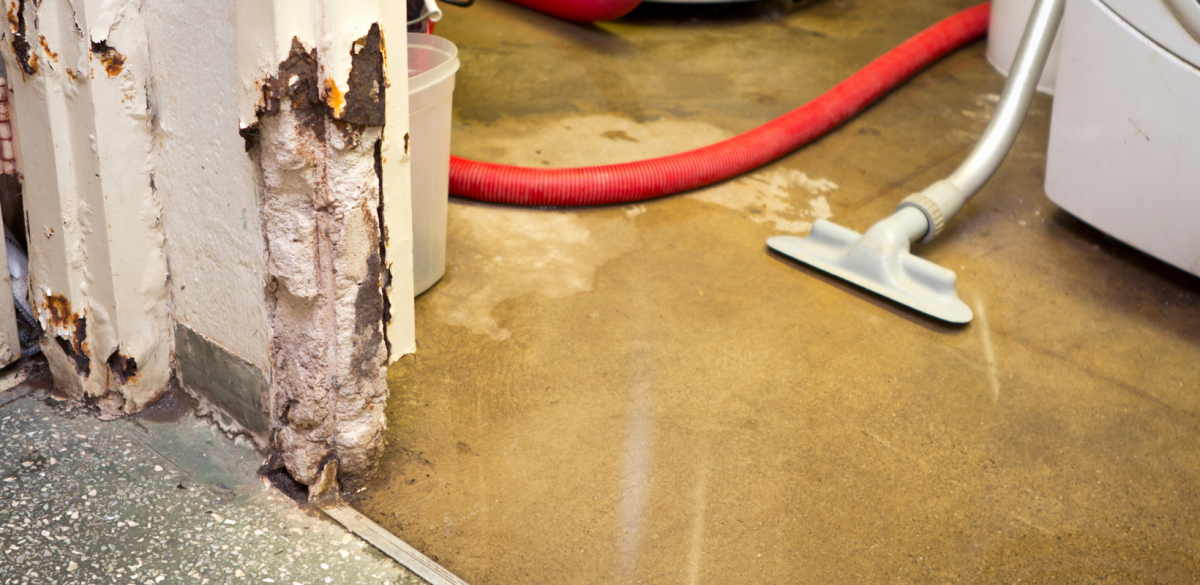
A sewage backup in your home or business can be extremely hazardous, posing major health risks and potentially causing severe damage. If your basement is flooded, it’s crucial to avoid entering the area until gas and electrical services have been safely shut off. Proper cleanup is essential to prevent illnesses and limit the damage, and children and pets should be kept away from the affected areas.

Step-by-Step Guide for Cleaning Sewage Backups

How to Safely Clean Sewage Backups - HydroForce Cleaning and Restoration

For extensive sewage backups, it’s always best to hire a professional restoration service. However, if the affected area is small and you choose to handle it yourself, here are some steps to help you clean up safely and effectively:

Clean and Sanitize

  1. Make sure to drain all sewage water by natural draining or pumping.
  2. All dirt, soil, and debris should be cleaned from surfaces that have touched the flood waters.
  3. All walls, floors, and any surfaces touched by floodwater should be cleaned with hot water and detergent.
  4. Make sure to rinse all areas with hot water.
  5. Walls, floors, and other surfaces should be sanitized by mixing 2½ tablespoons (tbs) of Lysol/Pine Sol per gallon of water or 8 tablespoons (tbs) of laundry bleach in each gallon of water used.
  6. Make sure to air out the area by opening windows and using fans.
  7. You should make sure not to track flood debris and sewage into clean areas.

Utilities

  • Reach out to the utility companies to have gas and electricity shut off.
  • Never touch the fuse box or any cords that are plugged in until the electricity is shut off.
  • If an appliance is under water, do not use it.
  • Never relight any appliances before the gas company has checked them. Also, make sure all pilot lights are on before you relight burners.
  • Never light matches until the gas is shut off as this can cause an explosion if there is a gas leak.

Clothing and Bedding

All clothing, furniture, carpets, toys, and even bedding should be thrown out unless they are thoroughly cleaned and disinfected. If there are objects that are movable, they should be put outdoors so they can be cleaned and dried in the sunlight. Make sure to put any discarded clothing in tightly closed bags until they are picked up for disposal.

After cleaning up, it’s essential to thoroughly wash any clothing and body parts that came into contact with the sewage. Be sure to wash your hands immediately afterward. Anyone involved in sewage cleanup should take extra precautions such as avoiding touching your eyes, nose, or mouth if your hands are contaminated or smoking with soiled fingers, as this can transfer harmful bacteria to your mouth. Once the cleanup is complete, carefully wash your hands and nails using a nail brush and plenty of soap to ensure all traces of sewage are removed.

What is Sewer Water - HydroForce Cleaning and Restoration

Foods

If your food has been contaminated with sewage, consuming it is very dangerous. This is how you should deal with contaminated food:

  • Any food that is contaminated, whether it is boxed or bottled, should be disposed of.
  • Any canned goods and jars can be kept if you thoroughly clean them. To fully clean them you should follow this process:
    • Scrub them with soap and water by using the brush around the rim of the canned jars or tops of cans.
    • They should be submerged in chlorinated water for 15 minutes. Make sure to use 1 ounce of bleach per gallon of water.
    • Make sure to air dry canned jars or cans to prevent rusting.
  • Any food that was stored in the freezer can be kept for up to 2 days after losing power if the freezer is full and 1 day if the freezer is half-full and not opened.
  • If the meat has ice crystals, it may be safely re-frozen. If it is cool but not frozen, you should cook it and then re-freeze it.
  • Any food that was stored in the refrigerator can be kept for 4-6 hours after losing power, however, this depends on the room temperature. Never open the refrigerator unless it is necessary. You can also add ice to the refrigerator to help keep food cold.
  • Any food that has an unusual color, odor or is perishable should be thrown away.
  • Make sure that any food that you are discarding is placed in a tightly closed container until it is picked up for disposal.

Please note: The information given in the above article may differ by state and municipality. You should always reach out to your local health agencies for specific guidelines for your area and for specific suggestions as needed.

Professional Sewage Backup Cleaning in Chicago, IL

Sewer Cleanup Services - HydroForce Cleaning and Restoration

Sewage backups are not only messy and stressful but also pose serious health and safety risks that require immediate and thorough action. By following proper cleanup procedures or hiring a professional restoration company and taking precautions with utilities, personal belongings, and food, you can restore your home or business, minimize long-term damage, and ensure the safety of those within the home or building.

In most cases, sewage backups cause immense damage and create dangerous situations, which means they are best handled by professionals. At HydroForce Cleaning and Restoration, we specialize in providing comprehensive sewage backup cleaning services for homes and businesses in Chicago, IL, and nearby areas. Our skilled technicians are dedicated to cleaning, drying, and fully restoring your property to its original condition while ensuring a safe and healthy environment for your family.

You can call us at (630) 835-0862 for emergency sewage backup cleaning in Chicago, IL, and the surrounding suburbs.

Categories
Mold Remediation Restoration Tips

How to Remove Mold From the Rubber Seal (Gasket) in Your Washing Machine

24/7 EMERGENCY SERVICE RESIDENTIAL & COMMERCIAL SERVICES

How to Remove Mold From a Washing Machine Rubber Seal (Gasket)

Mold on the rubber seal of a washing machine is a common issue, especially in front-load washers. If left untreated, it can cause strong odors, stain freshly washed clothes, and allow mold to spread deeper into the gasket folds. The good news is that most mold on a washing machine rubber seal can be safely removed at home using the right methods without damaging the rubber.

This guide walks you through the process of removing mold from a rubber gasket in a washing machine, explains what works (and what doesn’t), and helps you determine when cleaning is sufficient versus when replacement or professional assistance is needed.

Key Takeaways

Why Mold Grows on Washing Machine Rubber Seals

The rubber seal, also known as a gasket, sits between the washer door and the drum. Its folds trap moisture, detergent residue, and lint. Combined with warm wash cycles, this creates the perfect environment for mold growth. According to data referenced by the Centers for Disease Control and Prevention (CDC), mold is common in homes and buildings where moisture is present, particularly in areas that trap humidity and condensation.

Front-load washers are especially prone to this problem because:

  • Water pools inside the gasket folds
  • Doors stay closed between cycles
  • Excess detergent leaves a residue that mold feeds on

Once mold starts growing, it doesn’t always stay on the surface; it can embed itself into the rubber.

Why You Should Remove Mold Immediately

Ignoring mold buildup on a washing machine gasket can lead to several problems:

  • Persistent musty odors caused by microbial volatile organic compounds (MVOCs)
  • Clothes smelling moldy even after washing
  • Worsening mold growth inside gasket folds
  • Health symptoms for people with mold allergies or sensitivities

If you’re cleaning the washer regularly but odors keep returning, mold inside the gasket is often the cause.

How to Tell If Mold on a Washing Machine Gasket Is Severe

Not all gasket mold is the same. Understanding severity helps you choose the right solution.

Light to Moderate Mold (Usually DIY-Cleanable)

  • Surface-level black or dark spots
  • Mild odor
  • Mold wipes away with scrubbing

Severe Mold (May Require Replacement or Help)

  • Thick black mold embedded deep in gasket folds
  • An odor that returns quickly after cleaning
  • Rubber cracking, stiffness, or deterioration
  • Visible mold behind the gasket or drum lip

If mold keeps coming back despite proper cleaning, it may be growing behind the gasket or inside the machine housing.

Mold Growth on Washing Machine Gasket - HydroForce Cleaning and Restoration

What Kills Black Mold on Rubber Washing Machine Seals?

Some cleaners work well on rubber. Others cause damage.

Best Options for Rubber Gaskets

  • White vinegar: Safely kills mold and breaks down residue
  • Hydrogen peroxide (3%): Effective for stubborn mold stains
  • Commercial washing machine cleaners: Designed for appliance-safe use

What to Avoid

  • Bleach: Damages rubber, causes brittleness, and does not fully kill mold roots
  • Hot water alone: Removes odor temporarily but doesn’t eliminate mold

Bleach may lighten stains, but it weakens rubber over time and allows mold to return faster.

Read: Is Bleach or Vinegar Better for Killing Mold?

How to Remove Mold from a Rubber Washing Machine Gasket

The rubber gasket in a washing machine can be successfully cleaned without having to remove it. One of the best ways is to use vinegar, which is a safer option than bleach.

What You’ll Need

  • White vinegar or 3% hydrogen peroxide
  • Spray bottle
  • Soft brush or old toothbrush
  • Microfiber cloth
  • Gloves

Cleaning Steps

  1. Put on gloves and pull back the gasket folds to expose hidden mold.
  2. Spray vinegar or hydrogen peroxide generously on affected areas.
  3. Let it sit for 15–30 minutes (up to 2 hours for stubborn mold).
  4. Gently scrub mold using a soft brush, focusing on creases.
  5. Wipe clean with a damp cloth and rinse residue away.
  6. Dry the gasket completely and leave the washer door open.

For heavy buildup, repeat the process once more.

Removing Mold from Washer Gasket

Sanitize the Washing Machine After Cleaning the Gasket

Cleaning the gasket alone may not remove mold spores inside the washer.

  • Run the hottest cycle available with no clothes inside
  • Add a washing machine cleaner or vinegar to the cycle
  • Keep the door open afterward to allow full drying

This step helps prevent mold from spreading back onto the clean gasket.

Should You Replace the Rubber Seal Instead?

Replacing a washing machine gasket may be necessary if:

  • Mold is embedded deep into damaged rubber
  • Odors persist after multiple cleanings
  • The gasket is cracked or no longer sealing properly

While skilled DIYers can replace a gasket, it’s often best handled by an appliance professional due to the complexity and risk of leaks.

How to Replace the Rubber Seal in Your Washing Machine

While replacing the rubber seal is a complex task that is best left to appliance repair experts, handy homeowners may be able to perform the job themselves. If you are confident in your DIY skills, here is how you can replace the rubber seal yourself:

  1. Unplug the washing machine, unscrew the front panel, and remove the outer retaining band. Carefully pull off the rubber seal.
  2. Clean away the grime in the exposed areas with a damp cloth.
  3. Align the new rubber seal over the drum, ensuring the drain holes remain at the bottom.
  4. Once installed, return the retaining band to its position, reattach the front panel, and plug in the washing machine.

How to Prevent Mold From Returning

Indoor mold growth is directly linked to excess moisture, with mold able to begin growing on damp surfaces within 24 to 48 hours if conditions remain wet. Once the gasket is clean, prevention is key:

  • Leave the washer door open between cycles
  • Wipe the gasket dry after each use
  • Use high-efficiency detergent and avoid overuse
  • Clean the washer monthly
  • Remove wet laundry promptly

These habits dramatically reduce the chance of mold returning.

When Mold in a Washing Machine Signals a Bigger Problem

Mold Removal and Remediation - HydroForce Cleaning & Restoration

Persistent washer mold can sometimes indicate excess humidity or moisture issues elsewhere in the home. In those cases, surface cleaning alone may not be enough. If mold keeps returning or spreads beyond the washing machine, a professional assessment can help identify hidden moisture sources.

HydroForce Cleaning and Restoration provides professional mold remediation services for homes affected by mold growth. Our technicians locate moisture sources, contain affected areas, remove mold safely, and help prevent future outbreaks.

Homeowners in Chicago, Bridgeview, Oak Lawn, and nearby Illinois communities can rely on HydroForce for thorough, professional mold removal when DIY solutions fall short.


Frequently Asked Questions (FAQs)

To remove mold from a washing machine rubber seal, spray white vinegar or 3% hydrogen peroxide directly onto the mold, let it sit for 15–30 minutes, scrub the gasket folds with a soft brush, rinse thoroughly, and dry the seal completely before closing the door.

White vinegar and hydrogen peroxide are among the best cleaners for mold on a washing machine gasket because they kill mold spores without damaging the rubber. Bleach is not recommended, as it weakens rubber seals over time.

Mold keeps growing on washing machine rubber seals because moisture, detergent residue, and lint collect inside gasket folds. Leaving the washer door closed between cycles and using too much detergent increases the risk of mold growth.

Yes, mold spores and odors can transfer from a moldy washing machine gasket to clothing during wash cycles, causing clean laundry to smell musty even after washing.

Yes, bleach can damage washing machine rubber seals by causing them to become brittle, discolored, and cracked. Bleach may remove stains temporarily but does not fully kill mold roots and can worsen long-term gasket damage.